If you want to convert entire iTunes Library to MP3 then you’ve come to the right article. Many people get frustrated working with the directory structure of iTunes. If you haven’t heard of it, iTunes was scrapped on Mac because many users report it’s too confusing and its concept of operation is hard to grasp. iTunes was replaced by Apple Music on Mac. Additionally, the Finder program on Mac added sync capabilities to your mobile devices effectively replacing iTunes.
Fortunately, to convert iTunes library to MP3 is easily achieved by only using the official Apple tools. However, as you’ll see, there is lots of limitation to this. It’s best to use another tool for this. The next parts will introduce this.
Conversely, the reason for converting your entire iTunes library will also be discussed. What is the need for doing so? Are there advantages to doing this? Read through the next part to find out.
Contents Guide Part 1. Why do you need to convert iTunes Library to MP3? Part 2. How to Convert entire iTunes Library to MP3? Part 3. The Best Way to Convert iTunes Library to MP3? Part 4. Summary
The reason to convert entire iTunes library to MP3 is simple. Most people feel insecure if they don’t have a backup copy of their iTunes Library. This is justified because you won’t really know what happens if a data breach occurs within Apple Music. This story is all too common even for large corporations. An example of this is when the PlayStation Network was attacked sometime in 2011. There was a huge PSN outage between April 17 to 19 of that same year. Most PSN users could not even log in to their accounts. Consequently, 77 million PSN accounts have been compromised. The attackers were able to get sensitive data from PSN users including usernames, passwords, and credit card information.
Another reason to convert entire iTunes library to MP3 is the fact that Apple Music songs have the limiting feature of DRM. DRM stands for Digital Rights Management. It’s a protection mechanism employed by Apple Music to protect their copyrighted music from piracy. Apple implemented a technology called FairPlay that implements user keys before decoding any file for playback. This feature limits the playback of your songs to only authorized media players. You also won’t be able to edit your songs for use in another application.

However, as you’ll see in the next part, there is a limitation in using only Apple tools for converting your iTunes playlist to MP3.
Now that you know why you need to convert the entire iTunes library to MP3, let’s delve into the details of how to convert entire iTunes library to MP3. Note that you won’t be able to convert copyrighted music. This means you can’t convert those downloaded songs for offline listening from Apple Music. If you have a lot of these songs it’s better to skip to the next part. The next part utilizes a special tool to remove the DRM of Apple Music in a way that’s allowed by law.
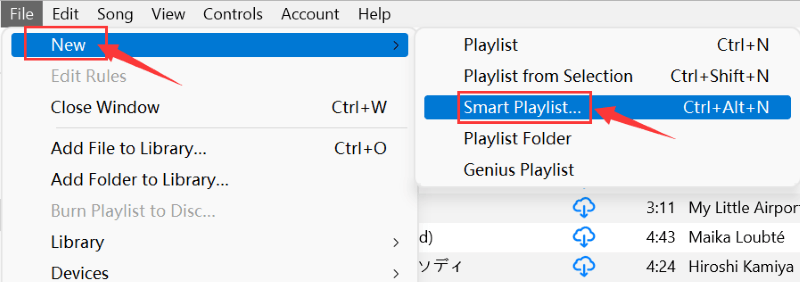
Here are the steps to convert your entire iTunes Library to MP3:
Make a Playlist to convert only songs with no DRM

Ensure your converter settings are set to MP3
Now you can select all the songs in the No DRM playlist. After that, go to file -> Convert -> Create MP3 version. These files will be added to your iTunes library.
The best way to convert entire iTunes library to MP3 is to use an alternate tool. With this, you remove a lot of restrictions associated with the iTunes app when it comes to converting to MP3. This alternate tool is called DumpMedia Apple Music Converter.
DumpMedia Apple Music Converter can easily convert all of your iTunes or Apple Music library to MP3 and other music formats. These formats include M4A, FLAC, and WAV. It’s very easy to use TunesFun; simply follow the steps below:
Step 1: Download and install DumpMedia Apple Music Converter. PC and Mac versions are available.
Step 2: Open DumpMedia. Then log in to your Apple Music account on the embedded web player.
Step 3: Drag and drop the songs to the side bar. Choose the songs you want to be converted through the checkboxes.

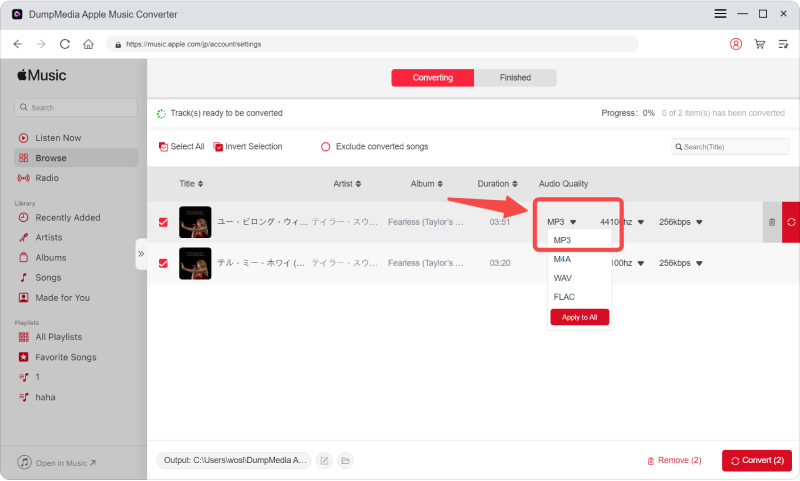
Step 4: Make sure you choose MP3 as the output format. Then Hit Convert t to start converting. It’s that easy!

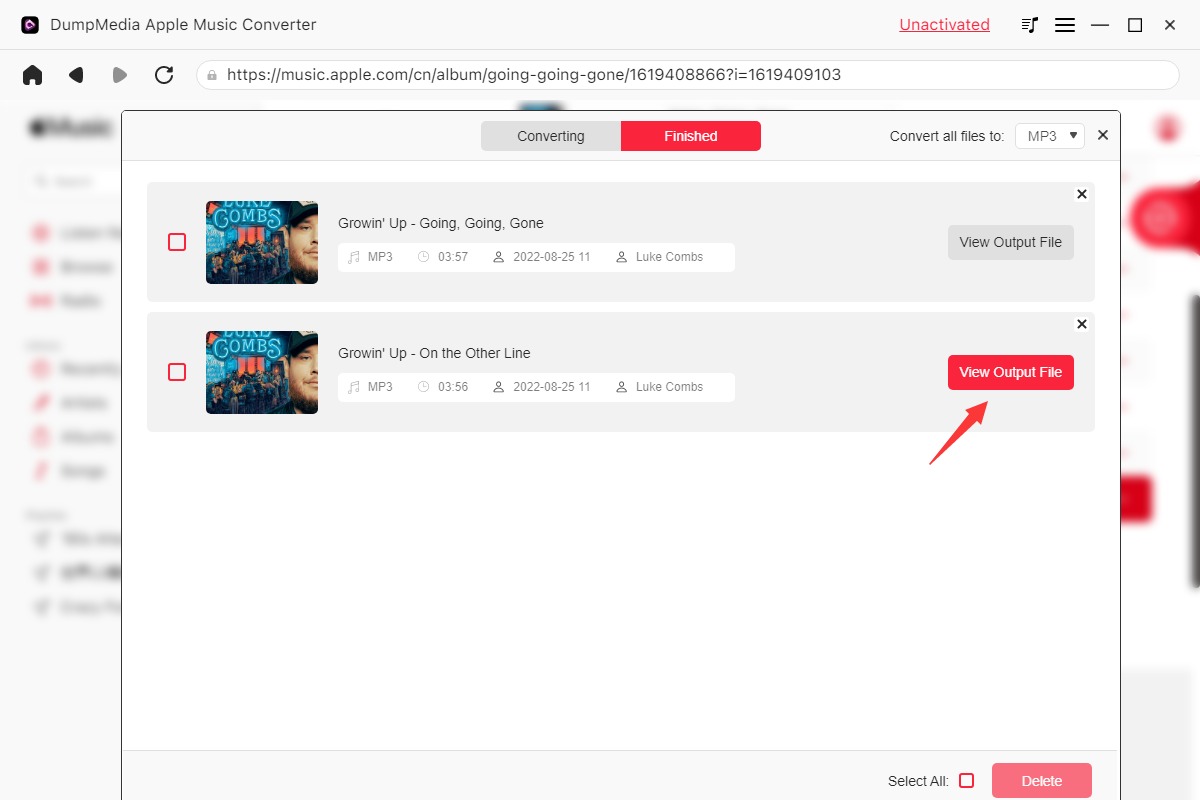
Step 5: The Finished tab will contain all your finished conversions.

Additionally, you can change bit rates, sampling rates, output formats, and ID3 tags with his wonderful tool. Note that this is a professional-grade tool with complete customer support and a money-back guarantee.
If you’re happy with the trial download feature of DumpMedia Apple Music Converter, purchase a license key. You’ll get a 30-day money-back guarantee in case you have problems with any DumpMedia product.
Now that you’ve converted your iTunes library to DumpMedia, you’ll be able to enjoy them anywhere using any media player. You can even burn these songs on a CD. The options are limitless when using this smart tool.
The article covered how to convert entire iTunes playlist to MP3. The steps were laid out accordingly using Apple tools. Alternatively, a more versatile tool was introduced to do your conversions. This tool is called DumpMedia Apple Music Converter. DumpMedia Apple Music Converter can easily convert your iTunes and Apple Music library and remove DRM so that you can enjoy your songs without limits.
