Apple Music is indeed one of the best music streaming services known to the public. Alongside other providers like Spotify, Pandora, Tidal, Google Music, and Amazon Music, it is very much used by a lot of people worldwide.
If you love listening to Apple Music songs and you purchased a subscription and it happens that you got an Apple TV at home, then this guide is for you. If you have been looking at the ways how to get Apple TV music, you are lucky enough to arrive at this page.
Since this article’s main focus would be on Apple Music and Apple TV, then we should first know some basic facts about these two.
Contents Guide Part 1: How Does Apple Music Work?Part 2: What Is An Apple TV and What Does It Do? Part 3: How Can I Get Apple Music on My TV?Part 4: To Sum It All
Apple Music is one of the music streaming services created and developed by Apple Inc. It has millions of songs in it making it enjoyable for users as they got a lot of options to choose from. It has about thirty million tracks which you can access once you have bought or paid the monthly subscription fee which differs depending on what country you are from. Apart from songs produced by several different artists, you can also listen to popular radio stations, got a list of music recommendations, numerous playlist collections, and more.
Now, that we already have some basic ideas about Apple music application then let us get to know more about Apple TVs and how to get Apple TV music in the latter part of this article.
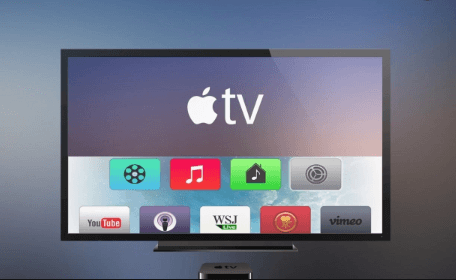
An Apple TV is not the usual television set you could think of. It is a small size box that serves as a media player wherein you can stream different types of media such as videos, music, games, and more. It can get some content out of the internet or the web which can make it easier to display those on your television.
And if you are a student with a subscription to Apple Music, then you can enjoy Apple TV for free!

As initially mentioned, there are a lot of things you can do if you got an Apple TV at home. Below would be a detailed list for your reference.
Tip: If you are not an Apple TV user, and wondering if is it worth getting an Apple TV, you can see the discussion in Quora and find the answer.
Here are the basic steps needed to be accomplished to get your Apple TV working.
Now, we will be heading to the main agenda of this post – how to get Apple TV music?
How to get Apple TV music? Here, we are about to discuss two ways on how you can finally play and stream your most loved Apple Music songs on your Apple TV – with the use of iCloud Music Library and without. Let us begin the discussion with the first one.
Surely, you are aware of the iCloud Music Library. It is a certain storage space wherein you can save thousands of Apple Music or iTunes songs. If you are utilizing your iCloud music library, then this option would be beneficial to you.
Here are the steps you need to do.
The added details would be stated below.
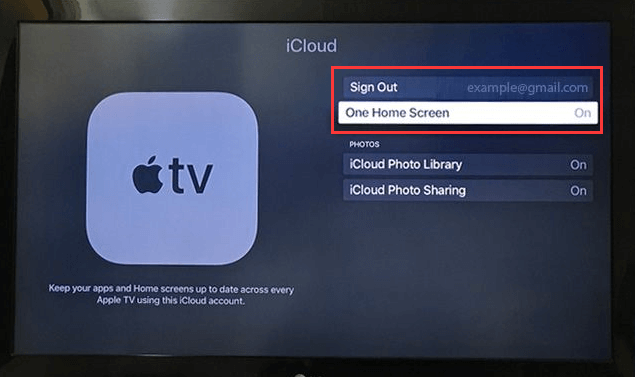
The basic setup procedures have been posted in the second part of this post. You may refer to that to be able to finally get your Apple TV working. Just keep in mind that you need to have this connected to your internet, head to Settings, and then make sure to log in using your Apple ID and password.

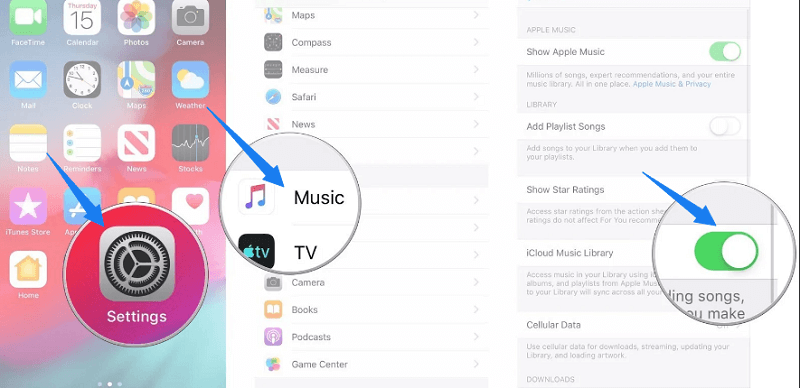
The next thing you need to do is to have your iCloud music library enabled. You have different ways to do this depending on the device you are using.
The last step left for you is to enjoy your Apple Music songs on your Apple TV as you can already access those since you have already enabled or turned on your iCloud Music Library.

iCloud music library makes it easy for users. But if you do not want to experience the drawbacks initially mentioned, then the second option to be presented in this post could be a better choice for you.
DumpMedia Apple Music Converter is a great tool that can remove the DRM (Digital Rights Management) protections of Apple Music songs. Because Apple Music songs are DRM protected, it is impossible for users to download the songs directly and have those played in any other unauthorized devices.
But, no need to worry about that. In addition, with this DumpMedia Apple Music Converter, you can have as many Apple Music songs you wanted to be converted and downloaded for offline streaming! Plus, you got to have a way to share those songs or playlists with friends not worrying about file formats since this converter can also perform the conversion of files!
Here are the simple guides to use this DumpMedia Apple Music Converter.
Let us look into these 4 steps further.
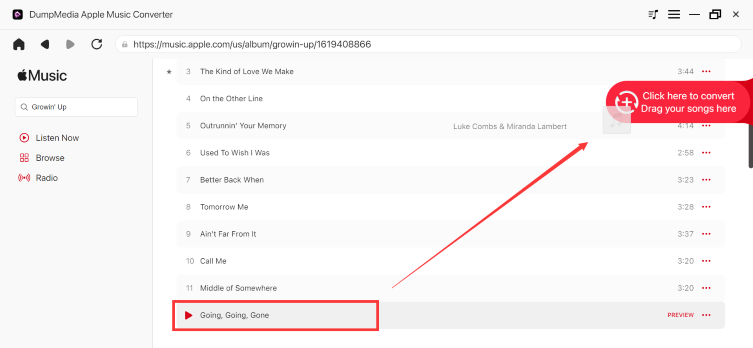
Of course, we need to ensure that DumpMedia Apple Music Converter has been downloaded and installed on your personal computer. Once installed, open and launch the program. Once the program has been launched, iTunes will also be activated.
Under the “Library” menu, tick “Music”. Once done, you will now be seeing all the songs and playlists stored on your iTunes library. To be able to choose the songs to be downloaded and converted.

The next step that should be done is to perform the adjustments on the settings of the resulting output. The application supports many DRM-free formats including MP3. This as well supports those in AC3, M4A, M4R, AIFF, FLAC, AU, and even MKA format.

The tool will also allow you to change other options such as the bit rate and sample rate. You can as well perform the renaming of the resulting file. In this step, you would also need to specify the output path or the target location wherein the files will be saved.
Upon completing all the adjustments wanted for personalization or customization, the final step would now be the conversion process. You can just hit the “Convert” button which is located at the bottom right corner of the screen.

Once you have the converted Apple Music songs saved on your personal computer, the last thing you need to do to finally have those streamed on your Apple TV is to perform the home-sharing. You just need to ensure that you are using the latest version of iTunes on your personal Mac or Windows computers.
You can easily turn on the “Home Sharing” on your Apple TV by heading to your “Settings” button, followed by “Account”, then “Home Sharing”. For your Mac or Windows computer, you can do it by signing in to your iTunes account, going to “File”, then “Home Sharing” and tick “Turn on Home Sharing”. Upon doing this, then you can finally enjoy all those Apple music songs you love.
Tip: In case you are troubling with some Apple Music problems, We have attached this link for you, you may be able to find the solution in it.
How to get Apple TV music? This post had highlighted the easiest guide you can perform in order to finally get and stream Apple Music songs to your Apple TV. You have two options to do it – use your iCloud library or a third-party software application. The latter is a more recommended one.
Upon finishing this post, which one do you think is a better choice?
