The iTunes application is a good platform wherein you can save your media files and have those organized and managed. It’s a product created by Apple Inc. and so a lot of benefits are presented to iOS device users.
Now, if you got some Apple Music songs or iTunes songs with you that you have purchased from the store before, you must know that those are under Apple’s FairPlay Protection policy. You can’t just have them played or accessed on any device that you like. Thus, there is a need for you to know the whole iTunes DRM removal process.
It might annoy you sometimes when you are trying to access those protected iTunes or Apple Music songs that you have. Well, that’s how it is. You can’t have them accessed on unauthorized devices as they are with DRM encryption. Additionally, you can’t have them saved on those devices as well and have them kept forever even if you like to.
To solve the dilemma, the only way out is to learn how to accomplish the iTunes DRM removal process. You might be wondering how this iTunes DRM removal process can be done so we just created this article to help you out.
Finding more about the process of iTunes DRM removal will help your music files playable on any media player or gadget. We’ve got here several methods to share so make sure to read the content presented in each part of this post.
Contents Guide Part 1. Lossless Removal of DRM from iTunes songs/Apple MusicPart 2. Remove DRM from iTunes Songs with iTunes MatchPart 3. Remove DRM from iTunes Movies/TV ShowsPart 4. Summary
The iTunes DRM removal process is so easy to do and handle if you are to rely on a professional application that’s already trusted by most users. When you try going over the web and key in “iTunes DRM removal process”, a lot of recommended tools will surely pop up on your screen. It’s not always suggested that you take the first on the list, install it, and use it right away.
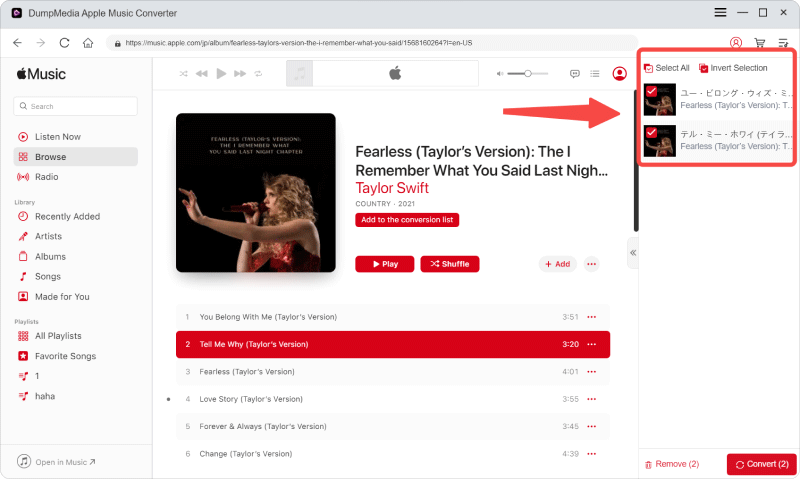
To lessen the time you need to speed to compare one app from the other, we will be sharing a great professional app here that can help you with this iTunes DRM removal process. We’re glad to discuss the DumpMedia Apple Music Converter in this section. If you haven’t heard or read about this app before, you’ll be surprised by how amazing this is.
The DumpMedia Apple Music Converter is an app that can, of course, aid in the iTunes DRM removal process. It can remove the DRM protection of the iTunes or Apple Music songs that you have while doing the conversion process. Yes!
It does help with the conversion of the songs as well into any of its supported output formats. Conversion is lossless so you shouldn’t be worried about the quality of the resulting files. Even the ID tags and important information will be maintained after the process.
Additionally, it works 10x faster than other apps and has only a few installation requirements. And oh, it’s worth mentioning that it is supported by both Windows and Mac computers. It even offers a free trial period and a one-month refund policy!
Also, you can use this DumpMedia Apple Music Converter is a powerful audiobook converter. If you are fond of listening to audiobooks, and you wish to keep them, you can also use this app to have them converted.
This DumpMedia Apple Music Converter is very to use as it has functions that are easily understandable by anyone. So, to guide you with the iTunes DRM removal process, we have here the steps you need to accomplish in case you decided to install this professional converter on your PC.
Step #1. Complete all the needed things before installing the app on your PC. Once completed, proceed with the installation process and then launch the app. On the main screen, you can start selecting or previewing the Apple Music or iTunes songs that you wish to process (to remove the DRM protection and then convert).

Step #2. Once songs are selected, you now have the option to change the output settings. You can see the menu at the bottom area of the page. Of course, you have to specify the output format to use as well as the output folder for you to easily access the converted and DRM-free files once the process has been completed.

Step #3. Tick the “Convert” button to start the conversion process. While the conversion is ongoing, the iTunes DRM removal process will also be done simultaneously by the app.

Since the DumpMedia Apple Music Converter works at a very fast speed, you can expect the files to be ready within just a few minutes. Now, since those are already DRM-free, you can play, move and save them on any device that you like!
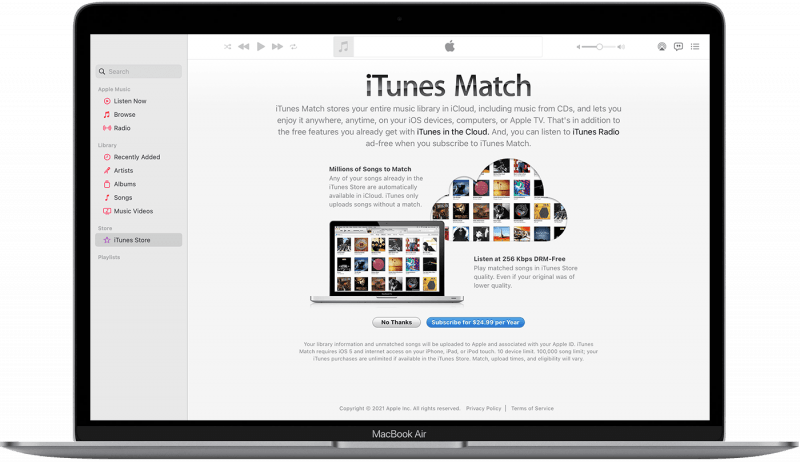
Are you fond of iTunes Match? Do you know that you can also use this during the iTunes DRM removal process? With iTunes Match, you can access those songs that you got from iTunes on all your devices as long as you have your iTunes app (including those songs that you got from CDs).
With the active subscription, you can upload up to 100,000 songs from your library to your iCloud account as well as download DRM-free songs. If you are unaware of how you can subscribe to iTunes Match to finally enjoy its features, we will be sharing the procedure here.
We will be giving you the steps to follow if you are to subscribe to iTunes Match on your Mac or Windows PC in this section.
Step #1. Open your Apple Music app first.
Step #2. Head to the sidebar area and then tap the “iTunes Store”. If you haven’t seen it right away, just tap the “Music” button and then choose “Preference”. Head to the “General” option and then choose the “OK” button next.
Step #3. Scroll until you see the option for “iTunes Match”. Click on it.
Step #4. You shall see the “Subscribe” button. Tap it. You will be asked to enter your Apple ID credentials – username and password. Provide as needed.
Step #5. You will be asked to do the confirmation of your billing information. Just do it and then finally hit the “Subscribe” button.

Step #1. If you are to use a Windows PC, open your iTunes app first.
Step #2. Tap the button for “Store” that’s located at the top area of the iTunes page.
Step #3. Scroll down until you see the option for “iTunes Match” that should be under “Features”.
Step #4. Provide and verify your billing information before clicking the “Subscribe” button.
Once you are done subscribing from iTunes Match, it’ll automatically scan your library to look for matches. Once the uploading process (of your music library) has been completed, you shall see the songs available on your iCloud library. To begin accessing them on any device, just make sure that you have turned on the “Sync Library” option.
You can get access to those iTunes or Apple Music songs as long as you are using the same Apple ID you used during the iTunes Match subscription process. You can now stream and download the songs that you like.
You just have to take note that once you stopped your subscription, you’ll still be able to stream those songs you downloaded before. However, those that are non-downloaded won’t be accessed.

If you are interested in the iTunes DRM removal process because you wish to remove the DRM of some iTunes movies or TV shows, there is a need for you to check out an app as well.
You can try using the UkeySoft M4V Converter. It aids in the iTunes DRM removal process of movies and TV shows and even lets you convert the files to MP4 format – that’s much more playable on a variety of media players.
In using this tool, you just have to install it first and start adding or loading those iTunes movies or TV shows that you wish to process. You can modify the output settings by tapping the “Options” icon before you click the “Convert” button. After the whole process, you shall see that the new files will be saved as MP4 files and are DRM-free already.

There are a lot of ways for you to accomplish the iTunes DRM removal process. It’s great to find out that you can remove the DRM protection of iTunes or Apple Music songs as well as iTunes movies and TV shows you purchased through some great and professional applications like the DumpMedia Apple Music Converter.
Click to have a free try! It's 100% secure!
If you got questions about the iTunes DRM removal process and anything that’s connected to this topic, let us know in the below section and we’ll try to get back to you to answer your questions!
