
The radio section of the Apple Music app is awesome. However, it becomes more awesome if you’re a paying subscriber. You can personalize radio stations in Apple Music if you’re on a paid plan.
If you’re one who isn’t too keen on upgrading your free plan to a paid plan, then you have an open mind about it. You won’t just have access to radio stations such as Bloomberg Radio, Beats 1, and ESPN news but you can also personalize the way you listen to them on various devices like your Android smartphone, Apple TV, iPad, iPhone, PC, and Mac.
Think of all the things you can do. Continue reading to learn how you can personalize radio stations in Apple Music.
Contents Guide Part 1. Requirements to Personalize Radio Stations in Apple MusicPart 2. Personalize Radio Stations in Apple Music on Various Devices Part 3. Add Apple Music Stations to LibraryPart 4. Bonus: Listen to Apple Music without Upgrade to A Paid Apple Music PlanPart 5. Conclusion
Personalizing your radio stations in Apple Music is a good enough reason to switch to a paid account. However, a paid Apple Music paid account is not all that you will need. You would also need the following to be able to personalize radio stations in Apple Music.
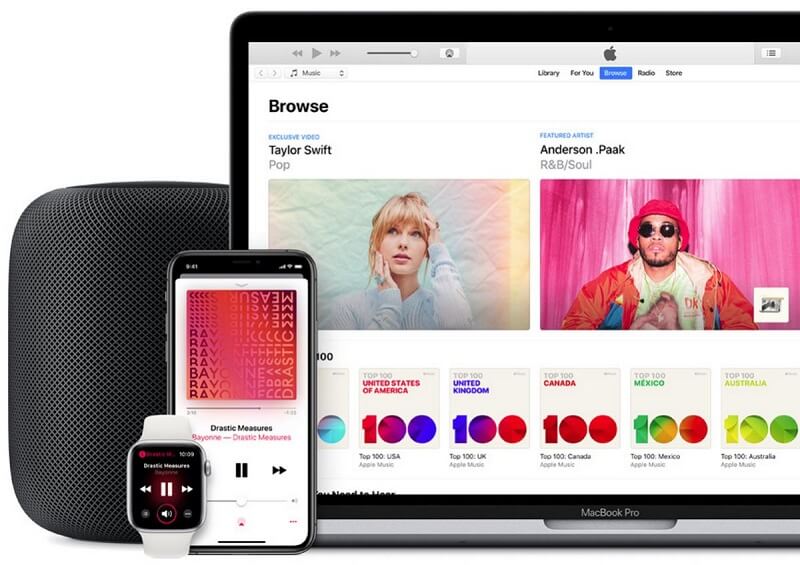
Once you’re a paid Apple music subscriber you will be able to personalize your radio stations, which is a great way to hear new music that you're most likely going to enjoy. The steps below will show you how to personalize radio stations in Apple Music on various devices.
Let's look at creating a station on iTunes and iOs on your PC and Mac. Check out the steps below to learn more.
Do a search on the top left-hand side of the screen. Type in an artist’s name and go to the artist’s page. Look for the Action button represented by three dots. You can do all sorts of things. You can click on it and do different things with the artist.
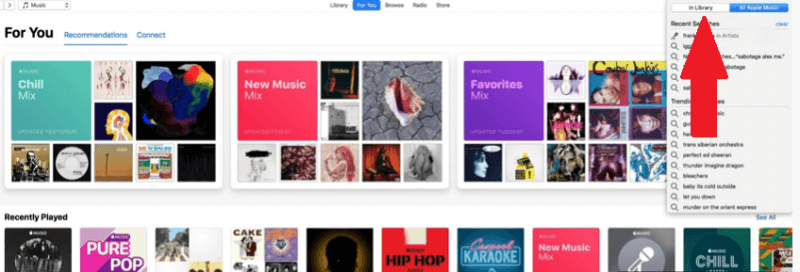
Once you click on the three dots, you will see Create Station from the drop-down list. Click on it. It will start to play a song from the artist that you have chosen. Jump to the end of that song there so you can see what it is it plays next.

Click on the little icon of the artist. That will make iTunes go away and launch the MiniPlayer instead. The MiniPlayer has a Star button. You can see, not only the music you’re listening to at the moment but what has been playing in the past.
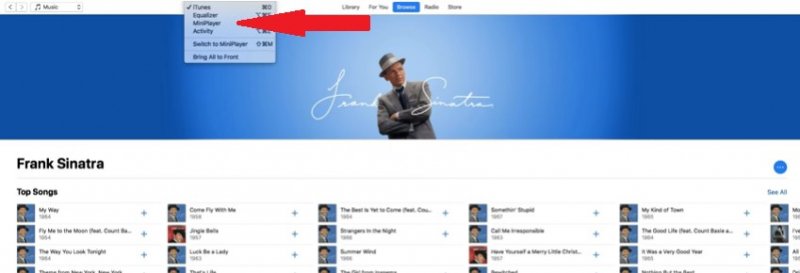
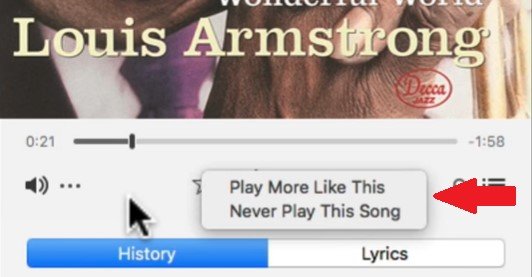
Click on the Star button under the song that’s playing. You will see two options there. These two options are the Play More Like This or Never Play This Song. You can refine the music you’re listening to with those two options. For example, if a song you’ve picked isn't shaping up to be the station you thought it would be, just continue to the option Never Play This Song until such time that your station gets better.
Close the MiniPlayer. Then go to For You on the top menu and click on it. Once you have clicked on it, you will see under the Recently Played area, your station. That's one way to get back to the station. You'll also eventually see your new station under Radio.
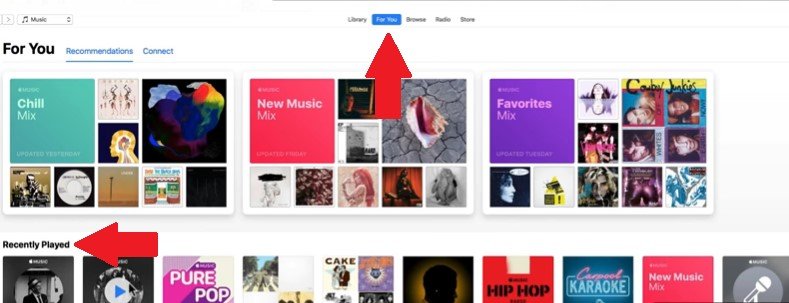
The steps below will show you how you can personalize your radio stations in Apple Music on your iPhone and iPad.
Click on the Music icon on your screen. Your Apple Music app will launch on your screen.
Once your Apple Music app is launched on your screen, select a song or an artist. Then look for the three dots.
Once you click on the three dots, you will see options. Choose which option suits you. It can either be New Station from Artist or New Station from Song. Once you have chosen, a new station is created based on the artists and songs you play.
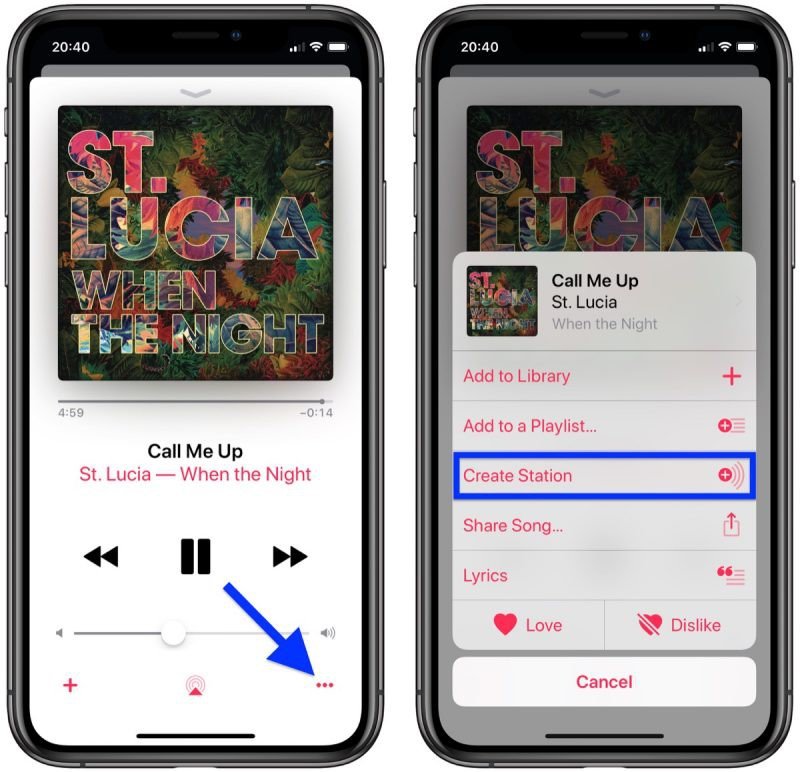
If you have an Apple TV, you will find the steps below very useful. Continue reading to learn how you can personalize your radio stations in Apple Music on Apple TV.
Launch the Music app on your Apple TV. After you have done so, start searching for a song or an album you want to play.
To launch the Options menu, get your Siri remote. Tap and hold the trackpad until the Options menu appears on your screen.
Now you can start selecting songs for your new station. You can do that by selecting Start Station from Song.
You now know how to personalize radio stations in Apple Music on various devices. Surprisingly, it’s not that hard to do. Don’t stop there because you can also add your personalized radio stations in Apple music to the library of your various devices. By doing so, you will be able to level up your listening experience with Apple music.
The steps below will show you how to add your personalized Apple Music to the library of your PC or Mac.
Open up your iTunes on your PC or Mac. Take your cursor to the name of the song.
When you click on the name of the songs, you will see three dots. Click on the three dots.
Now that you have clicked on the three dots, you will see the following options. They are Add to Playlist and Add to Library. You can click on the latter to add to the Library.
The steps below will show you how you can add your personalized radio stations in Apple Music on other devices such as Android, iPad, or iPhone.
Open the Music app by clicking on the music icon on the screen.
From the Home screen you see on your screen, switch to the Now Playing screen by tapping the song you’re playing.
You will see the three dots on the right part of the song that’s playing. Tap on the three dots to see the options Add to Library and Add to Playlist. Choose which one you prefer to add to your Library.
The steps below will show you how to add your personalized radio stations in Apple Music on your Apple TV.
Launch the Music app on your Apple TV. Then go to Radio and play it.
Get the remote control of your Apple TV. On the Touch surface, hold down on it.
As you’re holding down on the Touch surface of your remote, you will see the following options: Add to Library and Add to a Playlist. Choose the former to add to the Library on your Apple TV.
As you can see, it’s pretty easy to personalize radio stations in Apple Music on various devices. The thing about it is that you would have to upgrade to a paid Apple Music plan. If for some reason, you don’t want to upgrade your Apple Music plan to a paid version, you can consider using the DumpMedia Apple Music Converter to download the songs.
With the DumpMedia Apple Music Converter, you can create a playlist of the songs you hear on your favorite radio stations. You can just find some of your favorite songs on your free Apple Music account and then download and convert with the DumpMedia Apple Music Converter.
Another doable option is for you to download the songs you have just added to your Library with the use of the DumpMedia Apple Music Converter. You can do a lot with the DumpMedia Apple Music Converter to level up your listening experience on a free Apple Music subscription. More importantly, it has DRM removal from iTunes. Click this link to learn more about the DumpMedia Apple Music Converter.
Go right ahead and personalize your radio stations in Apple Music. You can now do it on your computer, mobile phones, and even on your Apple TV.
Have you ever personalized your radio stations in Apple Music? If yes, how did you go about doing it? Our readers would love to hear from you.
