
Enjoying the Spotify application would really be worthwhile if you are a premium user. You got to enjoy all the perks and features being offered by the Spotify application once you have brought and purchased an account and pay the monthly fee needed.
But, do you know that having a premium account is no longer the only way for you to enjoy Spotify? Yes! You can have your Spotify saved on your personal devices and gadgets even if you are only free users! In here, we are to explain a guide to help record Spotify songs.
The procedure needed to be accomplished is too simple and easy. You just need to pay attention to which among the tools to be presented will perfectly work for you and would suit your needs.
Let us now get to the discussion.
Contents Guide Part 1: An Overview About Spotify ApplicationPart 2: How to Record Spotify Songs Using Recording ToolsPart 3: Additional Tip: Sharing Your Recorded Songs to AnyonePart 4: To Wrap It All
Spotify has been known and popularized as one of the best music streaming services around the globe. There are millions of people recorded as users of this mentioned application. Alongside with iTunes or Apple Music, Tidal, Amazon Music, Pandora, and more, Spotify had been proven to have served the music needs of people all around the world.
Being compatible with numerous devices and gadgets such as personal computers, mobile phones, tablets, gaming consoles, smart speakers, televisions, and more, Spotify application has been a reliable partner for different types of people – the on-the-go, the office workers, students, parents, at-home people, and more.
Spotify continuously offers millions of songs, tracks, and playlists. You can find any song you wanted to listen to in this application regardless of what genre, who the artist is, what the album name is, and song title. You can discover new songs you are also not aware of as this is one of the many features Spotify has. You can even listen to podcasts and audiobooks if that would work for you!
You can enjoy Spotify more if you get to purchase a premium account. And, it quite makes your capabilities lesser if you will be settling as a free Spotify user. But, regardless of what type of user you are, you still cannot have any Spotify songs or files downloaded directly from Spotify and saved on your personal devices because such songs are DRM (Digital Rights Management) protected.
This is why Spotify users are still looking into ways they can have their favorite Spotify songs downloaded. And, one of the best ways it to perform recording and converting of Spotify songs.
Let us get to know more about the tools and software applications wherein you can choose from.
As initially mentioned, one way to get a copy of your favorite Spotify songs and files is to have those recorded using reliable and trusted tools. There are actually a number of recorders you will see once you have looked into the web. However, in this portion, we are to show and discuss only some of the most used and trusted recording software applications.
Audacity is a software application that is highly compatible with either Mac computers, Windows, and Linux. It is a free open source software which is very easy to navigate and control. Apart from being a recorder, it can also serve as a multi-track audio editor which is very easy to download and install. In order to use Audacity, you only need to perform some basic steps and procedures.
Here are the details pertaining to each step.
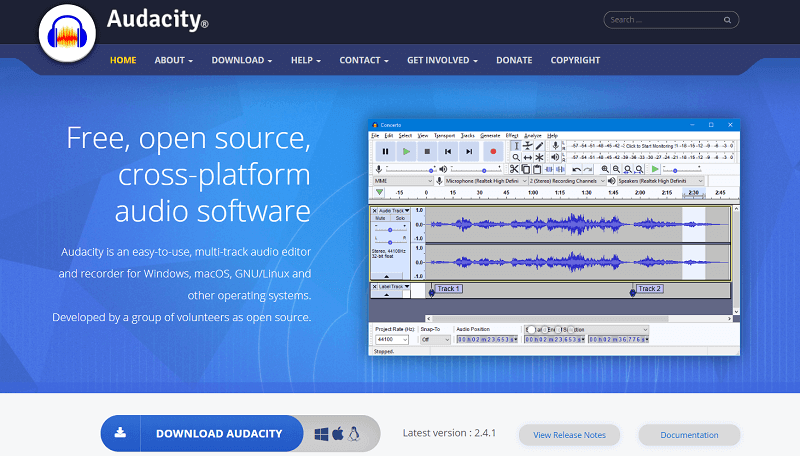
The initial thing you need to ensure is that you have the application successfully installed on your personal computer. If you cannot find where to download this software application, you can just head to the official website of Audacity and from there, you can easily see all those buttons to tick in order to download the software on your device.
As mentioned, this is compatible with either Mac or Windows so if you are worried, you have nothing to think about. Once successfully installed, you just need to open and launch it and the below icon will be seen on your device.
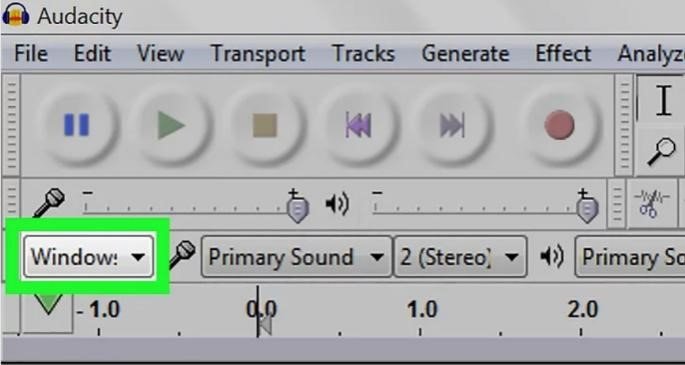
Once done with downloading and installation, we will now proceed with audio host and recording device selection. For an audio host, you can choose by selecting the drop-down arrow you will see at the top left corner of the screen highlighted on the below image. If you are using a Windows computer, then you should choose “Windows WASAPI”.
For Mac users, you should select “Core Audio”. As for the selection of the recording device, you can check out what output you are to use in playing the song. If you are utilizing your device’s microphone, then you can select it.
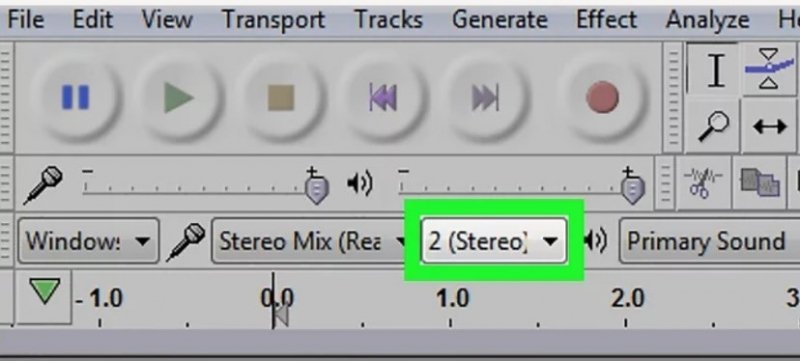
Before proceeding with hitting the “Record” button, you need to select stereo recording. This can be done by heading to the button shown on the below image, tick the drop-down arrow and choose the “2 (Stereo) Recording Channels”. This is the second option you will be seeing once the arrow has been ticked.
Apart from the stereo recording, there is as well a need to choose the audio playback device. The “Primary Sound” button you will see should be clicked and from there, you will select which audio output is being used to listen to the songs.
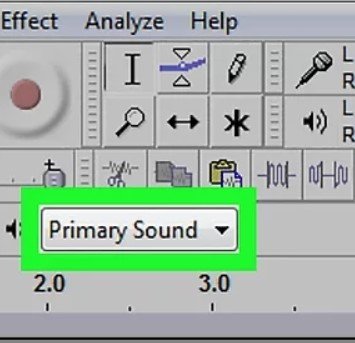
Once done with the two, you can now hit the “Record” button to proceed with the recording process.
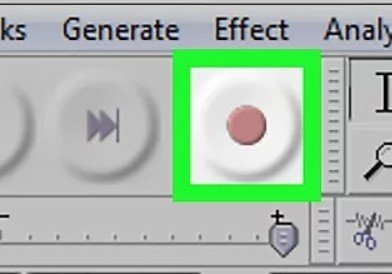
Once recording started, you can just head to your Spotify application then tick the “Play” button to let Audacity perform its recording job.
The last and final step to complete the process it to have your recorded file downloaded and saved on your personal device. You can do this by clicking the “File” button which is located at the top left corner of the interface. Once ticked, you will see new options on the screen, make sure to choose “Export Audio”.
You can export the file and save it as an MP3 file. You can also do the renaming and save it to a folder or location on your personal computer before hitting the “Save” button.
Apart from having Audacity, you can also try this Replay Music. This is as well considered as an ultimate recorder that has the capability of recording your Spotify songs and files making sure that you can have those in MP3 format. In using this, you need not to worry about the quality of the recorded files since those are proven to be of high quality.
What is more fascinating about this is its feature to filter sounds leaving super clean and polished files. You can try the software for free or upgrade to a better version to unlock more special and great features.
Aside from using the recording tools to save your favorite Spotify songs, you can also try using third-party software application like this DumpMedia Spotify Music Converter. Such an application is very much capable of downloading any Spotify song you want making it accessible on your personal device.
Since Spotify songs have this DRM (Digital Rights Management) protection, it is impossible to have those downloaded directly and DumpMedia Spotify Music Converter is a solution to that. This tool removes DRM protection and you can have the songs converted to any format you desire making it shareable to anyone and playable in different types of media and music players.
Here is the detailed step by step guide to follow.
Let us look into these steps further.
Of course, the first thing you need to do is to have this DumpMedia Spotify Music Converter downloaded and installed on your personal computer. Once done, just open and launch the program to start as well as your Spotify application.
You can begin adding the files by performing dragging and dropping or even adding just the file’s URL (link). This program supports batch conversion which makes it possible to convert not only a file but a number. Converting a lot at a time is not an issue.
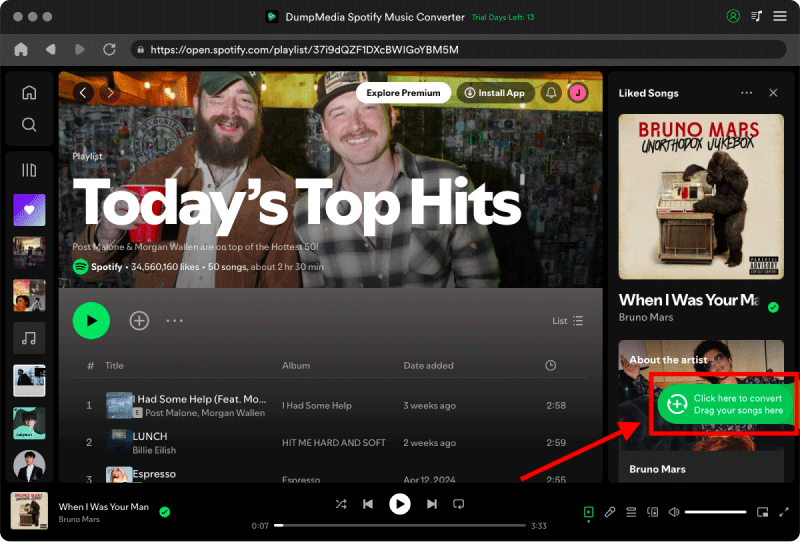
Upon importing and uploading the songs to be converted, the next step would be the selection of the output format. Make sure that you will choose any format you desire among those that you will be seeing on the screen. In this case, we ought to convert the songs to a format that has been generally supported by numerous media players.
You can have the songs converted to MP3 format or any other you prefer. You can do this by heading to the “Convert All Tasks To” button located at the top right corner of the screen.

The last step would be hitting the “Convert” button to begin the conversion process. This will only take some time since the program is designed to function five times faster than any other converters. While conversion is being done, status bars will be shown in the screen wherein you can monitor the progress of the process for each song.
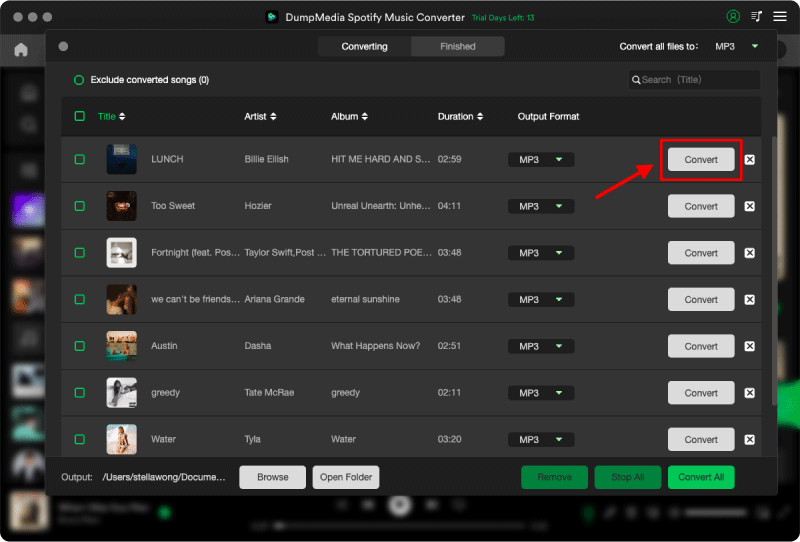
Upon doing these three easy steps, you can have your Spotify songs downloaded and saved on your personal computers and even have those transformed into any format!
Recording tools are very much helpful if you wanted to get a copy of your favorite Spotify songs and files. You can try using any of the two explained in this article. On top of this, you can also try using an alternative tool that has the same feature as the recording tools – giving you the chance to save and download the files to your devices.
Do you have any others in mind? Share those by leaving your comments in the section below!
