There are many ways to make your PowerPoint presentation interesting, such as adding animation to items, adjusting slide transition styles, and using a catchy theme that the audience can’t enough. Apart from all that, you can also add music to your PowerPoint presentations.
Adding music from Spotify to PowerPoint presentations is very easy. So, do you want to keep your audience engaged and entertained during your next presentation? In this article, you will learn how to add Spotify music to PowerPoint.
Contents Guide Part 1. Notes Before Adding Spotify Music to PowerPointPart 2. How to Download MP3 Music from Spotify for PowerPoint?Part 3. How to Add MP3 Spotify Music to PowerPoint?Part 4. FAQs About Adding Spotify Music to PowerPointPart 5. Conclusion
Before looking into the steps, let's look through some frequently asked questions about adding music from Spotify to PowerPoint presentations.
Unfortunately, Spotify and PowerPoint don't integrate directly. In general, Spotify songs are encrypted with digital rights management (DRM), meaning they can only be accessed through authorized devices, such as the Spotify app. You can't transfer them to other devices and platforms like PowerPoint, even if you are a Spotify Premium subscriber and know where are Spotify downloads stored on your device. So, you can't directly use Spotify songs in PowerPoint presentations.
PowerPoint only supports importing common audio formats, including MP3, AAC (M4A), WAV, WMA, MIDI, AIFF, and AU. However, all the music from Spotify is encrypted in the format of OGG Vorbis. If you want to add music from Spotify to PowerPoint presentations, you need to convert Spotify music to PowerPoint-supported audio formats.
To add music from Spotify to PowerPoint slides, you need to remove DRM restrictions and get Spotify songs to compatible formats like MP3, WAV, etc. DumpMedia Spotify Music Converter is an excellent choice to provide you with reliable solutions. Whether you have Spotify Premium or not, DumpMedia Spotify Music Converter can help you convert Spotify songs to DRM-free MP3, WAV, AAC, M4A, AIFF, and FLAC with just one click.
This powerful converter runs smoothly on macOS/Windows and includes an integrated Spotify web player. Furthermore, it preserves important ID3 tags and the original audio quality, enhancing your Spotify high quality streaming experience at the best possible audio quality. In this way, you can download your favorite music to PowerPoint presentations and play them with the best audio quality for mesmerizing your audiences.
🏆More Amazing Features of DumpMedia Spotify Music Converter:
Before adding music from Spotify to PowerPoint slides, follow the steps below to download songs from Spotify as PowerPoint-supported files using DumpMedia Spotify Music Converter.
Step 1. Download and install DumpMedia Spotify Music Converter to your Mac/PC. Launch it and you will see the interface. Use your Spotify Premium/Free account to log in.
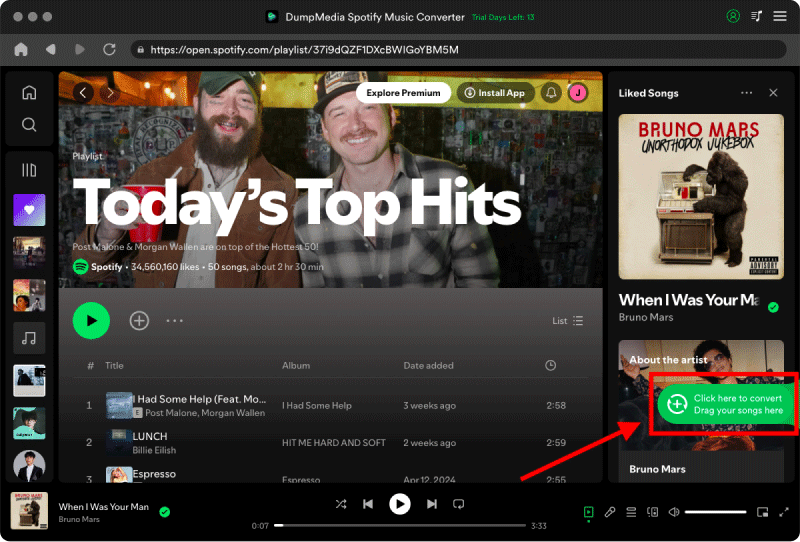
Step 2. Directly search for the songs, playlists, or albums you want to use in your PowerPoint presentation. Then drag and drop them to the "+" button, and add them to the converting list.
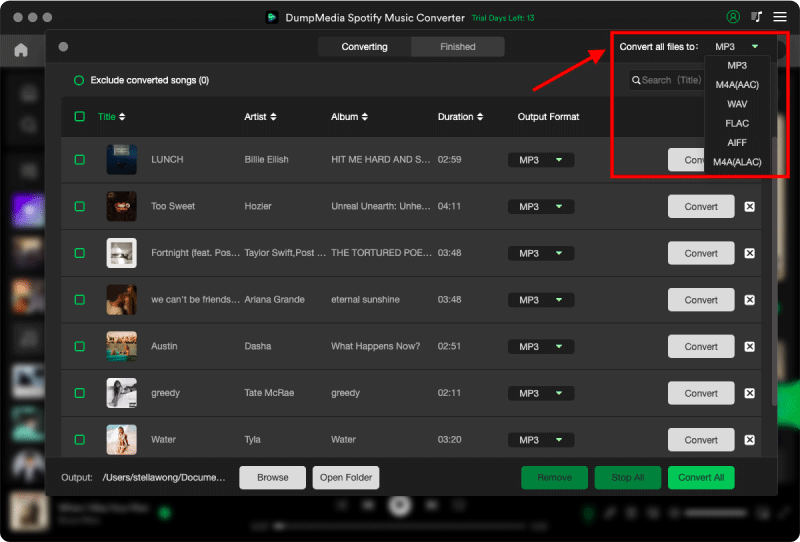
Step 3. To add music from Spotify to PowerPoint presentations, click the Format panel to choose MP3 as the output format. Other remaining output parameter settings can also be changed as you like.
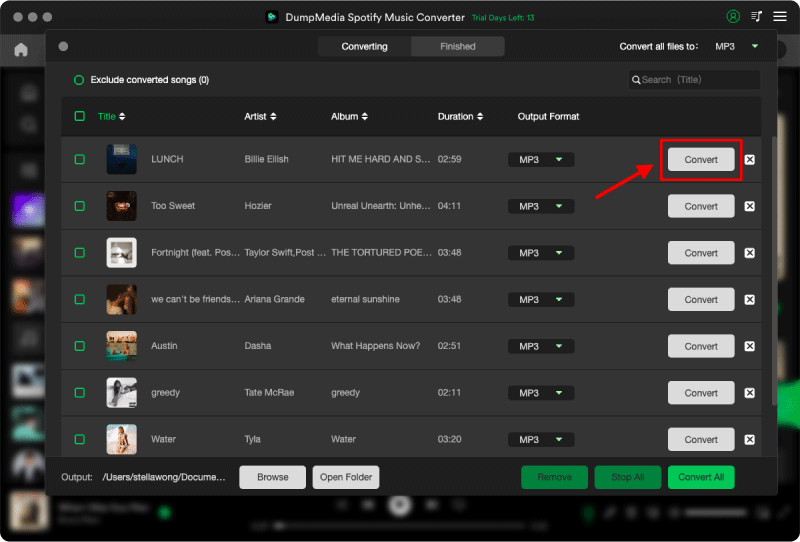
Step 4. Then, you can hit the "Convert All" button to save Spotify MP3 songs locally in bulk.
Probably the easiest way to add music to PowerPoint is to upload a song from your computer. Now that you've successfully converted your Spotify music files to DRM-free formats using DumpMedia Spotify Music Converter, adding music from Spotify to PowerPoint will be easier. You can refer to more information according to the how-to guide as follows.
Step 1. Select the slide you want to add music to.
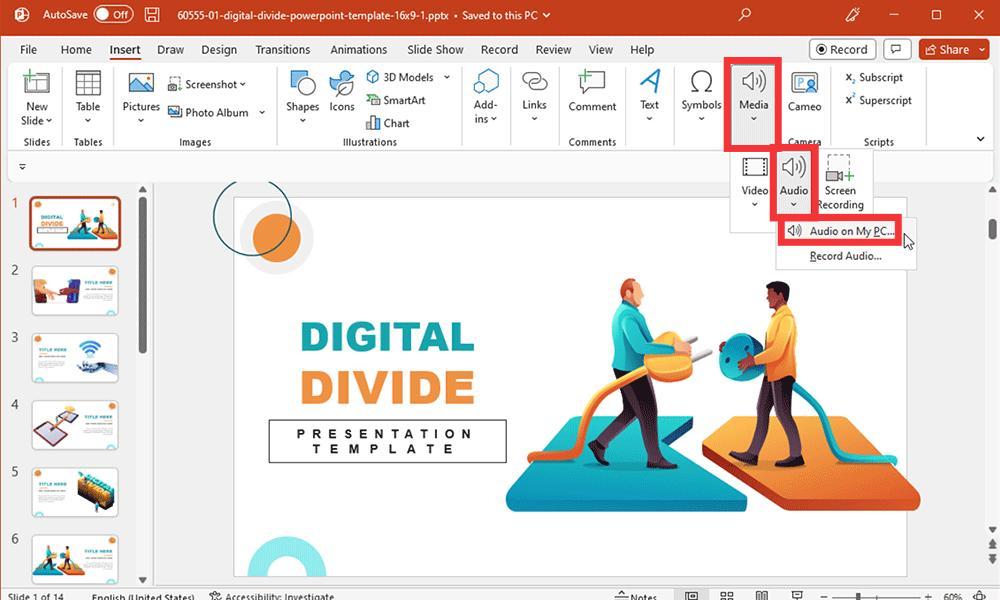
Step 2. Click on the "Insert" tab in the top left corner of your screen. Click on the "Audio" button to open the drop-down menu and pick "Audio on My PC" (for some versions, it shows "Audio from File").
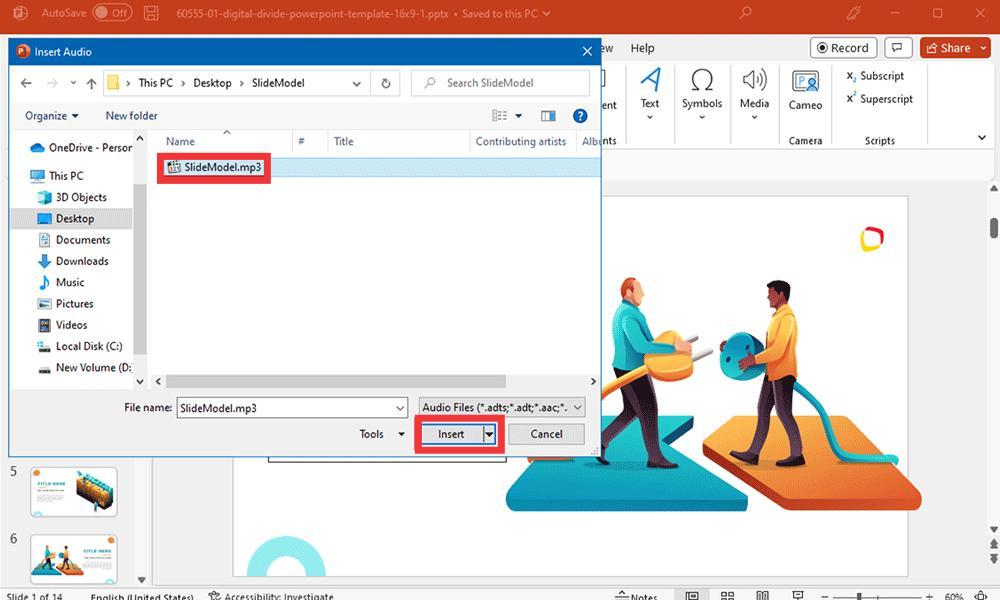
Step 3. Find the Spotify music file you want to add and click "Insert."
Step 4. A sound icon will appear on the slide. You can drag the icon and place it wherever you find it suitable, and you can also adjust its size.
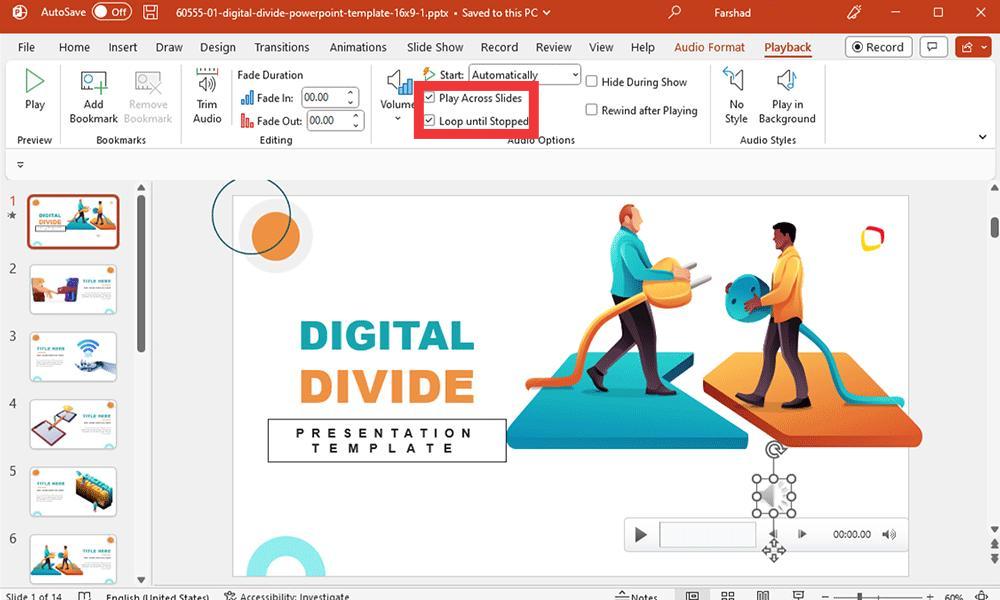
Step 5. With the audio icon selected, you can go to the "Playback" tab. The Playback tab lets you control whether to start the music by clicking or automatically.

Step 6. You can also play the music in a loop and across all slides instead of just one. Other options allow you to preview audio, trim the music file, add a fade duration at the beginning and/or end of the audio track, and adjust the volume.
You'll need to download DRM-free music from Spotify with DumpMedia Spotify Music Converter first, and then transfer it to your phone. After that, you can select your mobile device to make a slideshow and add the downloaded Spotify music to it.
Yes, you can control music playback via the Playback tab. Options include:
In conclusion, After reading this article, you will understand a lot when you add music from Spotify to PowerPoint. If you follow the instructions in this article, you will now know exactly how to add Spotify music to PowerPoint and the points you need to pay attention to when adding music to your presentation.
With the help of DumpMedia Spotify Music Converter, you don’t have to rack your brains to download DRM-free music to your presentation. DumpMedia can convert Spotify-protected files into a PowerPoint-supported format at a fast speed and high quality. Play around with the features in DumpMedia Spotify Music Converter to create some very unique, inventive sounds for your PPT now!