


How to Deal with "The Virtual DJ Spotify Tandem is Gone"
There was a time when Virtual DJ Spotify was just one team. They were perfect together. Spotify was a willing content contributor to the Virtual DJ. You could easily access your Spotify songs when you sign into the Virtual DJ. That was convenient. You just went on one platform to play your songs.
Unfortunately, those are gone. The Virtual DJ Spotify tandem is gone. Both have mutually agreed to part ways. Nonetheless, you can still find ways to reconcile the two. That is if you want to.
Contents Guide Part 1. What is a Virtual DJ?Part 2. How to Add Spotify Songs to Virtual DJPart 3. In Conclusion
Part 1. What is a Virtual DJ?
A DJ needs a lot of sound equipment to make awesome music. That has now changed, thanks to the Virtual DJ.
If you haven’t heard of the Virtual DJ, it’s a virtual set up that a DJ might use. It’s good enough to use anywhere. There is a lot of things that you can do with it.
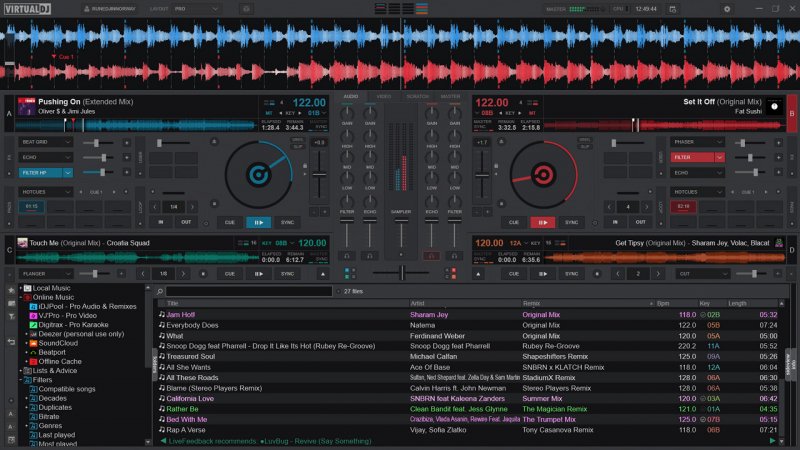
When you see download the program, you will see that you have virtual turntables and mixers. Hence, is the reason why it’s called Virtual DJ. The only that’s not virtual is you because you can be the DJ. Isn’t that awesome?
It’s safe to say that the Virtual DJ is an all-in-one package that you can use to create an awesome mix of music. You can remix songs with it. Add sample and effects and you can even record and output your remixes. It’s a great program that’s portable. You can take it anywhere. For example, you can take it to a party and do anything that a DJ might do. One thing is for sure, you can liven up your party with it.
Relationship between Spotify and Virtual DJ?
Everybody knows what Spotify is or at least, almost everybody. It’s a very popular music streaming service. Thanks to their free plan, it’s has gotten almost everyone signed up with it. These days, almost everyone uses Spotify to listen to their favorite songs.
It boasts of millions of songs to choose from and it’s pretty impossible not to find your favorite song in it. That is why it’s popular.
Having a Virtual DJ Spotify team spells perfection. Imagine, having the ability to access Spotify songs right within the Virtual DJ just makes everything convenient. Everything is in one place. You can remix dance music, add on some effects, and have the best party ever.
Unfortunately, there is no forever and the Virtual DJ Spotify team is gone. It doesn’t look like there is no reconciliation in the near future. That’s okay. There are still ways for you to add your Spotify songs to Virtual DJ.
Part 2. How to Add Spotify Songs to Virtual DJ
Ways to Convert Spotify Songs
Even if the Virtual DJ Spotify team no longer exists, you can still consider these easy ways to put them together again. First, you need to convert your Spotify songs.
Option #1. Use the DumpMedia Spotify Music Converter
To be able to add your Spotify songs to Virtual DJ, you would need to download, convert, and save them first. Since you are dealing with your Spotify songs, you would have to make sure that you remove the DRM. That is the safest way you can use your Spotify songs outside the app. You can also keep your Spotify playlists.
The DumpMedia Spotify Music Converter can do that for you. Continue reading to see how the DumpMedia Spotify Music Converter can deal with the DRM.
Step 1. Download the DumpMedia Spotify Music Converter
Step 2. Add your favorite songs.
Step 3. Choose a file format
Step 4. Select a location for your songs and convert
Continue reading to learn more about the detailed steps on how to use the DumpMedia Spotify Music Converter.
Step 1. Download the DumpMedia Spotify Music Converter
First and foremost, you need to download the DumpMedia Spotify Music Converter from this website. When you’re done downloading, install, and open the DumpMedia Spotify Music Converter.
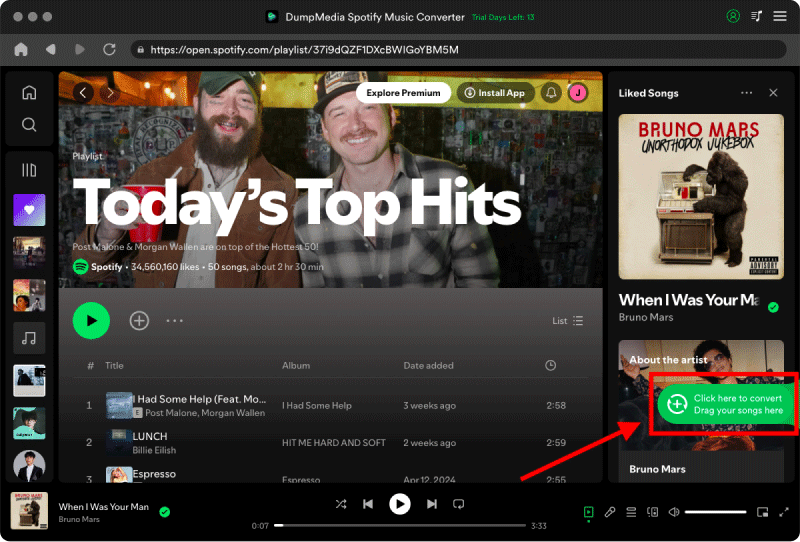
Step 2. Add your favorite songs
Adding your favorite songs to the DumpMedia Spotify Music Converter is easy. There are two ways to do it. You can drag the song from your Spotify account and dropped it onto the interface of the DumpMedia Spotify Music Converter. Another way for you to do it is by copying the URI link of the song from your Spotify account and then pasting it on the DumpMedia Spotify Music Converter.
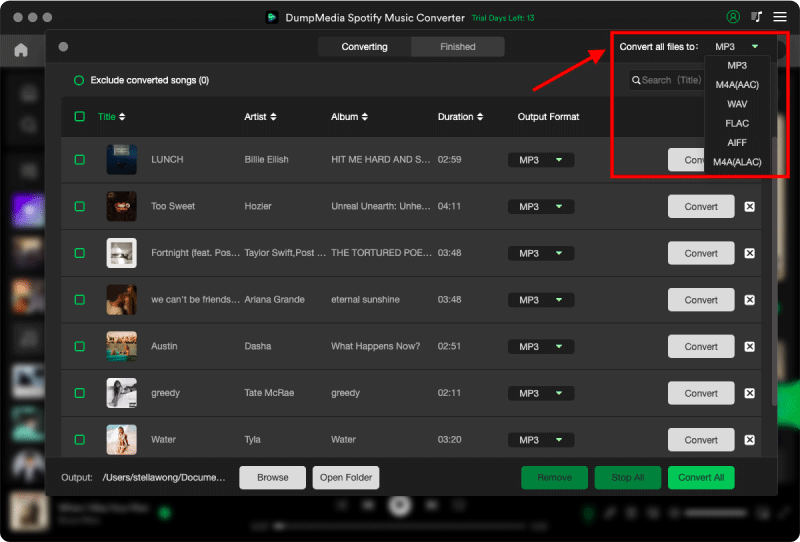
Step 3. Choose a file format
Now is the time for you to choose the file format of your output. Take note that Virtual DJ supports file formats such as WMA, MP3, Cda, MP4, Ogg, WAV; to mention a few. The good thing about the DumpMedia Spotify Music Converter is that it offers a long list of file formats. You will find all the file formats that Virtual DJ supports in the DumpMedia Spotify Music Converter.
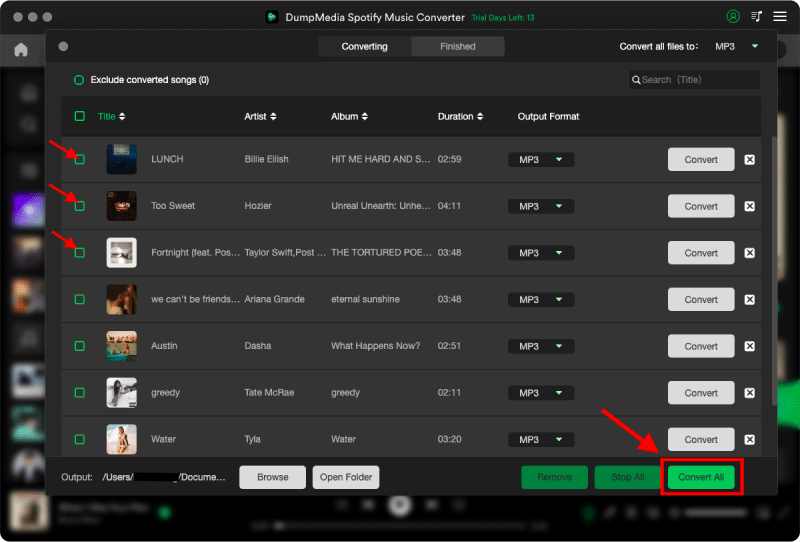
Step 4. Select a location for your songs and convert
Now that you have chosen a file format, click on the Browse button on the lower part of the DumpMedia Spotify Music Converter. That will prompt you to choose a location for your newly converted songs. Once you’re done with that, click on the Convert button.
Option #2. Use Audfree Spotify Music Converter
This is another program that can help you convert and download your Spotify songs so that you can eventually add them to the Virtual DJ. If you want to know how to use it, just follow the steps below.
Step 1. Download the program
After downloading, run the program. Ensure you have your Spotify opened on your computer as well. Log into your account if you have to.
Step 2. Choose the songs to add to the program
You can drag your Spotify songs onto the Audfree Spotify Music Converter window. Hence, is the reason why you need to have your Spotify account opened.
Step 3. Choose an option on the Output field
Take your cursor to the bottom part of the Audfree window and click on the Output field. You will be prompted to choose a location where you can save your songs. You can click on the Converted folder if you like.
Step 4. Select your saving point
Once you click on the Converted window of the Audfree Spotify Music Converter, you will be prompted to choose a saving point on your computer. You can choose to save the Converted folder on your desktop if you like.
Step 5. Click on the Convert button
Just click on the Convert button on the right bottom part of the AudFree window. If in case, you want to cancel, there is also a Cancel button on the right, the bottom part of the Audfree window. After you have downloaded the songs, you can add them to the Virtual DJ.
Adding Songs to Virtual DJ
Now that you have your songs converted and saved on your computer, it’s time to add them to the Virtual DJ. Just follow the steps below.
Step1. Download and Open the Virtual DJ Program
You can download the Virtual DJ here. You will find the Download button on the top menu.
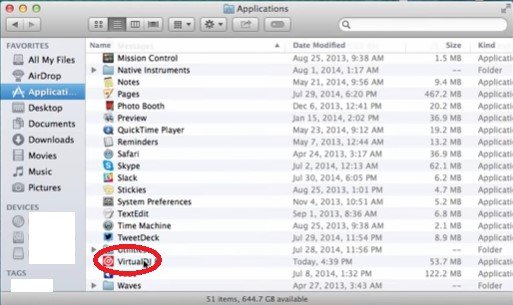
When you’re done downloading and installing the Virtual DJ on your computer, launch it so that you can create your account. Go inside your Applications folder and look for the Virtual DJ folder. Once you’ve found it, click on it. You will be taken to the Virtual DJ screen where you can create an account.
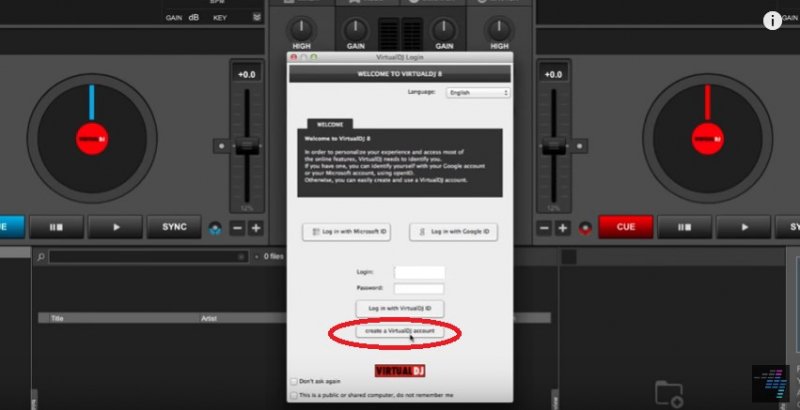
Step 2. Create Account
Take your cursor to the bottom part of the pop-up screen and click on Create a VirtualDJ account. Once you click on it, type in your credentials. Wait for the code that’s going to be emailed to you.
Check your email for the confirmation code. Copy and paste it on the Confirmation code field. Click on Create my account button.
Step 3. Find the Location of Your Newly Converted Spotify Songs
Take your cursor to the left, the bottom part of the Virtual DJ screen, and select the location of your newly converted Spotify songs.
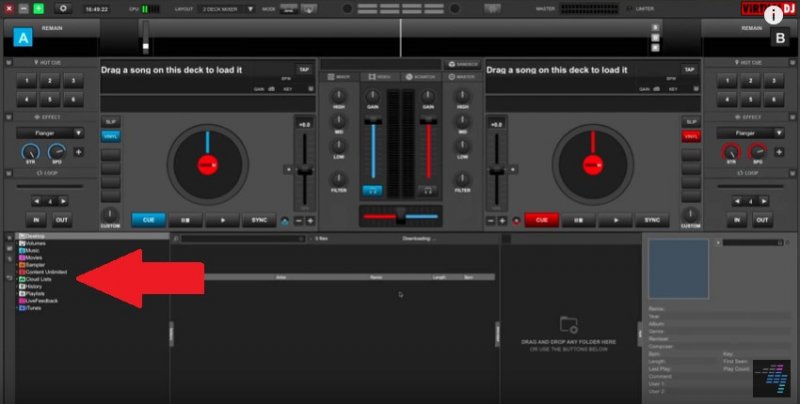
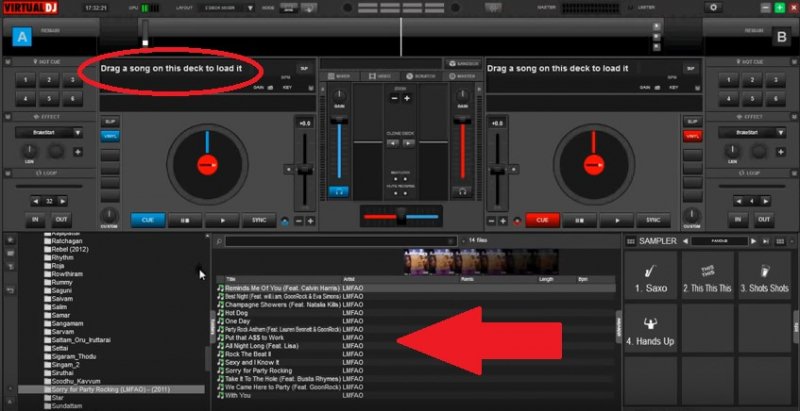
Step 4. Add Songs to Deck
Once you have clicked on the location of your newly converted Spotify songs, your list of songs will appear on the lower part of the Virtual DJ screen. Select the songs you want to add to the Virtual DJ by simply dragging them to the deck.
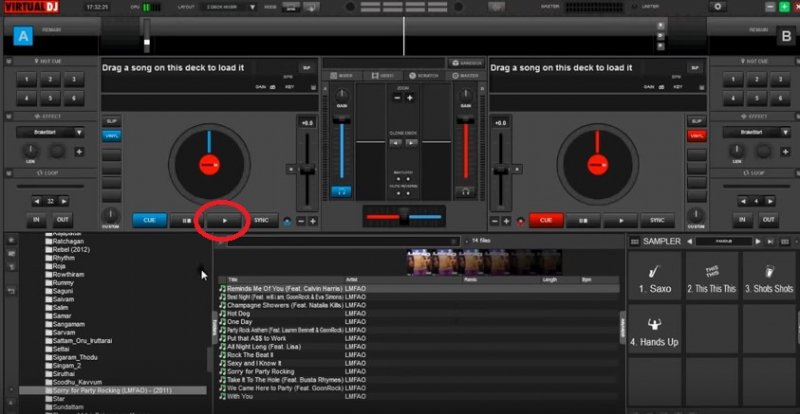
Step 5. Click on the Play Button
You’re all set. You have just added your Spotify songs to the Virtual DJ. Click on the Play button to listen to your Spotify songs on Virtual DJ.
Part 3. In Conclusion
There’s no need to cry over the fact that the Virtual DJ Spotify tandem is gone. Even if it’s gone forever, there’s no need to feel bad. If it doesn’t come back, it’s okay.
You can always download and convert your Spotify songs to your computer and eventually add them to the Virtual DJ. That is something you can do on your own nowadays. You don’t need to have any kind of coding skills to add your Spotify songs to Virtual DJ. You can revive the Virtual DJ Spotify tandem on your own.
Have you tried using the Virtual DJ program? Have you tried adding your Spotify songs to it? Share with our readers your valuable tips and tricks on how to add Spotify songs to Virtual DJ.

30% Off >>>