
Spotify is one of the most popular music streaming services currently available. It has both free and premium versions allowing users to enjoy more features on the latter. Tens of millions of songs, albums, and podcasts can be streamed with Spotify.
But, what’s the normal Spotify bitrate and how do you modify it? For casual music listeners, this wouldn’t be a problem. However, music enthusiasts would like to adjust their bitrate or audio settings to have a more enjoyable experience while listening to Spotify.
In this guide, we’ ll teach you about Spotify bitrate and audio settings. We’ ll start off with an explanation of what bitrate is. Then, we’ ll go on to giving you steps on how to change the bitrate while listening to Spotify. Finally, we’ ll end with a discussion on how to get Spotify music to work offline. Let’s get started.
Contents GuidePart 1. What Is Bitrate?Part 2. How To Adjust Spotify Bitrate Through The Desktop App Part 3. How To Modify Spotify Bitrate Through The Mobile AppsPart 4. Bonus: How To Listen To Spotify Music Offline
You may have heard of the word “bitrate” before. Some people have an overview of what the term means. However, for purposes of this article, we will explain what bitrate is. In this way, you’ll get acquainted with it better.
Bitrate is the amount of data, measured in the number of bits, that is being processed over a certain period of time. When it comes to audio files, bitrate is typically measured in kbps. That’s why you’ll see certain things like 120 kbps and 360 kbps.
The said unit of measurements means kilobits per second. If you say the music on Spotify is at 360 kbps, this means 360 kilobits of data is being stored per second of a particular song.
Obviously, the greater the bitrate of a particular audio file, the more storage space it will take up. In the case of Spotify, the higher the bitrate that you use, the more data you consume.

Spotify provides you with a variety of bitrates to choose from. The Spotify bitrate can be adjusted to choose the option that suits your needs and preferences. According to the music streaming service, you can make the sound quality higher if you want to enjoy the music more. On the other hand, you can save mobile data by turning the quality down.
Note : It is important to note that audio settings cannot be adjusted if Spotify Connect is actually active. And audio settings will vary depending on your subscription and the devices you’re currently using. Below is a chart depicting the Spotify bitrate we’re dying to know about:
|
Spotify (Free Version) |
Spotify (Premium Version) |
|
|
Web Player On Browsers |
Advanced Audio Coding 128 kbps |
Advanced Audio Coding 256 kbps |
|
Desktop Players And Mobile App Players |
Automatic - Based on the speed and stability of your internet connection. |
Automatic - Based on the speed and stability of your internet connection. |
|
Low* - About 24 kbps |
Low* - About 24 kbps |
|
|
Normal - About 96 kbps |
Normal - About 96 kbps |
|
|
High - Approximately 160 kbps |
High - Approximately 160 kbps |
|
|
Very High - About 320 kbps |
||
|
Legend: *The option for Low Quality isn’t on the desktop applications for Windows. |
||
Now that we have discussed Spotify bitrate, let’s look at how we can adjust it depending on the device we’re using. In this case, we’re going for the desktop application. Here are the steps on how to do it:
First, click the down arrow located in the upper right corner of Spotify’s desktop application. Then, choose Settings.
Go to the section labeled “Music Quality ”. Now, select from Automatic, Low, Normal, High, and Very High.
Now, you can start playing tracks with your desired audio quality. Use the search bar or go to My Library to find songs that you love.
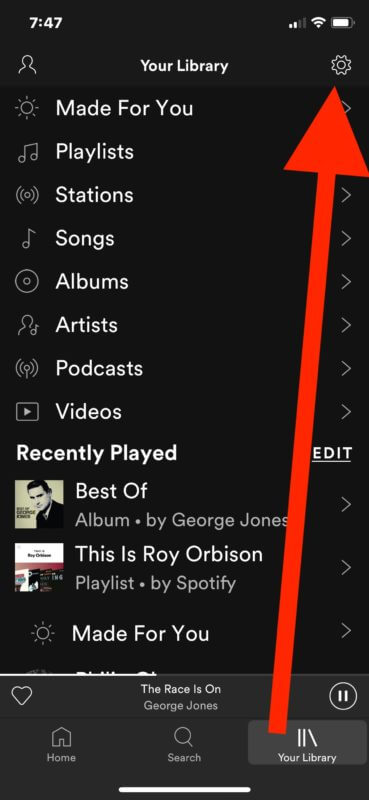
Visit the Home section of the mobile app by clicking “Home ”. Then, click the gear icon which is the button for Settings.
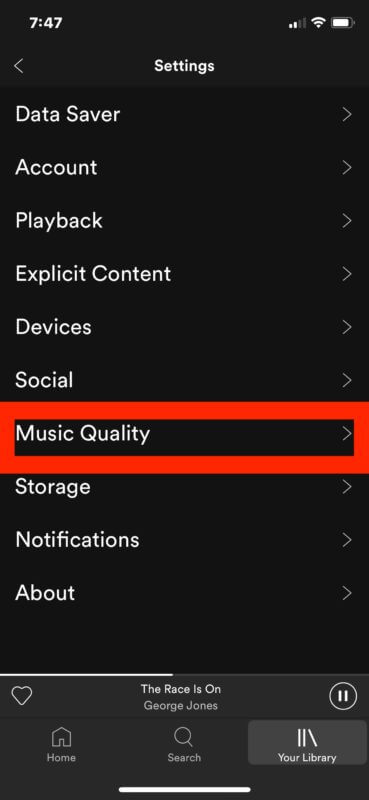
Go to the section labeled “Music Quality.” Now, select from Automatic, Low, Normal, High, and Very High.
Now, you can start playing tracks with your desired audio quality. Use the search bar or go to My Library to find songs that you love.
Note : It is important to remember that adjusting music quality is not possible through the web player. Thus, you must use a desktop or mobile app to change audio quality, especially if you really have to.
It’s possible to listen to Spotify music offline without paying for their subscription. With this, you can not only listen to music without an Internet connection, but you can also transfer it to any device you want.
This is possible through DumpMedia Spotify Music Converter. It enables you to download and convert music, albums, playlists, and any track from Spotify.
These tracks can be converted to a variety of output formats like MP3 which is the recommended output file. Quality is not compromised so you can ensure you get 100% original tracks. Below are the steps you can follow in order to download and convert Spotify tracks:
Download, install and open the software on your Windows PC or Mac computer. Then, simply drag the songs, albums, and playlists (or any track) you want to download towards the main interface of the program.
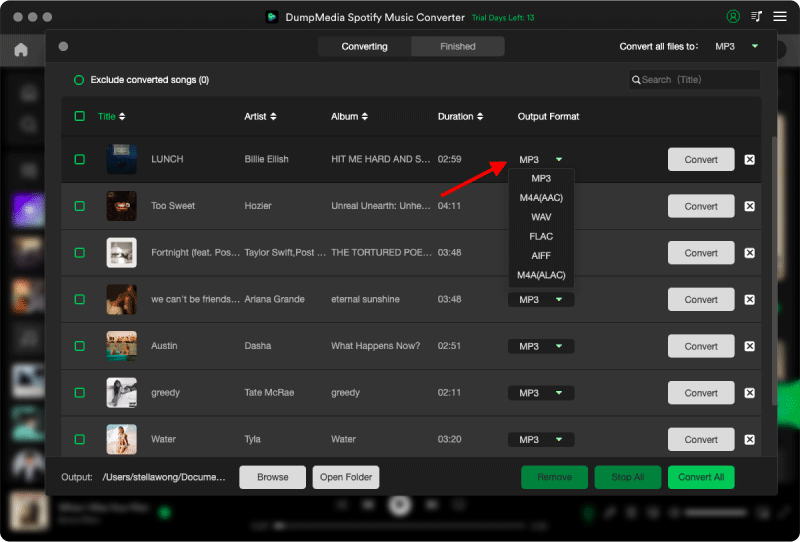
After this, you can choose the output format of the tracks you want to convert. The recommended output format is MP3. However, other formats available are M4A, WAV, FLAC, etc.
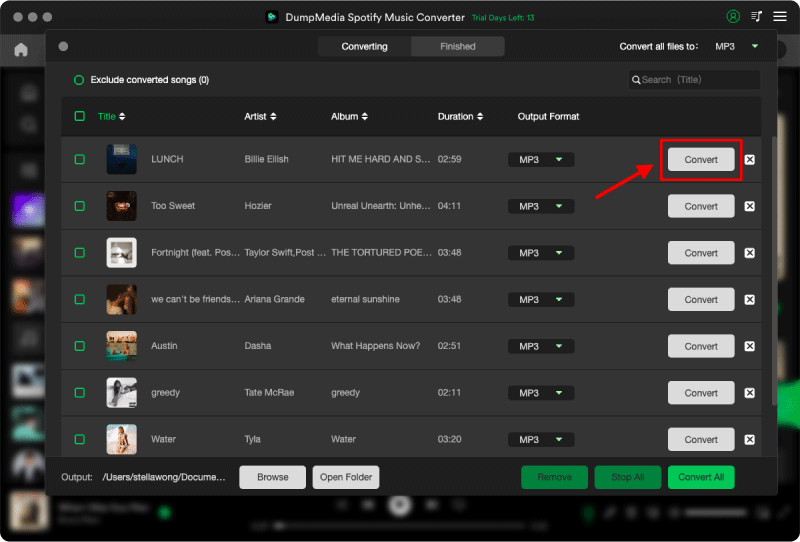
Now, you can start converting your tracks by pressing the “Convert” button. This is usually done at blazing fast speeds. You can wait until the conversion process is complete. Original quality is preserved as well.
To Wrap It All Up
We have given a complete guide on Spotify bitrate and how to adjust them through various devices. As you can see, options are available when it comes to bitrate on Spotify. We have automatic, low, medium, high, and very high. But if you don’t want to pay for the subscription, you can always use DumpMedia Spotify Music Converter to grab tracks from the platform.
So, what bitrate do you use when streaming and downloading Spotify tracks? Did you find our article helpful? Let us know in the comments section below.
