Spotify error code 3 usually happens on Windows. However, don’t be sure that it won’t happen on your Mac. if you listen to Spotify on your Mac, there’s a big chance that you will encounter the Spotify error code 3 as well.
As a Mac user, you have full trust in your machine. You’re confident that you own the best computer. That’s a valid feeling since Mac machines are pretty reliable and efficient. However, that does not mean that they are perfect because they’re not.
You are bound to encounter the said error and if ever you do, don’t worry. You can fix this particular error and go about listening to all the Spotify songs that you love.
Just continue reading this article to learn how you can fix Spotify error code 3 on your Mac. Make sure to read until the end to learn of a program that can help you avoid the said error.
Contents Guide Part 1. What is the Spotify Error Code 3?Part 2. How to Fix the Spotify Error Code 3?Part 3. Bonus: Avoid Spotify Error Code 3 Issue with DumpMedia Spotify Music ConverterPart 4. Conclusion
The Spotify error code 3 restricts your access to your account. In other words, you can’t get into your account. You are seeing messages that you don’t have an internet connection or your firewall won’t let you access your Spotify account.
The bad part is that you are seeing these messages even if you have an internet connection. The issue can get pretty annoying but try not to be annoyed. There are ways to fix this Spotify error code.
The good news is that there are various ways to fix this particular Spotify error code 3. Read on to learn more about them.
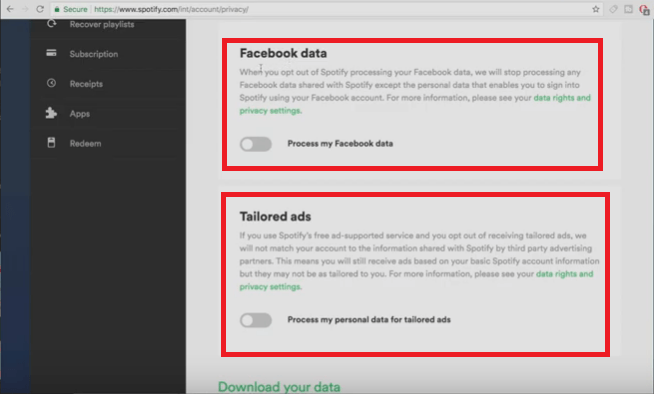
Your first option is to turn off Facebook Data and Tailored Ads. Check out the steps below to see how you can turn both them off.
You would need to log in via the Spotify website. Hence, go to Spotify.com and log in to your account from there.
Once you’re inside your account via the Spotify website, take your cursor to the left-hand side and look for Privacy Settings. Click on it.
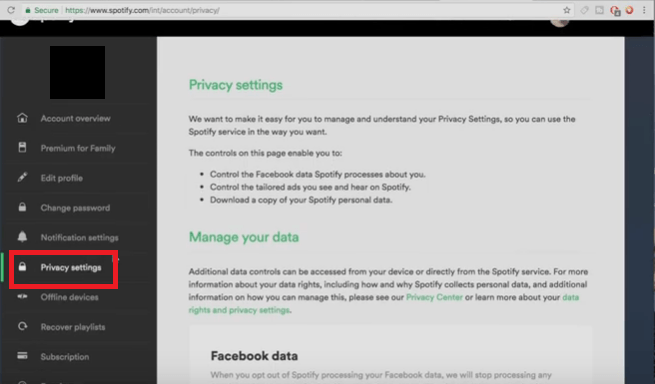
Once you have clicked on Privacy Settings, scroll down on the main page. Look for Facebook Data and Tailored Ads and turn them both off.
Check if the firewall on your Mac is off as well. You can do this by launching System Preferences and clicking on Security & Privacy. Then click on the Firewall tab to turn it off.
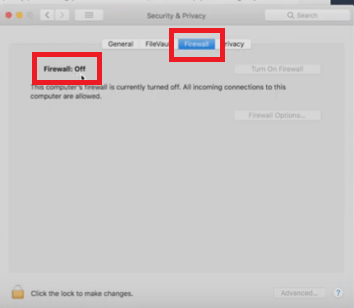
This is a good option to look into if the first option does not work. The steps below will show you how you can do it.
Using a VPN is another option you can look into. The steps below will show you how you can use a VPN.
If you want to avoid the Spotify error code, your best option is to use the DumpMedia Spotify Music Converter. This way, you get to convert and download all the songs that you like on Spotify.
The good thing about this program is that you can use it on your free Spotify account. You don’t have to sign up for a premium account.
When you convert and download using this particular tool, you get to keep all the songs that you like. That’s not all because you also get to play all your downloaded Spotify songs offline on any device. You see, the DumpMedia Spotify Music Converter converts the songs to any format that you like.
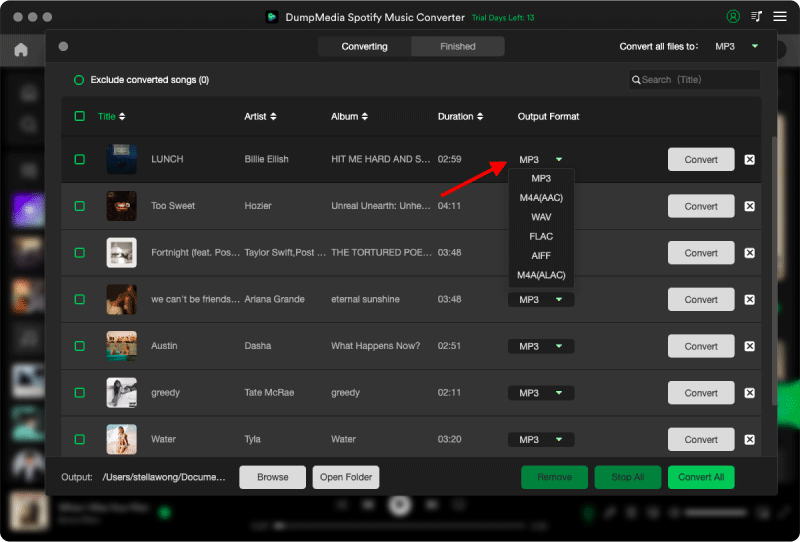
Once you get to convert the songs in DRM-free formats such as MP3, you won’t have any issues playing the songs on any device. For as long as you are signed up with Spotify, you can use this converter to avoid any issues with your account.
Don’t worry if you encounter this Spotify error 3 on your Mac. As you can see above, there are a lot of options for you to look into to solve the error.
Of course, if you want to prevent seeing the error on your Mac, you can choose to convert and download songs with the use of the DumpMedia Spotify Music Converter. It’s your best bet if you want to avoid the error and keep all your Spotify songs forever.
Have you ever encountered this error on your Mac? If yes, how were you able to fix it? Feel free to share with us some of your tricks to solve this particular issue.
