
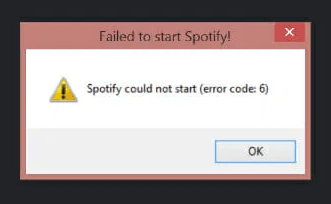
Spotify Error Code 6 is among the most irritating errors that you will encounter when you are using the Spotify desktop app.
This error will usually occur when you are launching the Spotify app and it crashes and eventually closes itself down. Launching the application again will not work because the same problem will happen when you do this.
Luckily, we will be giving you step-by-step guides on how to fix Spotify Error Code 6 on your Mac or Windows computers. Keep on reading to know which solutions will best suit your problem.
But before we proceed with that, let us have a quick background on what Spotify Error Code 6 is in the next section.
Contents Guide Part 1. What Is Spotify Error Code 6?Part 2. Ways to Fix Spotify Error Code 6 on Mac & WindowsPart 3. Most Recommended Solution to Fully Get Rid of Spotify Error Code 6Part 4. Wrapping It Up
Spotify Error Code 6 happens when users try to launch the Spotify app. Regardless if they are using a Windows or Mac computer. Once it happens, the whole app will crash and after some time, automatically closes down.
This error can be very annoying as it can occur at any time and when it does, you cannot fix it easily. The same thing happens when you try to relaunch the Spotify app so obviously, restarting the software is not going to fix your problem.
The only way you can get rid of Spotify Error Code 6 is to fix it manually. Now, let us get into the solutions on how you can do this for Mac and Windows users in the next section.
Spotify Error Code 6 has many possible solutions but for this guide, we will only be listing one recommended solution - clean reinstallation.
This method works most of the time for any app problem so we will be giving you a step-by-step guide on how you can do this on your computer starting for Mac users and then to Windows. Take note that you need to make sure to follow the instructions carefully to avoid additional complications.
For Mac users, you can clean reinstall the Spotify app by following the steps below.
Get your Mac and then go to your menu bar and click Spotify. Click Leave Spotify.
Next, you have to open Finder. Click on the Go tab and then choose Library from the drop-down list. If you cannot find this, press ALT from your keyboard. Once you are in the Libraryfolder, look for the Caches folder and then open it.
Look for the com.spotify.client folder under the Caches folder. Once you find it, delete it.
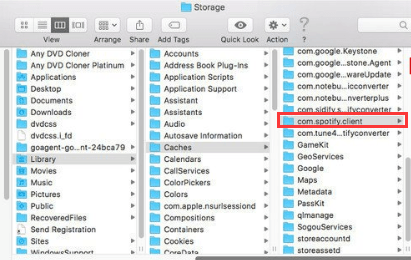
After deleting the com.spotify.client folder, go back to the Library folder and then go to the Application Support folder. Locate the Spotify folder and then delete it.
Once you are done deleting the necessary folders, you can now proceed to Spotify’s official website. Download the installer and then reinstall the app.
For Windows 8 users, below are the steps on how you can clean reinstall Spotify.
Get your Windows computer. Click on the Search icon on your taskbar and then type Control Panel. Click on it from the results to launch the Control Panel window.
Once you are in the Control Panel window, find the Programs section and click on Uninstall a program under it. Look for the Spotify app from the list that you will be presented. Once you find it, right-click on it and then click Uninstall. Just follow the instructions to clean reinstall the application.
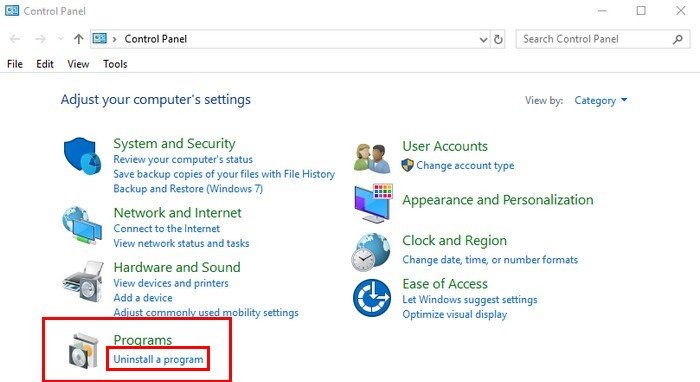
Once you are done uninstalling Spotify, you can now proceed to Spotify’s official website. Download the installer and then reinstall the app.
Follow the steps below to clean reinstall the Spotify app in Windows 10.
Get your Windows computer and then launch Spotify. Click Archive from the menu bar and then choose Exit.
Click on Start and click on the Configuration icon (it looks like a gear) on the left side. This will launch the Windows Settings window. Click on Apps.
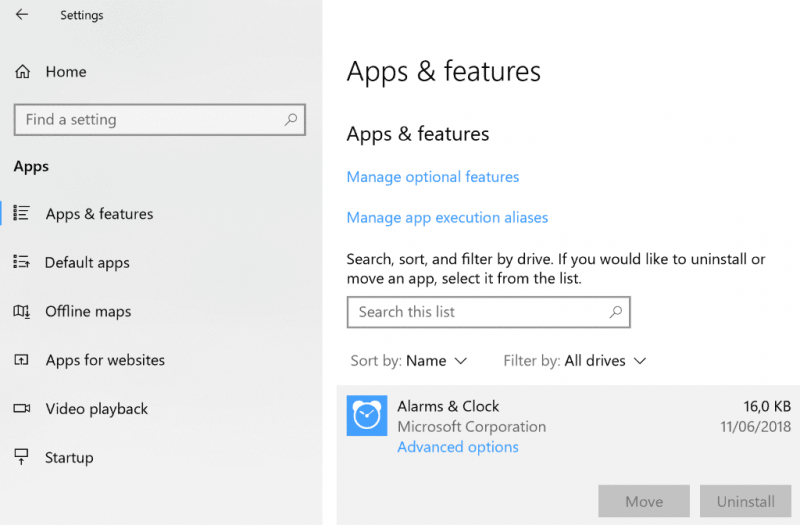
Look for Spotify from the list and then click on it. Choose Uninstall.
Once you are done uninstalling Spotify, you can now proceed to Spotify’s official website. Download the installer and then reinstall the app.
If you are using other versions of Windows, the steps are similar though there are a few variations.
For this method, we recommend that you download and convert your desired Spotify songs using DumpMedia Spotify Music Converter. You can use this app to download and convert any Spotify music to MP3, M4A, WAV, and FLAC, as well as playlists or albums.
This tool can keep the original quality of your Spotify files. It is a powerful and high-speed Spotify converter that allows you to enjoy your Spotify music without a premium subscription. Thus, giving you free Spotify for offline listening!
Aside from the above-mentioned features, DumpMedia Spotify Music Converter is also available in three languages but we are working on adding more. You can even customize the quality of the output audio file according to your needs.
Now, to convert your multimedia files to your desired formats, follow the steps below:
Below are the more detailed steps for converting your video files to your desired format using DumpMedia.
Before you can start using the application, of course, you need to download the software first. The good news is, DumpMedia has a free version for you to try the software first before you decide on whether it is the right tool for you or not but we assure you that you will not be disappointed with its features.
After downloading the DumpMedia installer, launch the application by following the steps below for Windows and macOS operating systems.
For Windows users:
Go to the Search icon (magnifying glass) beside the Windows icon in your computer’s Task Bar. Type DumpMedia on the text field. Click on the DumpMedia application on the search results.
For macOS users:
Click on the Launchpad icon in your computer’s Dock. The launchpad icon is a gray circle with a darker gray rocket at the center. Type DumpMedia on the Search bar at the topmost part Hit the Return button on your keyboard to launch the application.
Add the URI of your Spotify song/playlist/album on the search bar or you can drag and drop your files to the application.

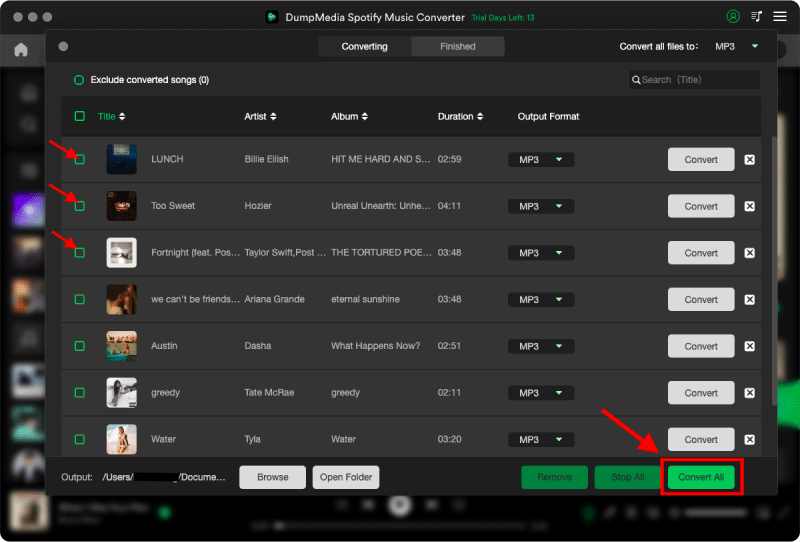
Look for the Convert all tasks to text at the top right corner of the interface. Select your desired output format (FLAC, WAV, M4A, or MP3). At the bottom of the interface, click on the Browse button and browse your computer to the desired destination folder of the converted files.

Click the Convert button to start the conversion of your video file. Wait for the conversion to complete.
Though Spotify Error Code 6 is a difficult error to get rid of, the solutions we have listed in this article will be able to help you fix the issue without the need for professional help.
We gave you solutions that are specific to the operating system you are using to make the task easier for you. We hope that we were able to help you fix your problem through our guide.
But, if you want to fully get rid of Spotify Error Code 6, you can use DumpMedia Spotify Music Converter to download your chosen Spotify songs and playlist instead so that you can listen to them offline.
The converter allows you to download Spotify songs and save it on your computer or mobile device without any limits. Now, you can enjoy your favorite songs without any error annoying you.
