Want to make your own movies? Or you might just want to burn a couple of videos on your computer to DVD. You can do both because it’s easy to burn WMV to DVD nowadays.
Yes, you don’t have to keep your movie collection on your computer. You can free up some space on your computer if you opt to burn WMV to DVD. It’s a lot simpler than you think. Even if you don’t have a DVD drive on your computer, you can still do it.
Contents Guide
Part 1. Why Burn WMV To DVDPart 2. 2 Easy Ways To Burn WMV To DVDPart 3. Converting Your Video Files To WMV before Burning to DVDPart 4. In Conclusion
Part 1. Why Burn WMV To DVD
The one practical reason for you to burn WMV to DVD is to save some space on your computer. While it is very convenient to have all your video files on your computer, you’re going to run out of space right away.
So what better way to save space and at the same time, preserve your movie collection but by burning WMV to DVD.

Bonus Tips: maybe you need to convert WMA to MP3 because an MP3 audio file is a more portable format as compared to WMA.
Part 2. 2 Easy Ways To Burn WMV To DVD
Option #1: Use A Web-based DVD Creator Software
If your computer or laptop does not have a DVD drive, don’t worry. You can use a web-based DVD creator software. Just follow the steps below to burn WMV to DVD using a web-based DVD creator software.
- Go to EasyDVDCreator.net.
- Scroll down and look for the red Download Now button. Click on it soon as you see it.
- Select whether you’re going use the Windows or Mac version.
- Download the software by clicking on the Try it Free Button.
- Wait for the download to finish.
- Follow the steps to install the software.
- Launch the software on your computer.
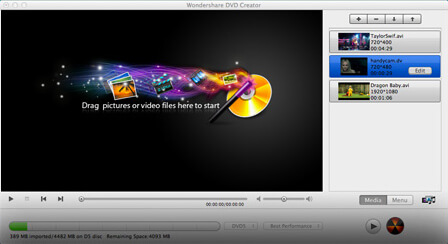
- Take some time to review the interface of the software. You will see the four menu tabs at the top that correspond to the steps you follow to create your DVD. These tabs are the following; Source, Menu, Preview, and Burn.
- Click on the Source button on the menu above.
- Import your WMV file by clicking on the Import button you see on the left panel.
- Select the video to import.
- Click on the Open button below the pop-up window. At this point, you can now do some minor editing. Just on the edit button that’s represented by a pencil icon.
- You can rotate, flip, or crop the image on the editing window. You will see the edited version in real-time on the left side of the screen.
- Enhance the video by using the settings found on the bottom panel. You can adjust the brightness, contrast, saturation, and volume of the video. You can also trim, put a watermark, and add subtitles to your video.
- Click the OK button once you are done editing. That will save the changes you made to your video.
- Create your DVD menu by clicking on the Menu tab above.
- Select a template on the right panel. Click on the green arrow download button you see at the top right-hand side of the panel to download more templates.
- Customize the background and music if you like. You can also add some new text if you like.
- Click on the Title Page on the left panel to create chapters. Then click on the chapter button you find at the mid, bottom part of the screen.
- Play the video and move the time bar to the point where you want to create a chapter.
- Click the Insert button on the bottom part of the video.
- Delete a chapter by clicking on that particular chapter on the right panel. Then click on the Delete button
- Click the OK button once you’re done adding chapters. That will save your settings.
- Click the Preview tab on the menu to get a real-time view of your new video. This is something you should before you burn WMV to DVD.
- Select the Burn tab on the top menu.
- Check the box beside Burn to disc. You can also create an ISO file by checking the box beside Save as ISO. You can do both if you like.
- Select your DVD burner on the Burner field.
- Label your disc on the Disc Label field.
- Click on the blue Burn button once you’re all set. That’s all it takes to burn WMV to DVD with this web-based DVD creator software.

Option #2: Use File Explorer On Your Computer
This option is only applicable if you have a Windows 10 computer that has a DVD drive. You won’t be able to use this option without the DVD drive on your computer. Follow the steps below.
- Open up your drive.
- Put your blank DVD right into the drive. Wait for it to start up until you see a prompt on your computer screen.
- Tap the notification box. That way, Windows 10 will know what to do when a blank DVD is inserted. This is if you have enabled autoplay.
- Open a File Explorer window and click on This PC on the left panel of the screen. Do this if you did not enable autoplay.
- Right-click on your DVD drive in the right pane to display a pop-up menu. Select Open Auto Play from the drop-down menu.
- Choose Burn files to disc.
- Name your disc on the Disc title.
- Select With a CD/DVD player.
- Click on the Next button.
- Copy the WMV video you want to burn to DVD into the empty File Explorer window.
- Click on the Burn to Disc button. You can see this on the top menu under the Share tab.
Part 3. Converting Your Video Files To WMV before Burning to DVD
If some of the formats of your video files aren’t WMV, don’t worry. One particular software can help you convert videos in all kinds of formats. That software is called the DumpMedia Video Converter and it supports about 300 formats. In case you want to convert some of your files into WMV before burning to DVD, you can use the DumpMedia Video Converter. For example, you can click this link to see how DumpMedia works on converting MP4 to WMV.
Free Download
Free Download
Part 4. In Conclusion
It is still pretty easy to burn WMV to DVD. Even if you don’t have a DVD drive on your computer, you can still do it. There are web-based programs that you can use.
Have you ever had to burn WMV to DVD? How did you do it? Share with us your thoughts.


