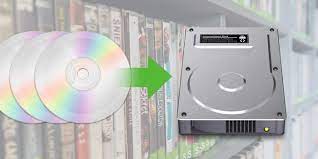
As technology advances DVDs are becoming bulky in people's houses hence the need for a small gadget with big storage space like hard drives. But the problem is how to copy DVD to hard drive successfully without content loss.
Hard drives are small with huge storage space which can reach 1TB but DVDs are small and vulnerable to destruction. A simple scratch on the DVD will make you unable to access your files. This is why it is good you copy DVD to hard drive as a way to back up your files.
Hard drives can either be internal or external but you can still copy DVDs to either of them. But for external hard drives, you must first copy to the internal hard drive then transfer to the external hard drive using a USB cable. This article will inform you how you can copy non-protected and protected DVDs to the hard drive.
Contents Guide Part 1. Can I Transfer My DVDs to an External Hard Drive?Part 2. How to Copy Non-protected DVD to Hard Drive?Part 3. How to Convert and Copy DVD to Hard Drive?Part 4. Summary
Yes, you can transfer your DVDs to an external hard drive. You can copy DVD to hard drive either directly or indirectly. You can copy DVD to hard drive directly if the DVD does not have DRM protection.
Most DVDs have a DRM protection and regional code that prevent you from editing the content which includes copying DVDs to the hard drive. If your DVDs have a DRM protection and regional coding, then you have to use third-party tools to copy DVD to hard drive.
These third-party tools are software and applications that can remove the DRM protection from the DVD and later copy the content on your external hard drive. You will get more explanation in parts 2 and three of this article.

It is possible both directly and indirectly to copy DVD to hard drive. For non-protected DVDs, you can directly copy their content to the hard drive by simply copying and pasting to the hard drive. The procedures are different in windows and mac.
First, note that only windows 10 has an in-built system that allows you to copy and paste from DVD to hard drive. A point to note is that you must connect your computer to the internet before you start to copy and paste the non-protected DVD. This is because when you are connected to the internet the media players on your computer will add information on the file while you are ripping the DVD. In the end, you will have the ripped DVD information plus other information from an online database.
How to copy non-protected DVD to hard drive in windows:
Step #1. Insert the DVD in the DVD drive. Then open your computer and click on the DVD drive. And the files on the DVD will open.
Step #2. Then is time to select the files you want to copy to your hard drive. If you want to copy all DVD files, press the "Ctrl + A" keys. But if you want to select DVD files at random, then press hold "Ctrl key" and left-click on the file you want.
Step #3. After highlighting the files, right-click on them and a pop-up menu will appear. From the pop-up menu select "Copy".
Step #4. Now open the folder on your hard drive where you want to save the contents from the hard drive. Then right-click on any space in the folder and select "Paste" and your non-protected DVD will start to copy to the hard drive.
It is easy to copy and paste the non-protected DVD to the hard drive. But you have to use the indirect method to copy DVD to hard drive by using DVD ripping software and application. There are several DVD ripping software and applications on the market.
DumpMedia Video Converter is the best application you can use to copy DVD to hard drive. It has great conversion and copying speeds of about 6X. It can convert your DVDs into several formats. For instance, you can convert It can convert your DVDs into 300 different formats.
This application is readily available online on the website and it is easy to install. It is user-friendly because with three simple steps you can convert and copy a DVD.
DumpMedia Video Converter allows you to enhance the quality of the DVD videos. You can easily change the resolution from SD to HD. On the other hand, this software can also be used to edit the videos on the DVD. You can trim the unwanted parts of the movie like the gaps. You can also crop and rotate some parts of the movie allowing you to enjoy the full movie experience. The software allows you to personalize the copied files because you can add texts and watermarks.
To use this software follow the simple procedure below:
Step #1. Download and install DumpMedia Video Converter and install it on your computer. Then insert the DVD you want to copy to the hard drive in the CD/DVD drive.
Step #2. Now open the program on your computer and click on the "Add Multiple Videos or Audios” button. Then click on the DVD drive and the content of the DVD will be displayed. Where you will select files you want to convert.

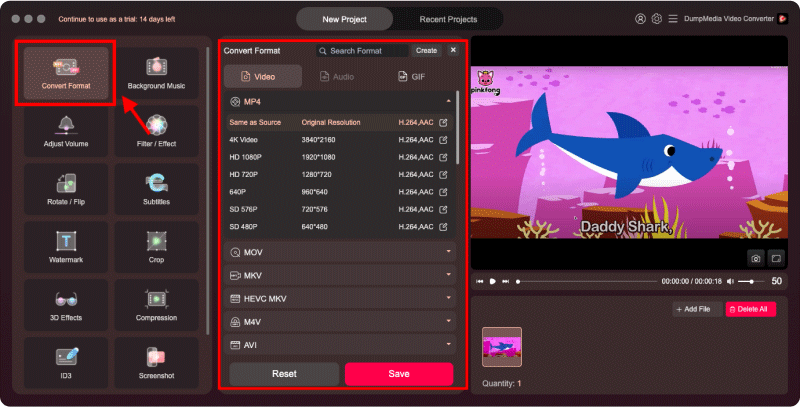
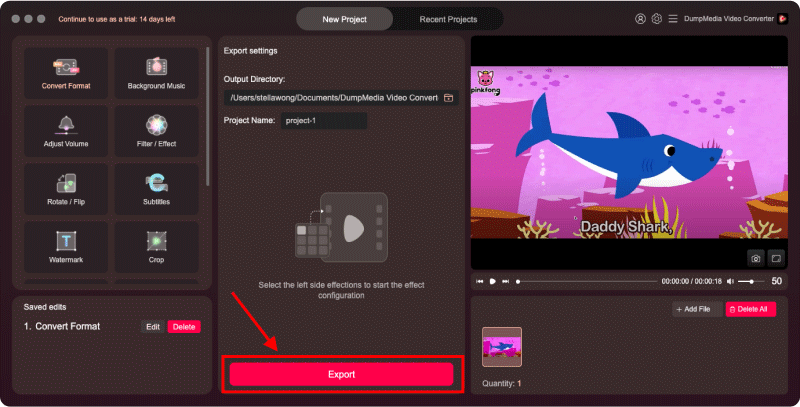
Step #3. Select the output format you want from the long list. Then select the folder on your hard drive when you want the converted files to be saved. You can also select other parameters like volume and brightness.

Step #4. Finally, click “Convert” at the bottom and the program will start working.

Yes, you can copy DVD to hard drive but the type of DVD will decide on the method you will use to do so. You can easily copy and paste for non-protected DVDs but for protected ones you need a third-party tool to help you to do so. There are so many of these tools but DumpMedia Video Converter will do the best job for you. You can choose to download the free trial or purchase it. If you purchase it, you will enjoy extra features like you can cut and merge two different videos. This software will not interrupt the smooth running of your computer and can work with other applications on your computer.
