Animated GIFs are popular methods of sharing reactions and content online. Making one requires a skill. But through existing online GIF YouTube makers, you can easily create your own GIF from your desired YouTube video. In the old times, you may have used Photoshop to create an animated GIF but Photoshop is not for beginners.
So in today’s discussion, we will give you 3 online methods on how to create your very own animated GIF from your selected YouTube video. After which we will give you our most recommended tool, DumpMedia Video Converter, which you can use to convert the resulting GIF to your desired format. Keep on reading to know more!
Contents Guide Part 1. Top 3 Online GIF YouTube Makers Part 2. How to Convert Your GIF to Your Desired Format Without Losing QualityPart 3. In Conclusion
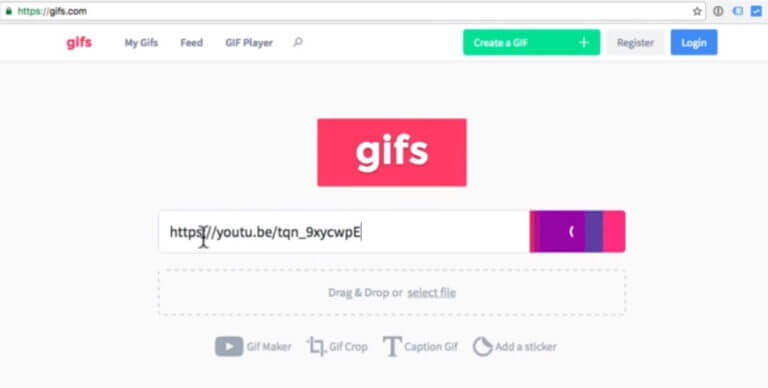
If you want more customization options for your YouTube GIFs, then GIFs.com is the ideal one for you to make GIF from YouTube online. To create a GIF from your YouTube video using this GIF YouTube maker, here is a summary of the steps:
Step 1. Locate your YouTube video.
Step 2. Add your YouTube video to the online tool.
Step 3. Customize your resulting GIF.
Step 4. Add a GIF title along with your desired tags.
Step 5. Download your GIF.
In the following sections are the detailed steps for the aforementioned guide.
Find your YouTube video which you want to create a GIF from and copy the YouTube video’s URL.
Go to GIFs.com’s website. Paste the YouTube URL on the white text box located on the page’s left side. Make sure that you pasted the whole URL so that GIF.com will be able to automatically detect your YouTube video. If this does not work, click the Continue button.

If you see an ad located at the bottom-left part of your image, make sure that you click the close button so that the ad will disappear. Otherwise, the ad will be included in the resulting GIF. You will find a timeline below your image where you can adjust the beginning and end times of your resulting GIF.
You have the option of making it as short or as long as you want but do not that the longer your animation is, the bigger the resulting file size will be. Some platforms where you will be sharing your GIF might have a size limit. For example, Twitter only allows up to 5MB of GIFs on mobile phones and 15MB for desktop users.
Next, add your desired effects, caption, or stickers. You can crop the image too and add additional effects like padding and blurring. Once you’re done, click on the Create Gif button at the top-right corner. The process may take a while to create the GIF especially if your GIF is a long one.
You will be directed to a new page that will ask for your confirmation regarding your GIF’s title and the tags that you want to include. Click on the Next button once you’re done.
On the next and final page, you will be given options for sharing, embedding, or downloading your created GIF. You also get to have a preview of your resulting GIF. If you don’t want your GIF to have a watermark, you can sign up for GIF.com’s premium service. But if you don’t want to pay for this, GIF.com offers a trial for its premium version for 7 days.
If you don’t have many editing activities you need to do with your YouTube GIF and want a faster method of creating one, Giphy is the perfect GIF YouTube maker for you. To make GIF from YouTube online by using this software, you can follow the steps below:
Step 1. Locate your YouTube video.
Copy your YouTube video’s URL which you want to turn into a GIF then go to Giphy’s GIF maker page.
Step 2. Add your YouTube video to Giphy.
Scroll to the bottom of the website and paste the YouTube URL on the input textbox. You will also notice that you have an option to upload other video files aside from entering the URL.
Step 3. Choose the duration of your resulting GIF.
Select the duration and start time of your resulting GIF then click Continue to Decorate.
Step 4. Do final touches.
You can include a caption for your GIF including stickers and others. Once you are done, click Continue to Upload.
Step 5. Publish your GIF.
Wait until your GIF is created. The process may take some time if your video is long. Once your GIF is created, publish your GIF by clicking Upload to GIPHY.
Step 6. Share your GIF.
After your GIF is published, you will be given options to either download it, embed it or share it on your social media accounts.
Because of the wide usage of GIFs, especially animated ones, YouTube created its own tool for making a GIF. However, the tool can only be used for a few videos so it is not that effective. But if you want to have a try and make GIF from YouTube online, you can follow the steps below.
Step 1. Navigate to the YouTube video that you want to make into a GIF.
Step 2. Go the video’s description box and click Share. If YouTube allows your video to be turned into a GIF, a GIF tab will appear next to Email. Click on the tab then choose the location where you want your GIF to start.
Step 3. You will be shown some text fields where you will be entering the bottom or top text. Click on the Create GIF button once done. After your GIF is created, it will be shown to you along with direct and embed links.

We recommend using DumpMedia Video Converter as a tool for converting various multimedia files into your desired format. DumpMedia is a powerful and high-speed all-in-one audio and video converter, downloader, editor, and player. It can convert your multimedia files into many formats with minimum quality loss. Enjoy the convenience of a friendly interface equipped with a lot of features to meet all of your video needs.
Now, to convert your multimedia files to your desired formats, download the software first and follow the steps below:
Step 1: Download the DumpMedia application
Step 2: Launch the DumpMedia application
Step 3: Add your GIF video file to the application
Step 4: Choose your desired output format and destination folder
Step 5: Start the conversion process
Below are the more detailed steps for converting your GIF files to your desired format using DumpMedia.
Before you can start using the application, of course you need to download the software first. The good news is, DumpMedia has a free Mac version for you to try the software first before you decide on whether it is the right tool for you or not but we assure you that you will not be disappointed with its features.
After downloading the DumpMedia installer, launch the application by following the steps below for MacOS operating systems.
Click the Add Multiple Videos or Audios button to import your files or you can drag-and-drop them directly into the main interface.

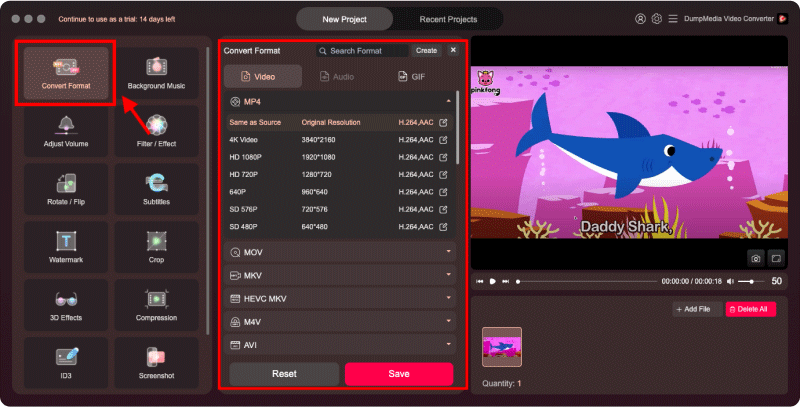
Look for the Convert Format button. Select your desired output format. At the bottom of the interface, click on the Save button and browse your computer to the desired destination folder of the converted files.

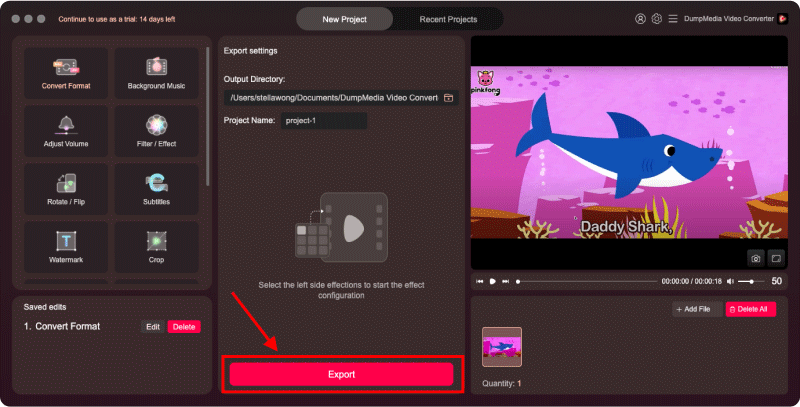
Click the Convert button to start the conversion of your GIF file. Wait for the conversion to complete.

This article gave you 3 GIF YouTube makers to make GIF from YouTube online:
Then for you to convert your created GIF to your desired format, you can use DumpMedia Video Converter which was also discussed in the last section of this article. By the way, you can check out our other blogs for more guides on other software issues and how to solve them here. Enjoy!
