
4K is the new big thing for televisions and 4K contents are starting to gain in popularity. However, 4K videos take up a lot of space making downloading and streaming of these videos in the optimum quality possible very hard. Luckily, the HEVC (H.265) codec is making this possible.
It may be taking slow before the mentioned technology becomes widespread but it is happening. 4K Blu-rays utilize HEVC and VLC 3.0 makes 4K and HEVC videos watchable on your computers. So do you want to convert your videos to HEVC for a smaller size? Then you’re on the right page! We will be discussing various tools you can use to convert your videos to HEVC in this article.
But first, let us talk about what a codec is, what is HEVC, and how HEVC works. Then we will discuss why you should use HEVC for your 4K videos.
Contents GuidePart 1. Things You Need To Know About HEVC File FormatPart 2. DumpMedia Video Converter: Best HEVC ConverterPart 3. Top 4 Online Tools To Convert Your Videos to HEVCPart 4. In Conclusion
Codec is an abbreviation for coder-decoder. It is a software using an algorithm in compressing raw video data to compact forms that are fit for Blu-ray disc storage, broadcasting, or streaming on the internet. Whichever type of device receives the video (your disc player, computer, or TV), the device will uncompress the data before it displays it on your screen.
Also, codecs remove unimportant details from your videos to reduce their sizes. However, high-level compression can cause the loss of too much data which will make your videos blocky or choppy when viewed. The majority of paid TV services utilize aggressive compression in getting all channels to your satellite receiver or cable. This is the reason why the videos you will see do not look good, unlike the Blu-ray ones.
An ideal codec should compress a video without causing many defects because of overcompression.
HEVC is an acronym for High Efficiency Video Coding and is also widely known as MPEG-H Part 2 or H.265. It is a standard for video compression which is one of the many several possible successors to AVC (Advanced Video Coding). AVC is also known as MPEG-4 Part 10 and H.264.
HEVC is the newest compression standard believed to be twice the compression ratio for data of AVC but with the same video quality level. Videos encoded in HEVC will still have visuals of high quality but only in smaller file sizes.
HEVC’s goal is the encoding of videos to generate the lowest bit rate possible through the use of tools like the Coding Tree Unit (CTU). This saves about half of the original bitrate while maintaining high levels of video qualities even in transmissions with low bandwidth utilization ratios. Simply put, compared with videos in H.264, H.265 videos offer smaller video sizes but with the same video quality level. H.265 enhances the video quality within a similar bitrate.
In addition, through HEVC, the bitstream is greatly improved so that users will take less time in streaming videos along with less space used. This is because HEVC videos have smaller compression sizes but still with good quality maintained.
Meanwhile, HEVC can support resolutions starting from 320x240 (240p) to 7680x4320 (4320p). This means that you can play 8K and 4K UHD videos on your portable devices, such as tablets and smartphones, online directly. HEVC has also been added into many services and consumer products such as the following:
HEVC is also used most especially in 2019 4K Ultra HD TVs such as the following:
We can expect the mainstream trend of HEVC in the future.
The current H.264/MPEG-4 codec makes the compression of huge amounts of information in films possible. This allows you to stream the videos on your Netflix account rather than saving all of the data into physical sources such as Blu-rays. Those images in high-definition that you see in Netflix videos are either in:
The 4K video images that Netflix currently streams in 4K televisions are composed of 8 million pixels or 3480x2160 resolution. This major jump to achieve great detail requires better ways of data compression so that the video can be stored or transmitted properly.
As mentioned earlier, HEVC is double the efficiency of H.264 while experiencing a minimal quality loss only. The result is that the current content is only going to need half of the data to be able to stream the video over Netflix. The streaming of 4K content will become feasible but Netflix requires broadband connections of 15 Mbps speed or better in streaming 4K videos.
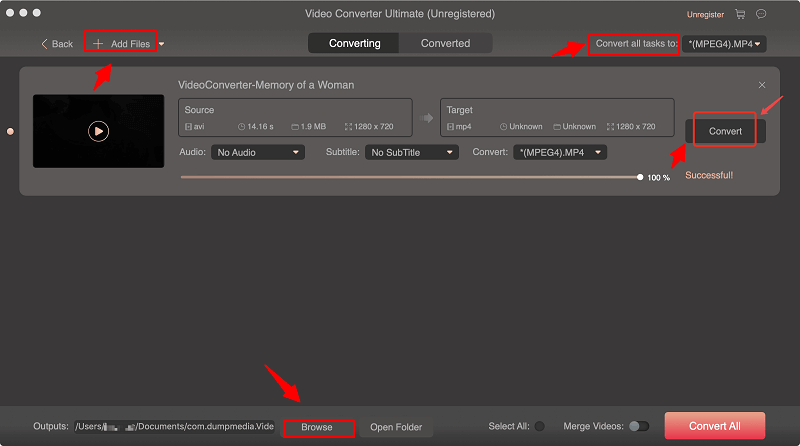
DumpMedia Video Converter is a powerful and high-speed all-in-one audio and video converter, downloader, editor, and player. Enjoy the convenience of a friendly interface equipped with a lot of features to meet all of your video needs. The software supports many formats including MPEG, 3GP, FLV, MKV, AVI, WMV, MOV, MP4 along with other regular video formats. To convert your videos to HEVC, download the software first and follow the steps below.
Step 1. Launch the DumpMedia application.
For Windows users :
Step 1a. Go to the Search icon (magnifying glass) beside the Windows icon in your computer’s Task Bar.
Step 1b. Type DumpMedia on the text field.
Step 1c. Click on the DumpMedia application on the search results.
For MacOS users :
Step 1a. Click on the Launchpad icon in your computer’s Dock. The launchpad icon is a gray circle with a darker gray rocket at the center.
Step 1b. Type DumpMedia on the Search bar at the topmost part
Step 1c. Hit the Return button on your keyboard to launch the application.
Step 2. Click the Add Files button located at the top-left section of the interface to import your files or you can drag-and-drop them directly into the main interface.
Step 3. Look for the Convert all tasks to text at the top right corner of the interface. Select HEVC as the output format.
Step 4. At the bottom of the interface, click on the Browse button and browse your computer to the desired destination folder of the converted files.
Step 5. Click on the Convert button to start the conversion of your audio file.
Step 6. Wait for the conversion to complete.
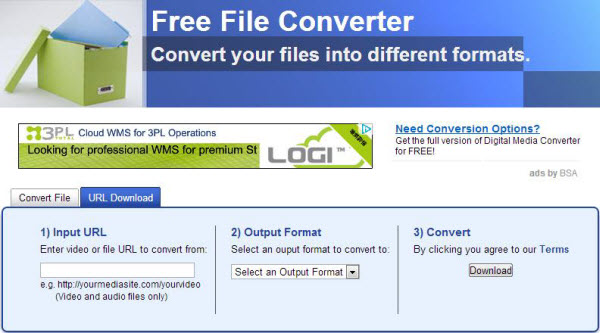
To convert a video file to HEVC using FreeFileConvert, follow these steps:
Step 1. Navigate to FreeFileConvert’s website.
Step 2. Scroll down until you see the light green big rectangle box.
Step 3. You can either import your video by uploading it from your computer, through a URL, or from the Cloud. You can see these options at the top-left corner of the rectangle. Click on the text link for your preferred import method.
File
Step 3a. If you choose File, click on the Choose button from the Input File step
Step 3b. Browse your video file you want to convert from your computer on the window that will appear and double-click on it.
Step 3c. Click on the OK button.
URL
Step 3a. If you choose the URL, paste your video’s URL in the text box in the File URL section.
Cloud Step 3a. Lastly, if you choose Cloud, click on the corresponding button on where you are going to import your video from - Google Drive or Dropbox.
Step 3b. A new window will appear asking for your login credentials. Enter them.
Step 3c. Browse your cloud for the video file that you want to convert and then select it.
Step 4. In the Output Format section, click on the Convert files to: dropdown button.
Step 5. Scroll down until you see the -- Video Format -- category.
Step 6. Look for HEVC under that category.
Step 7. Click on the Convert button in the Convert section.
Step 8. Wait for the conversion to finish
Step 9. A new page will load after the conversion. Scroll down until you see your converted video file.
Step 10. Click on the Download button at the right side of your video link
Step 11. When a window appears allowing you to choose the file location you want your converted video to be saved, choose your desired location and change the filename if necessary.
Step 12. Click on the Save button.
Step 13. Wait for the download to finish.
To convert your video file to HEVC using Convertio, follow these steps:
Step 1. Navigate to Convertio’s website.
Step 2. Upload your video by dragging it on the page or by selecting from your computer, Dropbox, Google Drive, or by entering the URL.
Step 3. Click on the drop-down arrow at the right side of the to label and choose HEVC.
Step 4. Click on the Convert button and wait for your video to convert.
Step 5. Click on the Download button.
Step 6. A new window will appear allowing you to choose the file location you want your HEVC video to be saved. Choose your desired location and change the filename if necessary.
Step 7. Click on the Save button.
Step 8. Wait for the download to finish.
To convert a video file to HEVC using Media.io, follow these steps:
Step 1. Navigate to Media.io’s website.
Step 2. Scroll down until you see Drag & Drop or Hit to Add File. You can either drag your video to that box or you can click on the + button to upload your video.
Step 3. A new window will appear. Choose the video file that you want to convert then click OK.
Step 4. Click on the drop-down arrow at the right side of the to label.
Step 5. Look for HEVC MP4 and click on it.
Step 6. Click on the Convert button.
Step 7. Wait for the conversion to finish then click on the Download button. You will be directed to a new page.
Step 8. When a window appears allowing you to choose the file location you want your HEVC video to be saved, choose your desired location and change the filename if necessary.
Step 9. Click on the Save button.
Step 10. Wait for the download to finish.
To convert a video file to HEVC using Media.io, follow these steps:
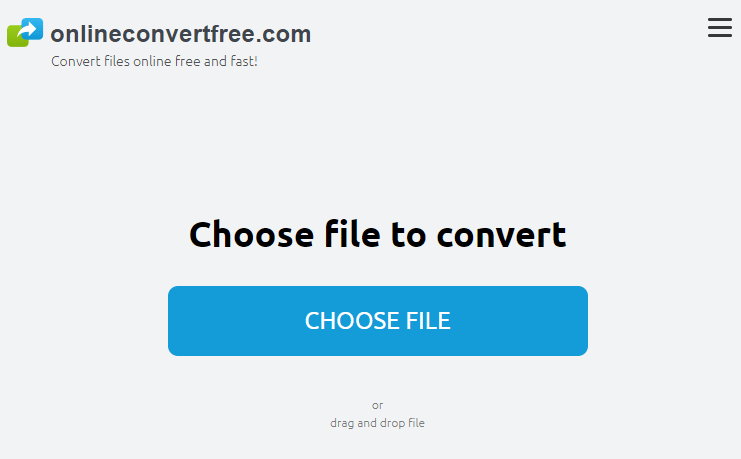
Step 1. Navigate to Olineconvertfree.com’s website.
Step 2. Scroll down until you see the big grey rectangle with the Choose file to convert written inside it. Click on the Choose File button. Note that the online converter only allows you to convert a minimum of two video files. So you need to choose two.
Step 3. A new window will appear. Browse your computer for the two video files that you want to convert to HEVC.
Step 4. Click on the Ok button to add your file.
Step 5. After your file is successfully uploaded, the content of the grey rectangle will change. Below the list of your videos is a CONVERT ALL TO dropdown button. Click on it.
Step 6. Scroll down, look for HEVC, and click on it.
Step 7. Click on the Convert button below the rectangle.
Step 8. Wait for the conversion to finish.
Step 9. Locate your converted HEVC videos by scrolling down.
Step 10. Click on the Download button beside each video.
Step 11. When a window appears allowing you to choose the file location you want your HEVC video to be saved, choose your desired location and change the filename if necessary.
Step 12. Click on the Save button.
Step 13. Wait for the download to finish.
In this article, we have discussed the things you need to know about the HEVC file format for you first. After which we gave you our most recommended video converter software to help you convert your videos to HEVC. And if you prefer online video converters, you can use FreeFileConvert, Convertio, Media.io, and Onlineconvertfree.com. Have fun watching your high-definition videos!
