


[Detailed] How to Put YouTube Songs on iTunes
Streaming YouTube Music through the app or online player is straightforward, but downloading music from YouTube Music to your device can be challenging, especially if you're trying to put YouTube songs on iTunes to sync with your iPhone or create ringtones. It may seem like there's no easy way to do this, but don't worry.
By using a reputable third-party music downloader, you can save YouTube Music directly to your PC in iTunes-compatible formats. From there, simply upload the tracks to your iTunes library, where you can easily add your favorite YouTube songs. So, go ahead and get the tools you need to make it happen!
Contents Guide Part 1. Is it Possible to Put YouTube Songs on iTunes Directly?Part 2. Download YouTube Songs on iTunes with Third-party ToolPart 3. How to Put Downloaded YouTube Songs to iTunesPart 4. Summary
Part 1. Is it Possible to Put YouTube Songs on iTunes Directly?
It's important to note that you can't directly download music from YouTube to iTunes using the YouTube Music app. This is because songs downloaded from YouTube are protected by Digital Rights Management (DRM), which restricts users to listening to the music only within the YouTube Music app. As a result, transferring these downloaded songs directly to iTunes is not possible.
However, there are alternative methods to get YouTube songs onto iTunes, even though no direct app exists for this purpose. One common approach is to use third-party software that can convert YouTube music into iTunes-compatible file formats, such as MP3 or AAC. Once converted, these files can be easily imported into your iTunes library, allowing you to enjoy your favorite YouTube music on iTunes.
Part 2. Download YouTube Songs on iTunes with Third-party Tool
As it stands, there's no direct way to put YouTube songs on iTunes. To move music from YouTube to iTunes, you'll first need to download the tracks from YouTube Music and save them as local files on your computer. Once downloaded, you can then transfer the music to your iTunes library.
However, downloading music from YouTube Music to your local storage is challenging due to Digital Rights Management (DRM) protections. Like many other streaming services, YouTube Music encrypts its songs, restricting playback to the app itself. This means that even if you download songs for offline listening, they remain locked within the app and can't be accessed by other devices or media players.
DRM restrictions are in place to comply with licensing agreements, but they also limit how you can use the music. You can't create personal backups, burn CDs, or use the files in third-party applications. If you decide to switch to a different service, transferring your music library becomes a complicated task, as there is no official way to export playlists or tracks from YouTube Music.
But don’t worry, DumpMedia YouTube Music Converter can help you do it. Here are the specific steps on how to use it:
Step 1: Download and Install the Software
Begin by downloading and installing DumpMedia YouTube Music Converter on your computer. The installation process is simple—just click the download button to get started for free.
Step 2: Log In and Select Your Songs
After installation, launch the software and start with a free trial. Log into your YouTube Music account, then browse through your library to find the songs or playlists you want to convert. Add them to the conversion queue with a few clicks.
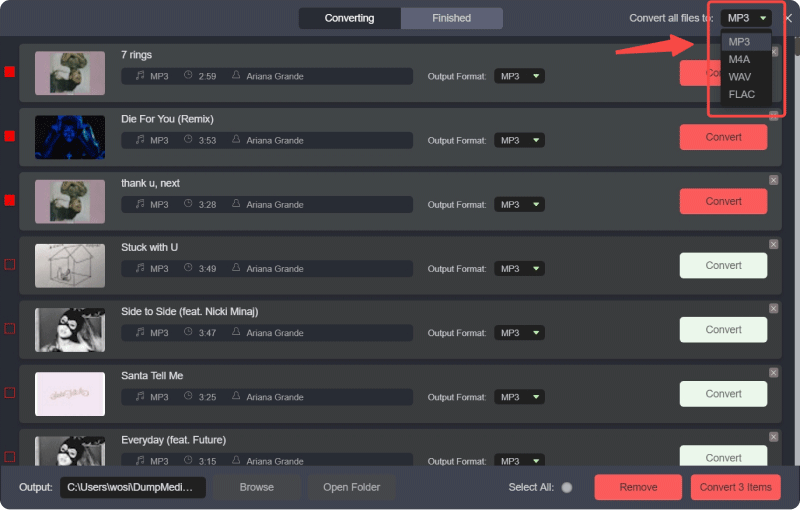
Step 3: Customize Your Output Settings
Next, choose the output format you prefer, such as MP3, M4A, WAV, or FLAC. You can also fine-tune the settings like bitrate and sample rate to control the quality and file size of your converted music.
Step 4: Choose an Output Folder
Select a specific folder on your computer where the converted files will be saved. This will make it easy to locate your music once the conversion is complete.

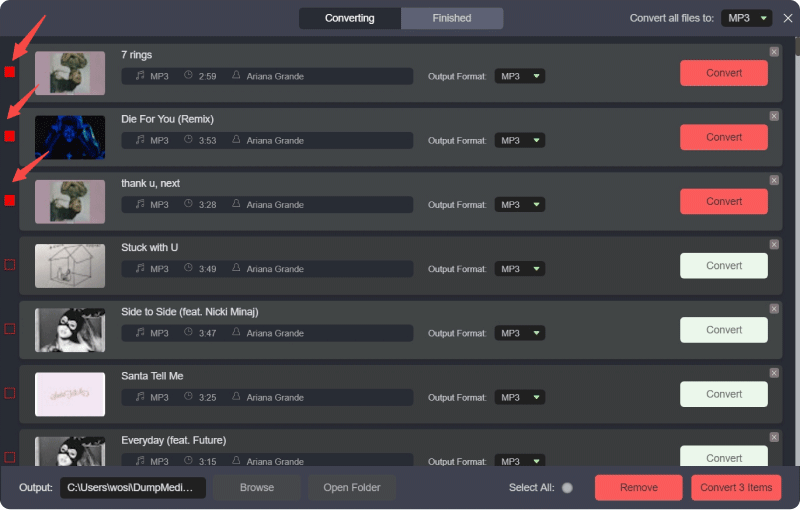
Step 5: Convert Your Songs
Finally, click the "Convert" button to begin the process. The software will quickly and efficiently convert your selected YouTube Music tracks. Once the conversion is finished, you'll find your files in the output folder you chose.

Part 3. How to Put Downloaded YouTube Songs to iTunes
After downloading YouTube music to local files, you can put them to iTunes on Windows PC or Mac. Since Apple has replaced iTunes with Music on macOS 10.15 and later, we will explain how to transfer downloaded music from YouTube to iTunes separately.
Once the YouTube music has been downloaded locally, you may put it into iTunes on a Mac or Windows computer. Since Apple has replaced iTunes with the Music app on macOS 10.15 and later, we'll provide separate instructions on how to transfer downloaded music from YouTube to the Music app.
On a Mac or Windows computer running macOS 10.14 or lower
Step 1: Open iTunes on Your Computer
Start by launching iTunes on your computer.
Step 2: Navigate to the File Menu
In the top menu, click on "File," then choose either "Add File to Library" or "Add Folder to Library" from the dropdown.
Step 3: Import Your Music
Browse to the file or folder you want to add, select it, and click "Open" to import your music into iTunes.
If you use the newly released Apple Music app on your Windows PC, the processes are a little different:
Step 1: On your PC, open the Apple Music app.
Step 2: Press the upper left three-dot icon.
Step 3: Choose Library > Add Files or Add Folder to Library from the menu.
Step 4: To import, choose the file or folder from the pop-up box and click Open.
On a Computer Running macOS 10.15 and Above
Step 1: Open the Music App on Your Mac
Begin by launching the Music app on your Mac.
Step 2: Access the Import Option
In the menu bar, click on "File," and then select "Import" from the dropdown options.
Step 3: Choose Your MP3 Files
Browse for the MP3 files you've downloaded from YouTube and select them.
Step 4: Import Your Music
Click "Open" to add the selected YouTube Music tracks to your Music app library.
Part 4. Summary
Putting YouTube songs on iTunes or the Music app is not straightforward due to DRM restrictions. Direct transfers aren't possible, but you can use third-party software to convert YouTube Music to iTunes-compatible formats like MP3.
After converting, you can import the files into iTunes or the Music app. This allows you to sync your music with your iPhone and manage your library effectively.

30% Off >>>