Since Apple Music is a very popular media platform, it is understandable that it has a lot of different users with different personalities. That’s why Apple Music has created a feature where you can either share your profile with other people to let them see what kind of music you are into or keep it private.
In this article, we will teach you how to make your Apple Music profile private so you can either share or keep your profile private whenever you want and use any device you like.
And while we’re at it, we will also teach you a special method where you don’t have to make a profile for yourself while continuously listening to your favorite Apple Music offline. If you want to know about convert Apple music to other formats, you can refer to another article.
Contents Guide Part 1. How to Make Apple Music Profile Private?Part 2. Bonus: How to Download Apple Music for Offline Listening?Part 3. Summary
If you want to keep your Apple Music profile to yourself, continue reading below.
Apple Music has a lot of users, that’s why they have made sure to create a feature on their app where users can either share their profile with their friends or keep it to themselves. If you are a much more private person then this article will teach you how to make your Apple Music profile private.
That’s right. Using the different methods we have prepared down below, you can now keep your whole profile or some parts of your Apple Music profile private. We understand that your privacy is a priority, and that’s why we have made sure to make these methods as detailed as possible so you can be comfortable and at ease while using your Apple Music account.
Method #1: How to Make Your Apple Music Account Private
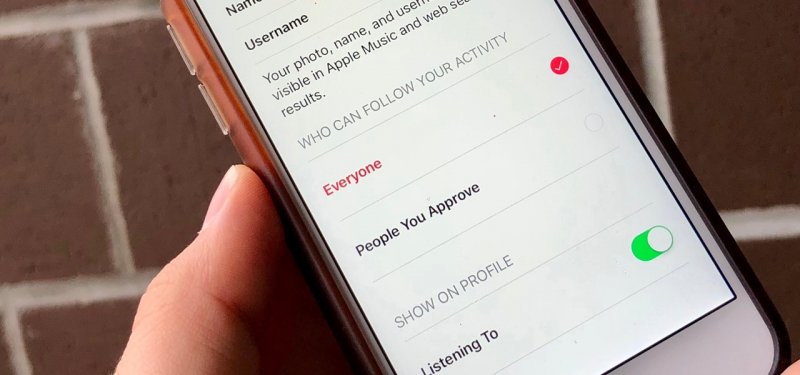
If you want to keep your Apple Music profile private while also letting selected individuals see the music you are listening to or the playlists you have created, you can follow this method. Just complete all the steps below:
Here are the steps about how to make your Apple Music account private:

Method #2: How to Keep Your Apple Music History Private
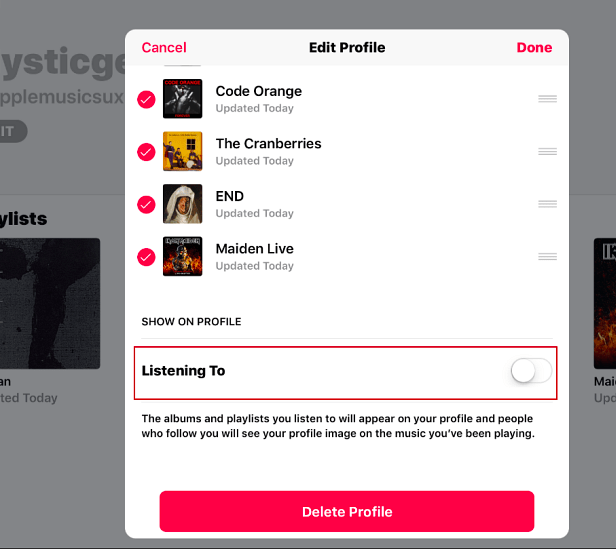
By using this method, you can now see the music listening history of other people while keeping your private information. Follow the instructions below to proceed.
Here are the steps about how to make your Apple Music history private:

Apple Music is a great piece of music streaming platform that always emphasizes that its topmost priority is its users' privacy. That is why, with the launch of the iOS 11, they upgraded their Apple Music app and made sure to add a privacy feature for their users who want to be more private with the music they are listening to.
This privacy feature can also keep their users more at ease when listening to their favorite Apple Music tracks.
However, we also know of a very special method where you don’t have to set up an Apple Music profile but can continue listening to Apple Music songs. This method can also make you skip the efforts of going private or public on Apple Music since it is entirely for yourself alone. So if you want to learn about this method, feel free to read the rest below.
If you are on this part of the article, then you are ready to hear and learn of the special method we have made just for you. This method is to help you skip the part of wondering how to make your Apple Music profile private since the method we are talking about is automatically private.
Yes, the method we are going to introduce to you is by using a third-party app like DumpMedia Apple Music Converter. This third-party app lets you stream Apple Music songs while you are offline and without subscribing to any Apple Music plan at all!
DumpMedia Apple Music Converter can remove the DRM tech that protects any Apple Music track and converts it into a file format that you prefer to use. DumpMedia Apple Music Converter is 100% proven and tested and is five times faster than other converting tools.
If you want to learn how to use DumpMedia Apple Music Converter, just simply follow the steps we have provided below:
1. Click the below icon to download and install DumpMedia Apple Music Converter to your MAC or PC
2. Launch the app and click Open the Apple Music Web Player
3. Select the songs you want to convert

4. Drag and drop them on the red button located on the pop-up window
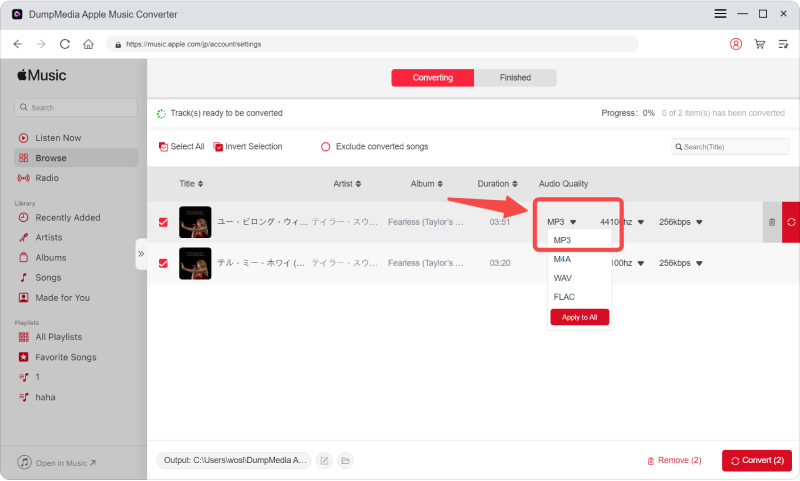
5. Choose the format and the folder where you want to save your files

6. Click Convert and wait for it to finish

7. Enjoy countless music brought to you by DumpMedia Apple Music Converter
And as easy as that, you now have a list of Apple Music tracks you like to listen to saved on your computer forever. You can also transfer these songs to your device using a USB cable so you can continue listening to them offline and whenever you want! This is made possible by DumpMedia Apple Music Converter, so what are you waiting for? Download their app now!
Now that you have finally learned the different methods you can use so you can keep your Apple Music profile private, we do hope we have helped you solve your question “How to make your Apple Music profile private?”
And don’t forget that you can also use our special method where you can skip the part of setting up a profile for yourself and directly listen to your favorite Apple Music songs without even subscribing to Apple Music and keep on listening to them offline and by using any device you want. This is only made possible by DumpMedia Apple Music Converter. Try it now!
