
Being such an excellent music streaming service provider, Apple Music is liked by many people. But sometimes, Apple Music users may encounter several types of errors while using the service. Some common Apple Music errors include Error Code 1006, "Try Again Later" Error, Error Code 8006, "Unable to Connect to Apple Music" Error, "Playback Error" or "Unable to Play" Error, and so on.
Among them, the "Apple Music not available in your region " Error typically occurs when trying to access Apple Music from a location where the service is not currently available. This can happen in regions where Apple Music has not yet been officially launched or where there are legal restrictions on music streaming services.
Have you ever encountered an "Apple Music not available in your region" Error? Do you know why it appears and how to fix it? In this article, we will tell you why this error occurs and how to fix it. We will also introduce you to a method to bypass Apple Music Errors permanently. Let's get started!
Contents Guide Part 1. Why is Apple Music Song Not Available in Your Country or Region?Part 2. How to Fix Apple Music Not Available in Your Country or Region ErrorPart 3. How to Avoid All Apple Music Errors ForeverPart 4. Summary
In the above paragraph, we've introduced some basic information about the "Apple Music not available in your region " Error. In this part, we will focus on the causes to figure out why Apple Music songs are not available in your country or region. The fundamental cases are enumerated below.
Apple Music is available in over 175 countries and territories across the world. There are exceptions to the rule that every country has a music collection of more than 50 million tracks. If you're traveling or using a VPN, this notice will appear. Music is subject to various limitations based on national regulations.
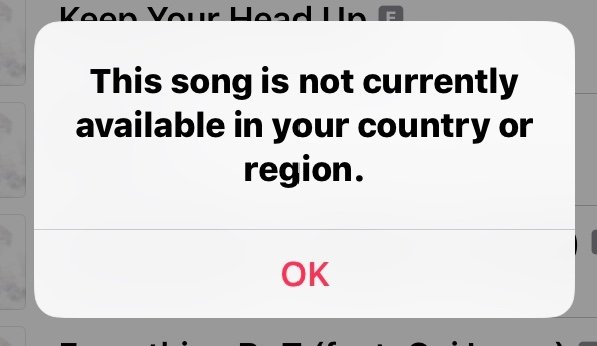
The music metadata is sometimes edited by the artist or record label: song title, release year, composer or lyricist, and so on. Apple Music may identify that the music you add to your music library does not match the songs in the system when you do so. As a result, your device will believe the music is unavailable in your nation or area.
The message "Apple Music Song Not Available in Your Country or Region " can potentially be caused by Apple releasing faulty upgrades to Apple Music or iTunes. The issue will be resolved once the bug is rectified.
Apple Music is not available in some countries due to certain licensing agreements and restrictions. In the previous paragraph, we explained why there ocurrs the "Apple Music Not Available in Your Country or Region" Error on your devices. Here are some possible solutions to fix the "Not Available" error when accessing the service:
The most basic approach is to disable the VPN, or you can return to the original country. If you're traveling abroad, you should check Apple's media services to see if the area or region you're visiting supports Apple Music.
You may either use the app's settings or the VPN's settings to turn it off.
Step 1: Go to the iPhone's Settings App.
Step 2: There will be a VPN option available.
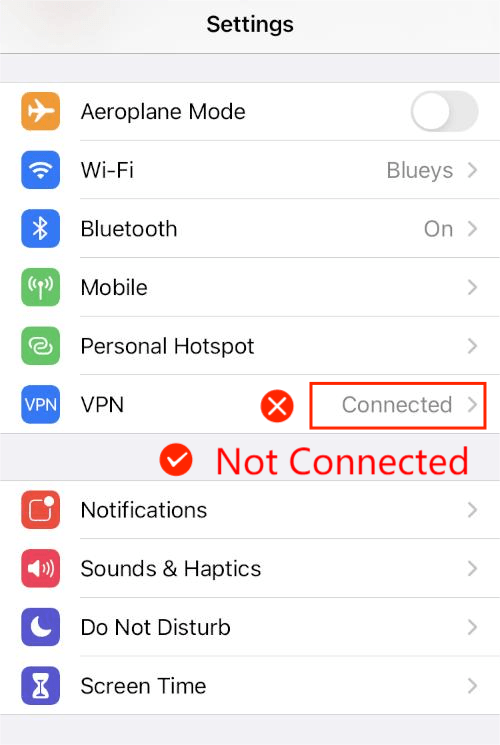
Step 3: To turn off the VPN, simply press the switch.
Step 4: disable VPN on iOS
If the above modification doesn't work, you might try moving your iPad or iPhone to a different area.
Step 1: To get to the App Store, click the Account icon in the upper right corner.
Step 2: Click on the Account ID
Step 3: Now choose Country/Region from your account Apple ID. Select Change Country or Region from the drop-down menu.
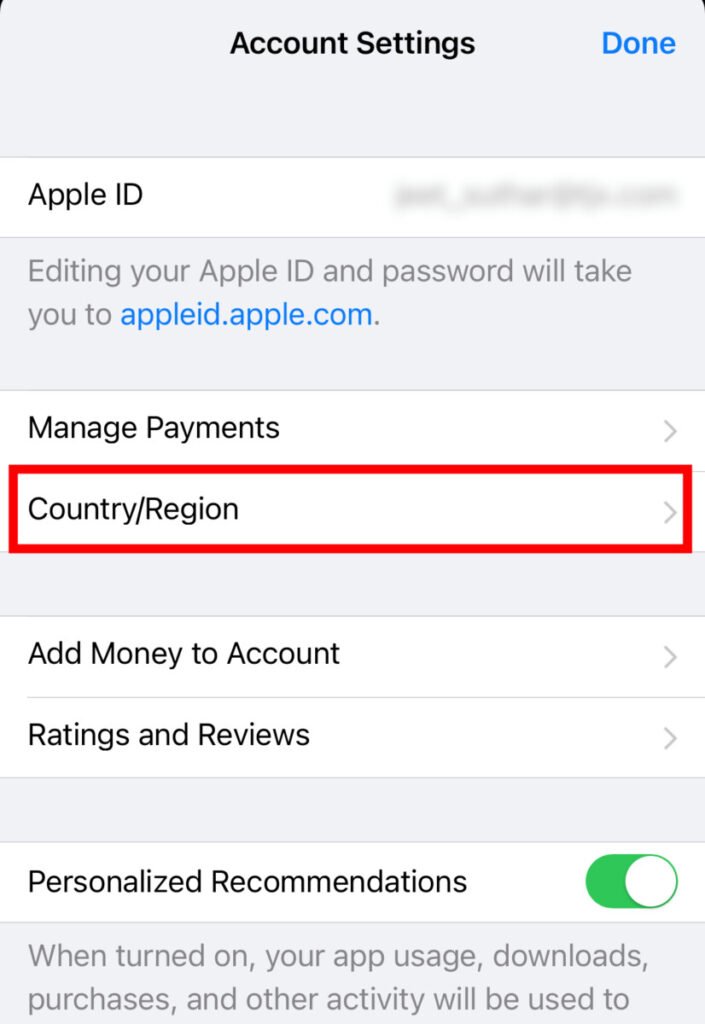
Step 4: Here, select Change Country or Region. Modify your country or region
Step 5: Scroll down to the country where the song is accessible and choose it. Choose a country
Step 6: Click Agree to accept the Terms of Service.
Step 7: On the next screen, choose None as your payment method.
Step 8: Fill in any billing name, street, city, and province randomly. Insert a random address
Step 9: You must provide a valid Postcode.
Step 10: Save it by hitting Done; the App Store will then automatically switch to the Korean version. To finish setting up, click Done.
Step 11: Restart your iPhone once everything is set.
Step 12: Open Apple Music after the restart and listen to your selected music.
Next, make sure your iOS is up to current. If there is a problem with the current iOS build, the error Apple Music Not Available in Your Region will appear as well. As a consequence, as soon as Apple's developers become aware of the problems, they fix them with software updates. It is the user's responsibility to install software updates as they become available.
To see whether there's anything new,
Step 1: Open the Settings
Step 2: Select General
Step 3: After that, choose Software Update.
Step 4: Update your software
Step 5: The system will request another update.
Step 6: You will be prompted to install an update if one is available.
Step 7: To do so, go to the menu and choose Download and Install.
Step 8: After updating your iOS, go to Apple Music and test if the music plays properly.
To begin troubleshooting, remove your Apple ID from the iPhone on which you are having a problem with Apple Music song availability. According to what I've heard, this patch has helped a few people.
This approach will delete any music you've downloaded to your device from the Apple Store so you may listen to it offline. It's only normal that the Apple ID associated with the Apple Music subscription becomes disconnected.
Step 1: Launch the Settings application.
Step 2: Tap the name at the top of the screen (personal Apple ID).
Step 3: On the following page, scroll to the bottom.
Step 4: Select Sign Out.
Step 5: You'll be asked to enter your Apple ID password.
Step 6: Return to the device and log in using the same Apple Login details you used before.
Check Apple Music to see whether the issue This Song of Apple Music Not Available in Your Region still appears.
Being a popular platform for streaming music, Apple Music can sometimes encounter errors. We've given out some tips to help you avoid common issues in the previous part. But if you want to avoid all Apple Music errors forever, you could consider converting Apple Music to your computer.
By converting the Apple Music songs, firstly, you may resolve any errors that are currently occurring on Apple Music. Additionally, converting to a different platform can often provide access to more features and options, such as the ability to upload your music. To do this, you need a professional Apple Music converter.
Among all those Apple Music Converters, the one we recommend here is the DumpMedia Apple Music Converter. The noteworthy features of this Apple Music Converter by DumpMedia include:
Below are the detailed steps about how to use DumpMedia Apple Music Converter to convert your Apple Music to MP3. Let's get started!
Step 1: Download and install the DumpMedia software.
Select the version that matches your operating system and click the above icon to download. Take notice that the program is compatible with both Windows and Mac computers. You may also test out the free trial version before purchasing the full version.
After you've finished downloading and installing the app, go to the registration page to activate it. You will be emailed a code, which you will enter into the app's registration box to activate it.
Step 2: Open the DumpMedia Apple Music Converter and update your iTunes library.
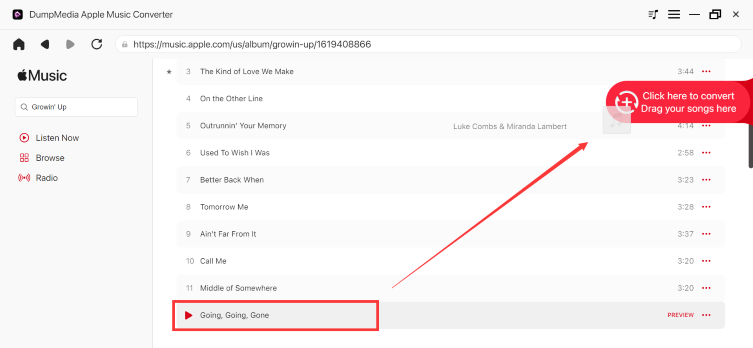
Launch the DumpMedia Apple Music Converter when it has been installed. The Converter will then automatically upload all of the downloaded iTunes music, Apple music, movies, and podcast files. So make sure you've downloaded the music you wish to convert to your PC.
In the "Playlists" area, you can view and verify the uploaded files. If you can't find the music files you wish to convert in the Converter, refresh your iTunes collection by clicking the "Refresh" icon.
Step 3: Select desired files, output format, and storage location.

The video or song kinds of uploaded files are shown on the left side. You may start by selecting a category to search for your desired files in the right column. Tick the front box to choose them. You may also use the top-right search box to find them. Then check them off.
Then, under "Output Settings," select the converted format from the drop-down box. M4A, MP3, AC3, AU, AIFF, M4R, FLAC, and MKA are all supported. The appropriate parameter is set, but you may adjust its Codec, Sample Rate, Bit Rate, and Channels in the right column.
Choose a storage path after that, otherwise, the converted files will be placed in a default folder.
Step 4: Convert the sound files and wait for the conversion to complete.

Press the "Convert" button to begin the converting process. Then wait for the conversion to complete. The conversion time is determined by the quantity of files being converted.
When you're through, you won't have to worry about Apple Music not being available in your region anymore or wanting to listen to music without data.
Even if the message "Apple Music not available in your region " occurs, there are several easy fixes accessible. However, the simplest approach to eliminate this problem is to download and convert Apple Music songs to MP3 or other audio formats, and then store them on your PC. You have total control over Apple Music tracks in this manner. Apple Music may be simply transferred to a USB drive or played on an iPod nano/shuffle if necessary. DumpMedia Apple Music Converter, an Apple Music DRM removal tool, is required for this.
