“Can someone help me with the process of how to convert to MP3 in iTunes?”
If you have been using the iTunes app, you are surely into purchasing songs from the iTunes Store and storing them and your other media files in your library. Well, there is nothing wrong with that. The iTunes app can actually perform not only as a media player but also as a file organizer.
The major dilemma of most users when it comes to using the iTunes app is when they have really huge library. Of course, if you have that on your PC, it would be so tedious to move those files that you have to other devices.
Additionally, the receiving devices should have the iTunes app installed on them. To lessen the burden, knowing how to convert to MP3 in iTunes would be a great help.
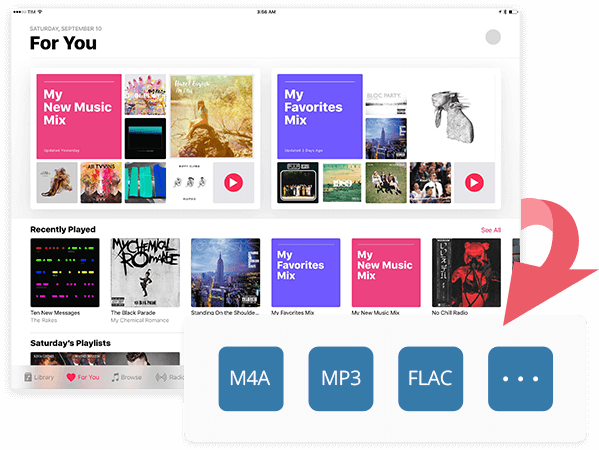
The MP3 format is a flexible format that is mostly used by people. With its compatibility on almost all devices, it is no doubt that users often call it the universal file format among all. Well, this is actually true. Almost all gadgets and media players support access to MP3 files. And so, knowing how to convert to MP3 in iTunes will let you ease the compatibility issues.
If you aren’t aware, originally, those iTunes songs that you have are in AAC format. And this format is not playable on a variety of media players. Converting the files to MP3 would be a major relief. So, start learning the process of how to convert to MP3 in iTunes from this article then.
Contents Guide Part 1. How to Convert Song to MP3 with the Apple Music App or iTunesPart 2. How to Convert Songs to MP3 within iTunesPart 3. Summary
If you are not aware, people tend to look for the process of how to convert to MP3 in iTunes because MP3 seemed to be the most versatile and popular format of all. In fact, the reason behind this is that this was the known format during the booming years of digital music. And so, almost all media players and gadgets support access to such files. Another thing is that it’s basically free of use.
It is true as well the AAC, the file format for iTunes, was created to replace MP3. And, it actually has a better quality. However, AAC isn’t widely used though it’s totally accepted in the industry.
A lot of people are not into investing money just to get a new media player or device to stream these AAC files. Thus, they are more into looking for methods of how to convert to MP3 in iTunes.
If you are one of those people, don’t worry, you can do the conversion through either the iTunes app or the Apple Music app. We have the procedures here. Just remember that you can follow these if you have songs that are not protected by DRM.

If you are using a Windows PC, it is recommended that you use the iTunes app to do the process of how to convert to MP3 in iTunes.
Here is the procedure.
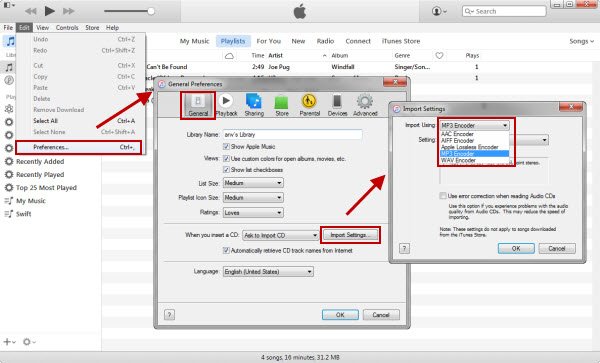
Step #1. Open your iTunes app and then tap the “Edit” button. From the options displayed, choose “Preferences”, then “General”, and finally, “Import Settings”. Once you performed this, you shall see a new window on your screen. You must choose “MP3 Encoder” using the drop-down under “Import Settings”. Additionally, you have the option to select the conversion quality.
Step #2. Once you are okay with step 1, just tap the “OK” button and then head back to your iTunes library. Choose the iTunes song you wish to convert to MP3 and then have it highlighted. Tap the “File” button next and then click “Convert”, then “Create MP3 Version”. If you wish to process a lot of iTunes songs in one go, you can do that by highlighting multiple songs.

By doing the above two steps, you are already accomplishing the “how to convert to MP3 in iTunes” process. Now, we’ll move on to the process of doing the conversion on the Apple Music app.
As mentioned, you can also utilize your Apple Music application during the conversion process in case you are using your Mac PC. Here is how it can be done.
Step #1. On your Mac PC, open your Apple Music app. Hover over the menu bar and then tap the “Music” button then choose “Preferences”.
Step #2. Click “Files” then choose “Import Settings”. Afterward, tap the “MP3 Encoder” button.
Step #3. You can now choose the iTunes songs to convert to MP3 and then click “File”, “Convert”, then “Create MP3 Version”.
Here’s an extra tip for you. If you wish to convert tracks under a folder or from a disc, you can just select it and then tap the “File” button, then “Convert”, then “MP3”. The process of how to convert to MP3 in iTunes is easy, right? Additionally, you have learned how to do the conversion through the Apple Music app as well.
Again, it is worth reiterating that these procedures can only be performed if you are to process iTunes songs that are DRM-free. In case you wish to convert those protected iTunes songs that you have to MP3, there is a need for you to look for a reliable converter first. Of course, we have a recommendation in the second part.
If you have the songs on your iTunes library that were bought under your Apple Music subscription, you should know that those songs aren’t yours and that they are under DRM protection. This means that if you are to perform the conversion process, an error will pop up on your screen telling you that it is not possible to do it unless the DRM protection is removed. But how can you do that?
This is simple. You only need an app like DumpMedia Apple Music Converter on your PC! It’s totally supported by Windows and Mac computers so you won’t have any problems with compatibility.
The DumpMedia Apple Music Converter is an app that’s very capable of removing the DRM protection of iTunes songs letting you convert and access them on any device or media player that you have.
You can use this to convert your iTunes songs to MP3 format and any other format that it supports like FLAC, MKA, AC3, and more. It can do the conversion process 10x faster than other applications while ensuring that output files are of high quality. Additionally, DumpMedia Apple Music Converter can also function as a powerful audiobook converter. It can have your AA / AAX files transformed right away.
The DumpMedia Apple Music Converter is also designed to have a user-friendly interface. So, in case you are worried about how you can use the app, there is nothing to think about that much. Its functions and keys are very easy to handle and understand. Of course, to help you, we have here a preview of the procedure that you can follow if you wish to use the DumpMedia Apple Music Converter to process the conversion of your protected iTunes songs to MP3.
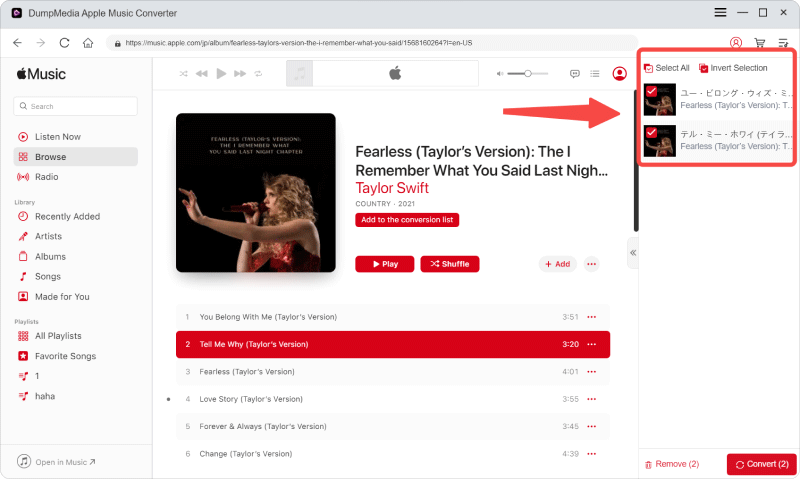
Step #1. Complete all the needed requirements prior to the installation of the app on your PC. Install the DumpMedia Apple Music Converter afterward and then launch it. On the main page of the app, you can start previewing or selecting the iTunes songs that you wish to process.

Step #2. Once you are done with the selection process, you can now start modifying the output settings. At the bottom area of your screen, you shall see the options. Make sure to choose MP3 as the output format and then define an output folder afterward. Also, you can change the bit rate and sample rate if you want to.

Step #3. Finally, to let the app start the conversion of the songs, you just have to tap the “Convert” button that’s at the bottom-right area of your screen. Once tapped, DumpMedia Apple Music Converter will process the transformation of the iTunes songs as well as the removal of the DRM protection.

The app, as mentioned, can process at a speed of 10x faster than other apps. With this, you shall expect the output files to be ready within just a few minutes.
You now learned how to convert to MP3 in iTunes as well as on your Apple Music app. Finally, you can have your iTunes songs playable on any device or media player that you own without thinking about compatibility problems. Also, if you got DRM-protected ones, you could always use apps like DumpMedia Apple Music Converter to get rid of the limitations and then finally stream as much as you like!
Click to have a free try! It's 100% secure!
