“I have my favorite Apple Music files with me, but I am having a hard time moving them to my MP3 player. Can you let me know how to transfer music from iTunes to Sandisk Sansa Clip? I wish to enjoy them during my free time, but they seemed to be not playable on my Sandisk Sansa Clip.”
Being able to listen to the songs you love while you are traveling or while killing some time at home is one of the best things in life, especially for all those music enthusiasts all over the globe. If you are also experiencing the dilemma of streaming some music files on your MP3 players like Sandisk Sansa Clip, that’s not an issue.
In this post, we will be dealing with the procedures of how to transfer music from iTunes to Sandisk Sansa Clip. So, if you wish to know how the transfer will be possible for both the non-DRM and the DRM protection music files, complete reading this post.
Let’s start with the discussion then.
Contents Guide Part 1. Can You Transfer Music from iTunes to Sandisk Sansa Clip? Part 2. How to Transfer Music from iTunes to Sandisk Sansa Clip? Part 3. Summary
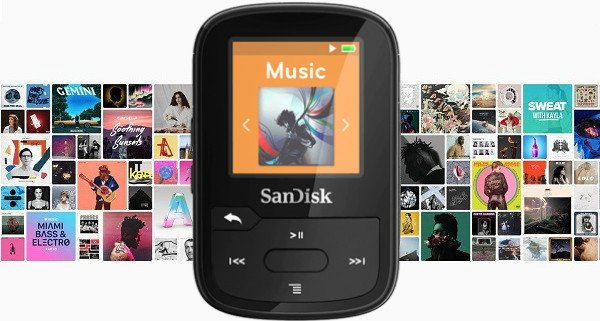
If you have a Sandisk Sansa Clip and you want to stream all your favorite Apple Music songs using it, you must know the procedures of how to transfer music from iTunes to Sandisk Sansa Clip first. But is the transfer possible?
Most MP3 players like Sandisk Sansa Clip are only capable of accessing and opening files in MP3 format. That is why many would encounter an issue when trying to open iTunes music files using it.
Those Apple Music and iTunes songs are usually in AAC format which is not supported by Sandisk Sansa Clip. So, for you to have them accessed, there is a need to transform the AAC format into MP3 format first. After doing so, the transfer can easily be done.
So basically, the answer to the question is – “yes, you can have any music from your iTunes app transferred to your Sandisk Sansa Clip for streaming”.
As you continue reading this post, you’ll surely know more details about the whole procedure.
Let’s jump into the second part of this article then.

Since the main agenda of this article is to discuss how to transfer music from iTunes to Sandisk Sansa Clip, we will be helping you out by giving you the procedures of how it can be done if you have non-DRM iTunes music files as well as the DRM ones.
We will be discussing first how to transfer music from iTunes to Sandisk Sansa Clip if you wish to move the non-DRM-protected ones (that is your local fi Here are the steps that you need to follow.
Step #1. You have to create a playlist first in your iTunes library. To do so, you just have to open your iTunes app and once you are on the main screen, just tick the “Music” button. You need to import the files to transfer to the new playlist you just created.
Step #2. On your Sandisk Sansa Clip, you have to modify the USB mode to MSC.
Step #3. Make sure your Sandisk Sansa Clip is connected to your PC with the help of a USB cable. Once the connection has been established, double-click on the Sandisk MP3 player that you shall see right away. Afterward, double-click on the folder that says “Music”.
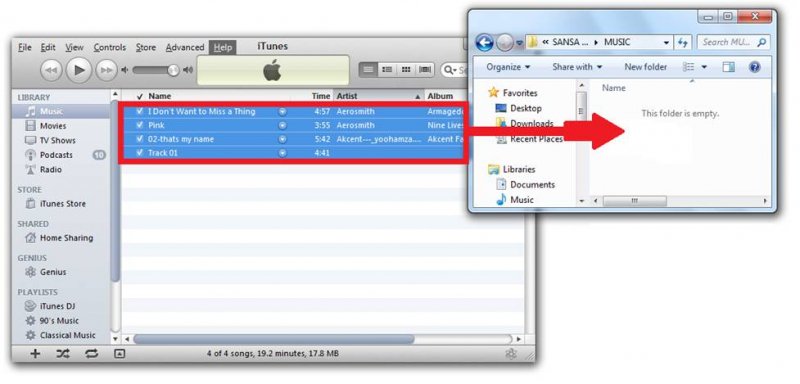
Step #4. Begin transferring the iTunes music files to your Sandisk Sansa MP3 player. Do this by heading to “Library”. Once done, tick the “Music” button. Make sure you select the “List” view. Just choose the track you wish to transfer to your Sandisk Sansa Clip. You can also select multiple files if you want to. Once tracks are selected, just drag them to the “Music” folder on your Sandisk MP3 Player. Make sure that you won’t disconnect the Sandisk MP3 Player on your PC while the transfer is being done.
Step #5. Once the process is completed, just have your Sandisk MP3 Player disconnected from your PC.

Here’s another method of how to transfer music from iTunes to Sandisk Sansa Clip – copying your local files via an MTP connection. We got here the steps you must follow.
Step #1. Using a USB cable, make sure your Sandisk MP3 Player is connected to your PC.
Step #2. Look for the local files that you wish to transfer. Have them copied.
Step #3. If the connection is successful, just look for your Sandisk MP3 Player in your PC’s “My Computer” folder.
Step #4. Find the “Locate” folder on your Sandisk MP3 player and then have it opened.
Step #5. Just have those tracks you copied, pasted to the “Music” folder of your Sandisk MP3 Player.
Step #6. Once copying or transfer has been done successfully, just disconnect your device from your PC.
By completing the above 6 steps, you can now have those local files moved to your Sandisk Sansa Clip player!
But what if you got protected Apple Music songs that you wish to stream on your Sandisk Sansa Clip? What will then be the procedure of how to transfer music from iTunes to Sandisk Sansa Clip? Learn all the details you need as you jump to the next paragraphs.
The steps of how to transfer music from iTunes to Sandisk Sansa Clip are so easy to do and follow if you got local files and non-DRM-protected tracks. But what if you have protected AAC files? Well, you must know that downloading them and having them transferred from one device to another cannot be done directly. There will always be a need to seek help from professional applications like DumpMedia Apple Music Converter.
With apps like this DumpMedia Apple Music Converter, you can have the protected files easily converted to other formats like MP3 and have the DRM protection removed. The DumpMedia Apple Music Converter, particularly, can offer a lot of things apart from conversion to multiple formats it supports and DRM removal.
It can also work as an audiobook converter. With the help of this app, you can stream in offline mode while ensuring that the files are still at 100% original quality. You can even personalize some output settings if you intend to do so.
The DumpMedia Apple Music Converter works at a 10x faster speed compared to other applications available to the public. It is so easy to handle and use and installation requirements are only a few.
For your reference, we have here the procedure of using this app to convert the protected Apple Music files to MP3 for you to have them streamed on your Sandisk MP3 Player.
Step #1. You have to install the DumpMedia Apple Music Converter on your PC first. This can be done so easily as long as you have all the installation requirements completed and fulfilled. Once you installed the app, just have it launched.
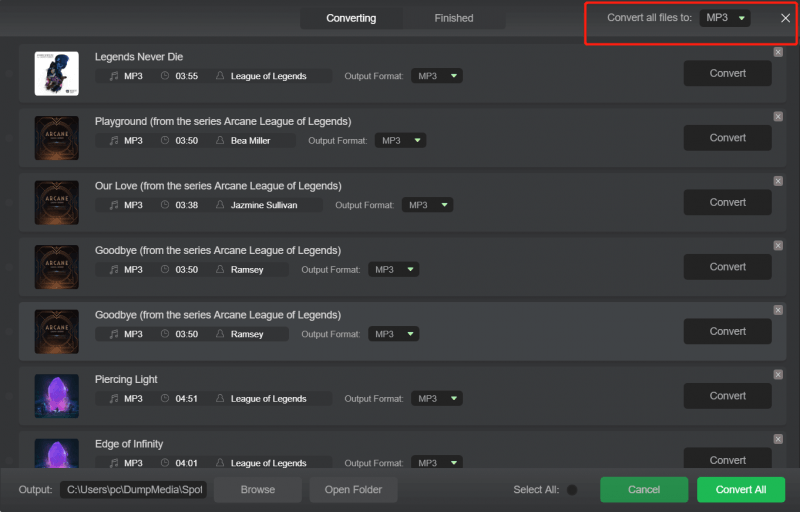
Step #2. Right away, on the main screen, you can preview and start selecting the Apple Music files to convert. Once tracks are selected, choose MP3 as the output format to use. You can utilize the drop-down arrow on the “Output Format” menu to select the desired format after the conversion process. In this step, you can also customize the settings as you wish and put the output path.

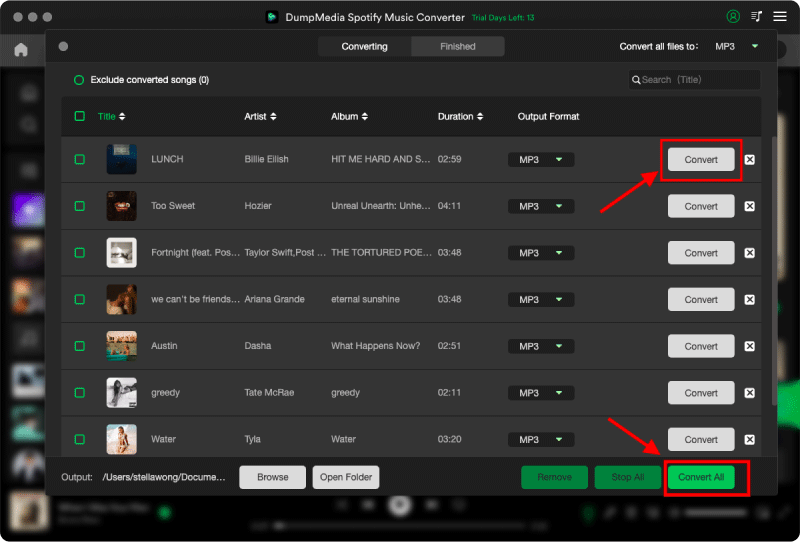
Step #3. Once setup has been done successfully, just tap on the “Convert” button to let the app start the conversion process as well as the DRM removal procedure.

After a while, you should be able to see those converted tracks available on your PC for download and forever keeping. Now, here is how you can move the converted files to your Sandisk MP3 Player using your iTunes app. If you are using a Windows PC, you can just copy and paste the converted files to your Sandisk MP3 Player.
Now, for Mac users, the use of the iTunes app will be very vital. Here is what you need to do.
After finishing the above two things, just follow the same steps stated in the “Transfer Music Files To Sandisk Sansa Clip Using iTunes” procedure that you surely have read already in the earlier part of this post.
Just like that, you now know how to transfer music from iTunes to Sandisk Sansa Clip! Moving your local files is so easy to handle. The only dilemma occurs if you wish some protected files to be moved to your Sandisk Sansa Clip player. But that can be solved via great apps like DumpMedia and Apple Music Converter!
