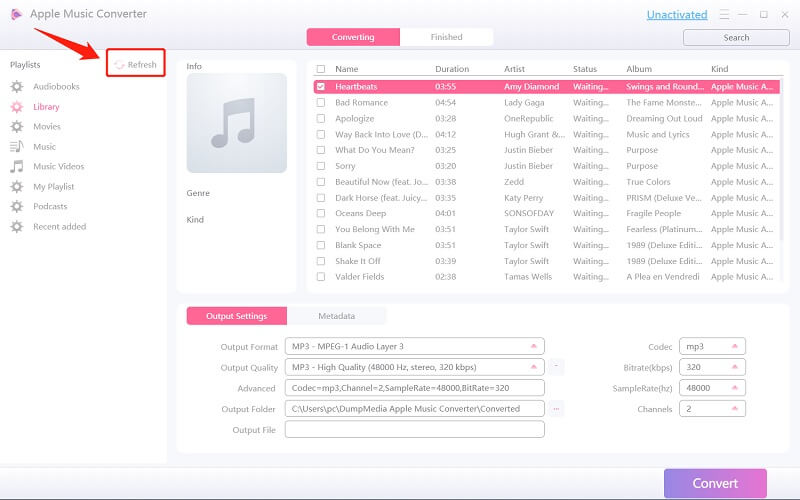
Step 1: Install and Register the Software
First, install the software and then “activate” it in the registration page - open the registration window and type in the Activation Code received. (The purchased one provides more functions and has no time limitation.)
Step 2: Launch the Software and Refresh Your iTunes Library
After activating the software, launch it. Then all the downloaded Apple music, iTunes music, videos, podcast files will be automatically uploaded into the Converter. So make sure the songs you want to convert have been downloaded onto your computer.
You can preview and check the uploaded files in the “Playlists” section. If you couldn’t find the music files you want to convert in the Converter, click the “Refresh” button to update the iTunes library.

Step 3: Choose the Wanted Files, Output Format, and Storage Path
On the left side, there shows the audio or video types of the uploaded files. You can choose one category first to look for your wanted files on the right column. Select them by ticking the front box. Or you can directly search them in the search box on the top. Then, tick them.
Next, go to the “Output Settings” and choose the converted format in its drop-down list. Here supports MP3, M4A, AC3, AIFF, AU, FLAC, M4R, and MKA. The corresponding parameter is set, but you can customize by yourself on the right column, including its Codec, Bit Rate, Sample Rate, and Channels.

Tip: When converting an audiobook, the formats like MP3, M4A, FLAC, AC3, AU, MKA, M4R, and AIFF are provided.
After that, choose a storage path or the converted files will be automatically saved in a default folder.
Step 4: Convert the Audio files and Wait for the Process
Hit the “Convert” button and start the converting process. Then, wait for the conversion. The conversion time depends on the numbers of files you convert.

