Taking screenshots is a handy skill for capturing important information, sharing details, or troubleshooting issues. If you own a Dell laptop or desktop, you might be wondering, “How can I screenshot on Dell?” Luckily, Dell devices make it easy with several built-in methods. In this article, we'll explore two straightforward techniques to help you master taking screenshots on your Dell computer.
Contents Guide Part 1. Screenshot on Dell Using the Print Screen KeyPart 2. Screenshot on Dell Using Snipping Tool or Snip & SketchPart 3. Screenshot on Dell Using Third-Party ToolPart 4. Conclusion
One of the simplest ways to take a screenshot on a Dell computer is by using the Print Screen (PrtScn) key on your keyboard. This method captures the entire screen and saves it to your clipboard, allowing you to paste it into any application that supports image pasting. Here’s how you can do it:
Step 1. Locate the Print Screen Key
On most Dell keyboards, you'll find the Print Screen key labeled as “PrtScn” or a similar abbreviation. It is usually located in the top row of the keyboard, often near the F12 key.
Step 2. Capture the Entire Screen
Step 3. Capture Only the Active Window
For more control over your screenshots, Dell computers come with built-in tools like Snipping Tool (available in older versions of Windows) or Snip & Sketch (introduced in Windows 10 and later). These tools offer more options, such as capturing specific areas or adding annotations. Here's how to use them:
Step 1. Open Snipping Tool
Type “Snipping Tool” in the Windows search bar and select it from the search results.
Step 2. Create a New Snip
Click on New to start a new screenshot.
Choose the type of snip you want: Free-form, Rectangular, Window, or Full-screen.
Drag your cursor to select the area you want to capture.
Step 3. Save Your Screenshot
Once the screenshot is captured, it will appear in the Snipping Tool window.
Click File > Save As to save your screenshot to your desired location.
Step 1. Open Snip & Sketch
Type “Snip & Sketch” in the Windows search bar and open the app.
Step 2. Start a New Snip
Step 4. Edit and Save
In addition to the above two methods, you can also choose to use third-party tools. Generally speaking, third-party tools have more complete functions. We recommend DumpMedia Screen Recorder, which is a professional screenshot tool. In addition to the screenshot tool, it also has screen recording, audio recording, and webcam recording functions.
Free Download Intel Mac M-Series Mac Free Download
Key Features of the Screenshot Function:
Getting Started with Screen Capture: A Step-by-Step Guide
Step 1. Download and Install the Program
Free Download Intel Mac M-Series Mac Free Download
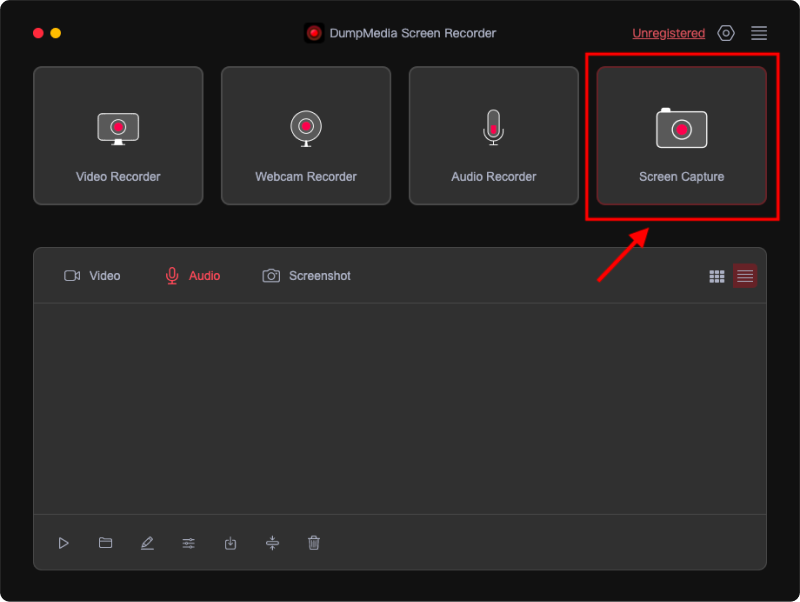
Step 2. Open the Program and Choose Capture Option
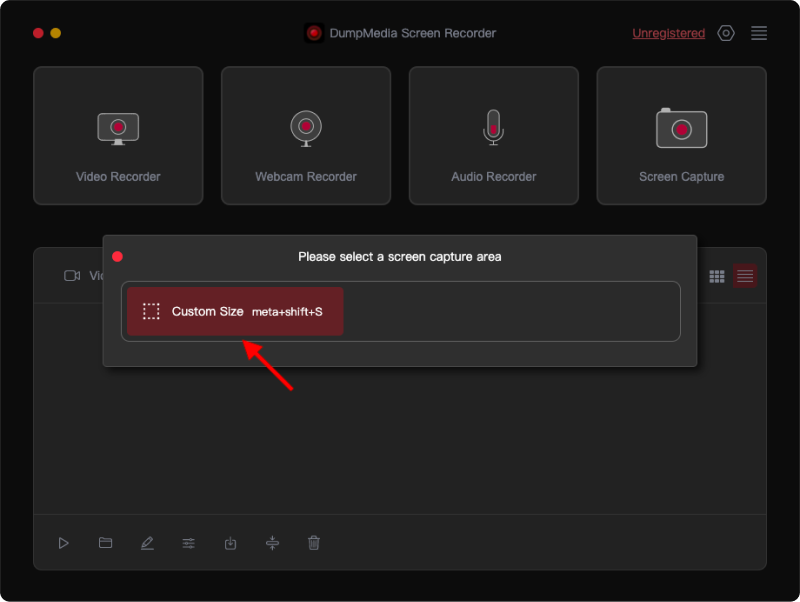
Step 3. Define Custom Capture Area
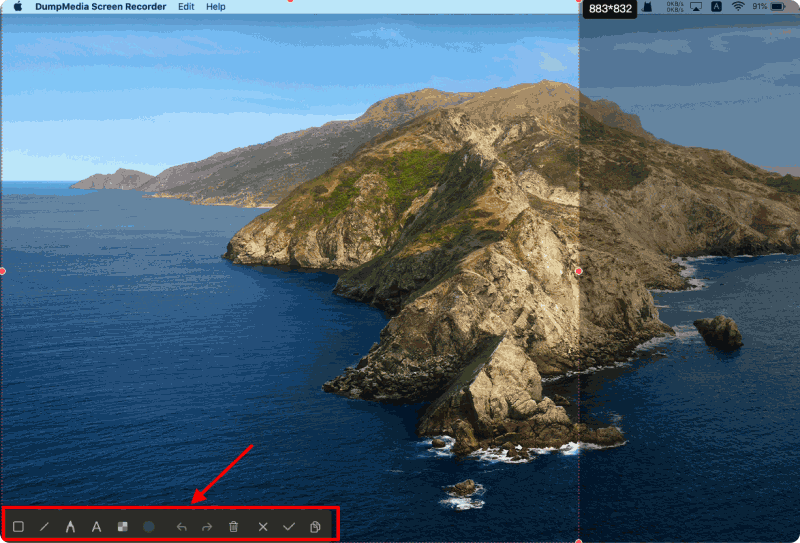
Step 4. Finalize and Save Your Screenshot
Step 5. Edit Your Screenshots
Taking screenshots on your Dell computer is easy with several available methods similar with taking screenshots on HP. You can use the Print Screen key for quick, full-screen captures, or opt for Snipping Tool and Snip & Sketch for more control and annotation options. Each method offers a unique way to capture and manage your screen content, depending on your needs.
For those seeking additional features, third-party tools like DumpMedia Screen Recorder provide advanced functionalities, including customizable capture areas and instant editing options. Mastering these methods ensures you can efficiently capture, edit, and share important information, making your Dell computer a versatile tool for various tasks.