DVD is kind of old fashion nowadays. With the development of mobile device technology. People tend to use digital format instead of DVD. If you think you also need to do this, we are here to help.
This article will give you instructions about how to convert DVDs to WMV. If you think this article might help you out, keep reading and find out.
Contents Guide Part 1. About WMV Format Part 2. How to Convert DVD to WMV without Quality Loss?Part 3. Summary
Before heading to the steps of how to convert DVD to WMV format, it would be better if we’ll first give information about the WMV format which is actually the main topic of the discussion in this post.
If you are not aware yet, WMV or Windows Meda Video was developed by Microsoft. Files in this format are generally in smaller file sizes compared to the others as this format was designed specifically for internet streaming applications.
This also uses Microsoft's Advanced Systems Format (ASF) container format making the WMV files somewhat similar to the ASF files (ASF is also one of the file formats created under Microsoft). WMV is the usual format that is being used for HD DVD and Blu-ray Discs.
When it comes to playing WMV files, there shouldn’t be much issue because WMV files are playable on Windows-based players and devices such as Windows Media Player, Microsoft-based or Windows-based televisions, VLC Media Player, Kodi, and more.
You might also see or read another format that looks almost the same as WMV, the WMA format. They are actually the same but just differ in one feature – WMA files do not have video data. The WMA format can only store and cater to audio data.
So now that you know the basic information about the WMV format, we will now be dealing with the detailed step-by-step procedure of how to convert DVD to WMV format.
The second portion will be talking a lot about the mentioned procedure so make sure to check out the content of the next section to know more about DVD to WMV format conversion.
If you have been moved by the idea to transform the DVD files you have to WMV format, you must know what tools you should be using. When you search and browse through the web, you will see a lot of recommendations and software applications. However, if you will do the “how to convert DVD to WMV format” process for the first time, it might be confusing to immediately rely on the first search result you’ll see.
To give you an idea, we have here a professional software application that can aid in the DVD to WMV transformation. Among the many trusted apps, we truly recommend using this DumpMedia Video Converter. What’s with this DumpMedia Video Converter that makes it so recommended?
With the DumpMedia Video Converter, you can easily convert those DVD files that you have not only to WMV format but to other commonly used formats like M4V, MKV, FLAC, MOV, MKV, it can also convert between those formats like MP4 to WMV.
While using this app, you can also do video enhancements and even customizations as you can edit them, flip, rotate, crop, or even add effects. This also has a very fast speed – 6x faster than any other video converters. It can even maintain the original quality of the files so worrying about the outputs’ quality isn’t a thing!
What’s more enticing is that this app works so well with a very easy and friendly user interface. You can convert your files easily even if you are not that knowledgeable and you are to do the process for the first time.
Of course, we will be showing how to convert DVD to WMV format using this DumpMedia Video Converter. You only need to follow three basic steps to finally have the converted file saved on your PC.
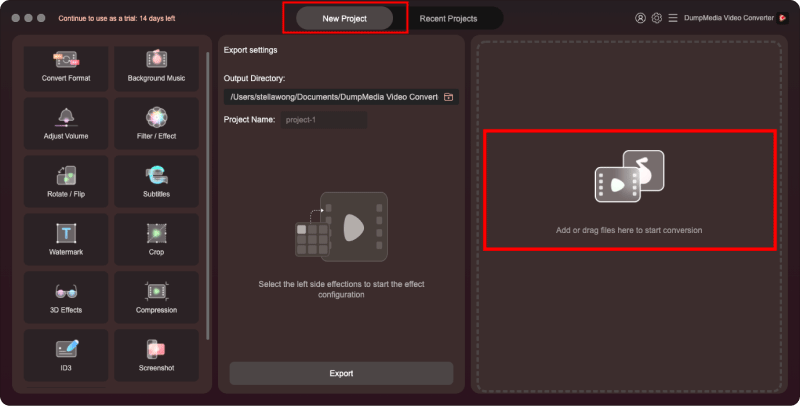
Step #1. Make sure you install the DumpMedia Video Converter successfully on your PC after completing all the installation requirements. Launch the app and right away on the main screen, you can start adding the DVD files.
Of course, you need the DVD disc on your DVD drive first so that you can rip the files from it. During the uploading process, you can either drag and drop them or just use the “Add Files” button that you’ll see at the top area of the page.
Step #2. There is a “Convert All Tasks To” option at the top area as well. Here, you will be choosing WMV as the output format. You can also see the options to edit the settings of the video or do the video customization you prefer.
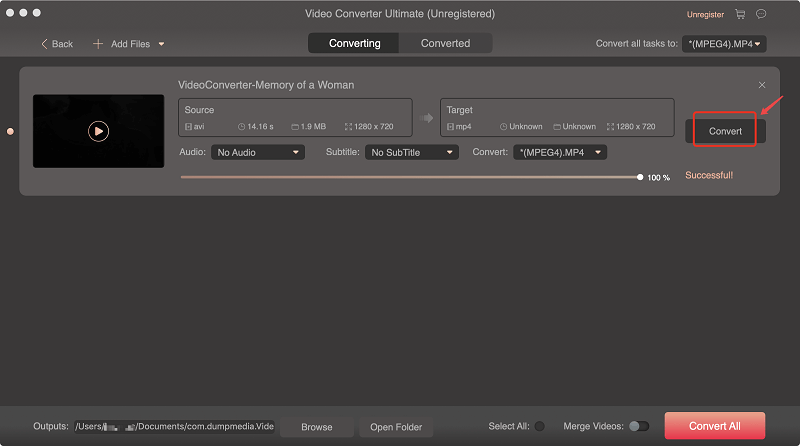
Step #3. Once you are okay with everything that has been set up, choose the “Convert All” button that is at the bottom area of your screen.
The app should convert the DVD files right away into WMV format. In a few minutes, you can have the files watched through your personal computer or move the files to external drives or handy devices!
Finally, you now know how to convert DVD to WMV via an amazing professional software application named DumpMedia Video Converter. The whole procedure is so easy. You just have to make sure that the app has been installed properly and everything should be good to go!