It's unfortunate that technical difficulties may prevent you from listening to YouTube Music songs while you're unwinding and enjoying your music. If the mobile app or website isn't working properly, clearing the cache is usually a good idea. Rest assured, though; this won't remove your preferences or permanent data—it simply removes temporary files that are used to expedite the process, and the cache will rebuild itself. This guide will show you how to clear YouTube Music cache on an Android or browser.
Contents Guide Part 1. How to Clear YouTube Music Cache on AndroidPart 2. How to Clear YouTube Music Cache on Web BrowserPart 3. Best Way to Listen to YouTube Music Songs without InterruptionPart 4. Summary
Before we go into detail, please be aware that the processes may alter somewhat based on the manufacturer of your phone, although they shouldn't be too different. Here is the overall procedure:
Step 1: Open your phone's Settings app.
This can usually be found on your home screen or in your app drawer, represented by a gear icon.
Step 2: Navigate to Apps or Apps and Notifications.
The exact wording may vary depending on your device and Android version, but it will generally be one of these options.
Step 3: Find YouTube Music and select it.
If YouTube Music is not visible under the list of recent apps, tap on the option to view all apps. This may be labeled as See all apps, App list, or a similar term.
Step 4: Under YouTube Music's app info, select Storage & cache.
This section displays the storage and cache information for the app.
Step 5: Tap Clear cache.
This will remove temporary files and free up space without affecting your personal data or app settings.
Once all of this is completed, try reopening YouTube to see whether your problems have been fixed.
How to clear YouTube Music's cache on the web is slightly different than on Android. Generally, you can't clear the cache for a specific website, so you'll have to clear the cache for all websites at once. We've listed some steps for different browsers.
Step 1. Click the three dots located in the upper-right corner of your browser window.
Step 2. Select Clear browsing data from the menu.
Step 3. In the Basic tab, open the Time range drop-down menu and choose All time.
Step 4. Make sure the Cached images and files box is checked. Uncheck all other options unless you are certain you want to delete those data types as well.
Step 5. Click the Clear data.
Step 1: Click on the menu icon (three horizontal lines) located in the top-right corner of your browser window, then select Settings.
Step 2: Go to the Privacy & Security section.
Step 3: In the Cookies and Site Data section, click Clear Data.
Step 4: Uncheck the box next to Cookies and Site Data.
Step 5: After verifying your selections, click the Clear button to proceed with deleting the selected data. This will help improve browser performance and resolve issues caused by outdated cached data.
Step 1: Open Safari on your Mac, then click on Safari in the menu bar at the top of the screen.
Step 2: In the drop-down menu that appears, choose Preferences.
Step 3: In the Preferences window, click on the Advanced tab.
Step 4: Check the box next to Show Develop menu in the menu bar.
Step 5: Go back to the menu bar at the top of the screen and click on Develop.
Step 6: In the drop-down menu that appears under Develop, click on Empty Caches.
If clearing the cache hasn't resolved the issue of songs not playing, you might want to try using professional YouTube Music converters to download the songs as local files. This way, you can enjoy your music offline without any internet limitations.
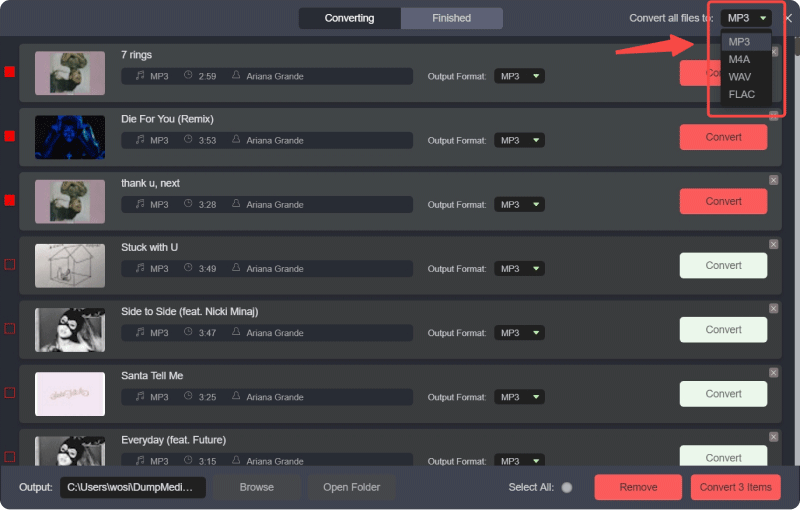
DumpMedia YouTube Music Converter is a great tool for this purpose. It allows you to convert YouTube Music tracks into various popular audio formats like MP3, WAV, FLAC, and M4A. These formats are compatible with most music players and devices, making it easy to listen to your favorite songs anytime, anywhere.
Additionally, DumpMedia YouTube Music Converter offers a range of basic features to enhance your music experience.
Here are the steps:
Begin by downloading and installing DumpMedia YouTube Music Converter on your computer. Once the installation is complete, launch the software and log in to your YouTube Music account.
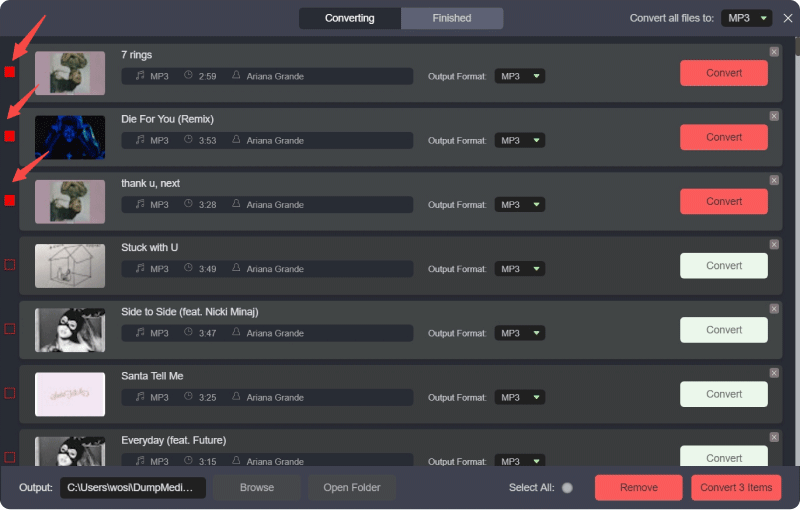
Navigate through your YouTube Music library to select the songs or playlists you want to convert. Drag and drop your chosen songs to the conversion button.

Choose your preferred output format, such as MP3 or AAC. Adjust settings like bitrate and sample rate to tailor the quality and size of the files.

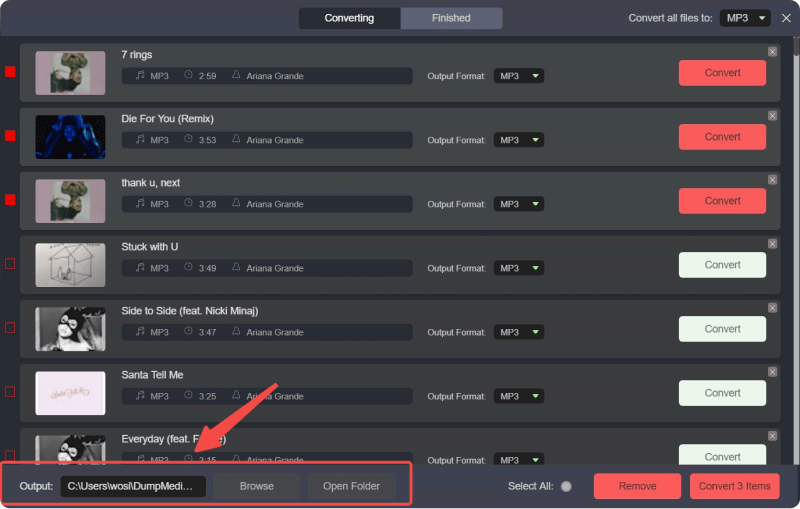
Select a folder on your computer where you want to save the converted files.

Click the "Convert" button to initiate the conversion process. The software will efficiently convert your selected YouTube Music tracks into high-quality files. Once the conversion is complete, you’ll find the files in your chosen output folder.

Learn how to clearing YouTube Music cache can resolve many common issues, whether you're using the app on an Android device or a web browser. For Android, this involves navigating through the settings to clear the app's cache. On web browsers like Google Chrome, Firefox, and Apple Safari, you'll need to clear the cache for all websites.
If these steps don't solve the problem, consider using a YouTube Music converter like DumpMedia to download your favorite tracks for offline listening. This ensures uninterrupted enjoyment of your music, with the added benefits of retaining ID3 tag metadata and accessing various audio formats.
