Adding music to your Google Slides presentation can elevate your presentation, making it more engaging and livelier. This guide will show you how to add music to google slides from YouTube, there are two ways to do this: the first is to download music from YouTube and upload it to Google Drive, and the second is to add music directly from YouTube using a link.
Not only are these methods easy to do, but they can also add a unique musical atmosphere to your presentation, grab your audience's attention, and make your presentation livelier and engaging. With this guide, you'll learn how to easily create an impactful presentation that showcases your professionalism and creativity. Let's take a deeper look at these methods together to add movement and appeal to your presentation!

To add YouTube Music to Google Slides, one effective way is to download YouTube Music to a local file, and then add the downloaded music file to Google Slides. By downloading YouTube Music as a regular MP3 format or other audio format, and uploading it to Google Drive.
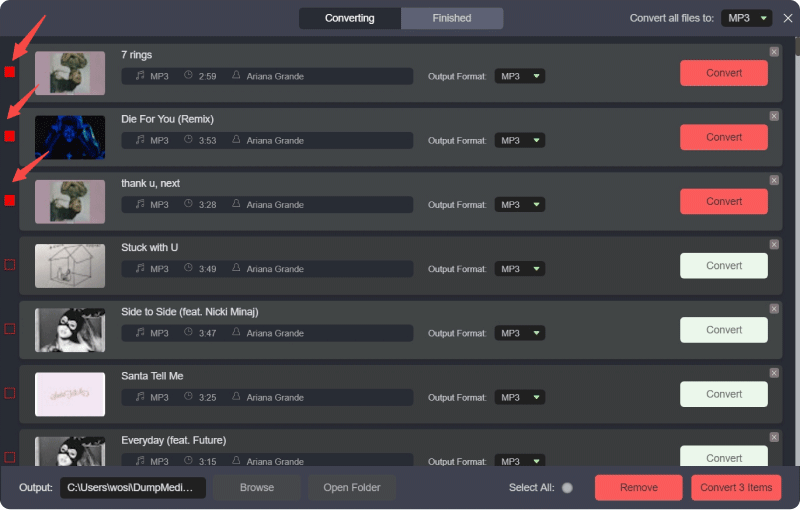
However, YouTube Music imposes DRM protection on its songs, restricting offline access on different devices. To bypass this limitation and download YouTube Music without a premium subscription, you'll need a reliable third-party tool like DumpMedia YouTube Music Converter. This robust converter not only ensures lightning-fast download speeds but also supports a wide range of output formats including MP3, WAV, FLAC, and M4A. Additionally, it allows users to convert entire playlists, facilitating the simultaneous download of multiple songs. Here's a step-by-step guide to downloading YouTube Music songs using DumpMedia YouTube Music Converter:
1. Install DumpMedia YouTube Music Converter: Begin by downloading and installing the software on your device.
2. Log in to your YouTube Music account: Sign in to your YouTube Music account within the software interface.
3. Choose the songs and desired output format: Select the songs you wish to convert and specify the desired output format for the downloaded files.

4. Click "Convert": Initiate the conversion process by clicking the "Convert" button, and let the software handle the rest.

After following the instructions in the first section to convert YouTube Music to the format you desire, you can now add them to your Google Slides.
Step 1: Upload the downloaded YouTube Music to Google Drive.
Step 2: Insert the uploaded music files into Google Slides.
Step 3: Customize audio settings.
After inserting the audio file, you can adjust the size and position of the audio icon on the slide according to your needs.
Step 4: Set audio playback options.
Step 5: Test your slideshow presentation.
Start your presentation from the beginning or from the slide where you added the YouTube Music audio file to ensure it plays correctly.
In addition to inserting downloaded YouTube Music into slides, you can also insert YouTube Music song links into slides, but this requires some conditions. You can check whether you meet these conditions first:
If the above conditions are met, please continue reading.
Step 1. Select the YouTube Music tracks you want to add
Step 2. Insert YouTube Music track link
Step 3. Test your slideshow presentation.
Click on the text box or shape containing the link, and the audio will start playing. For the inserted song to play properly, you need to make sure you are logged into your YouTube Music account, and you need to manually start or stop the audio playback during the demonstration.
This guide presents two ways to add music from YouTube to Google Slides: downloading and uploading to Google Drive or directly inserting YouTube Music links. Both methods enhance engagement and attention. For seamless integration, consider using DumpMedia YouTube Music Converter to bypass DRM restrictions. Elevate your presentations by incorporating music, whether through uploaded files or inserted links, for a dynamic and captivating experience.
